Finding your acrylic nail brush splayed or splitting is frustrating; it derails your nail art, turning potential masterpieces into a “hot mess.” Understanding why this happens is key to maintaining brush performance.
Spot the Problem Early
A fraying or splitting brush directly impacts nail artistry precision. Your brush is the tool for magic on tiny canvases; when it misbehaves, results suffer.
Impact on application is significant: a compromised brush unevenly distributes monomer and powder, leading to streaky, uneven application. Crisp lines and intricate designs become difficult. Instead of a smooth finish, a split brush leaves grooves, ridges, and bumpy textures, creating “Bumpyville” on acrylic nails.
Beyond aesthetics, a damaged brush risks nail health. It can tug delicate nail beds, stressing natural nails and compromising acrylic adhesion. This not only makes beautiful nails less likely to stay put but can also lead to snags and a type of nail damage that opens doors for unwanted issues like infections. If you’re struggling with your acrylic nails not staying put, you might find our guide helpful. The problem, therefore, extends beyond mere visual imperfections to potential physical harm and compromised product longevity. Read more on how long your acrylics should last.
Brush deterioration impacts the artist’s confidence and creative flow. A frayed brush disrupts concentration and stifles creativity. Beginners might attribute poor results to lack of skill, while a quality brush empowers unique expression and skill development.
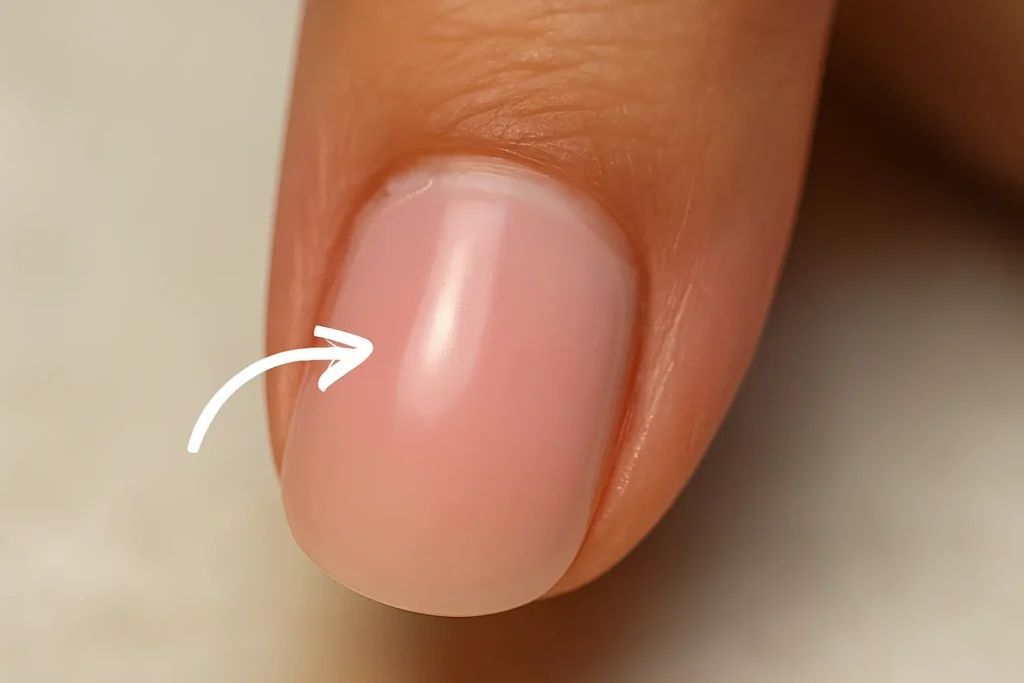
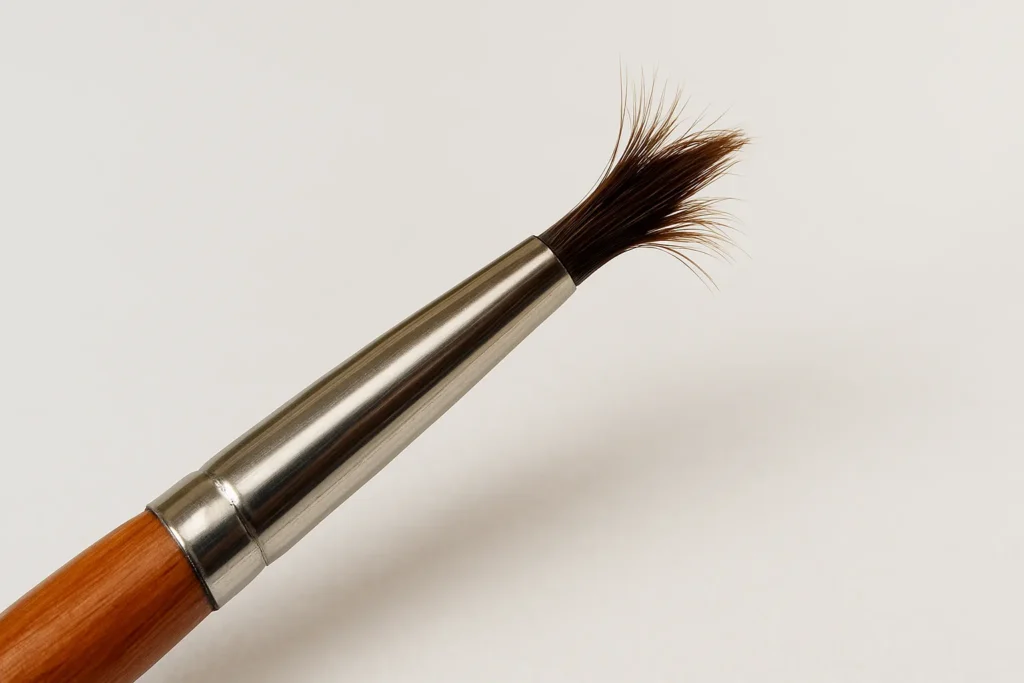
Early recognition is key. Signs include splayed or splitting bristles, losing a neat tip , permanent loss of original shape , hardened product buildup causing stiffness and bushiness , lack of natural snap/flexibility , and stray hairs leaving grooves in acrylic.
For pros and DIY enthusiasts, brush condition is paramount. Quality tools offer better control and precision for intricate designs , last longer, and ensure consistent performance, protecting your investment. A well-maintained brush eases application , while a damaged one can lead to frustrating clumps, bubbles, or streaks.
Common Reasons Your Acrylic Nail Brush Is Fraying or Splitting
Understanding why your brush is deteriorating is the first step toward keeping it healthy. Often, it’s a mix of things, but these are the most common culprits. (And if you’re ever wondering about the materials you’re working with, like, we’ve got you covered there too!)
Product Buildup and Improper Cleaning
Product residue is hands down the top reason your brush is struggling. If you don’t thoroughly remove acrylic after each use, it hardens inside the bristles, making them stiff, brittle, bushy, and difficult to work with. This hardened acrylic can clog up the brush, preventing it from picking up or spreading product evenly in future applications.
Now, you might think acetone is the quick fix for stubborn buildup, but for natural hair acrylic brushes, it’s a big no-no. Acetone is incredibly harsh. It severely dries out and damages natural bristles, making them brittle, sparse, and highly prone to fraying and breaking. Even worse, it can dissolve the adhesive holding the hairs inside the brush’s metal ferrule, causing the whole brush to fall apart.
And beyond brush damage, acetone is highly flammable. Its vapors can easily ignite, posing serious fire or explosion hazards. Heating acetone, even with warm water for soak-offs, drastically increases its evaporation rate, leading to higher concentrations of harmful vapors that can irritate your respiratory system and cause more severe health effects with prolonged exposure. Plus, acetone can degrade certain plastics, compromising container integrity and leading to leaks or spills.
Cleaning agent choice impacts brush integrity and safety. Acetone’s drying and adhesive-dissolving properties directly attack natural hair brush structure, posing a critical longevity and safety issue.
Use liquid monomer for cleaning acrylic brushes; it’s gentle and dissolves residue effectively. Use clean monomer for final rinses. Professional brush cleaners/conditioners, like those from Mia Secret, are also fantastic for rehydrating and keeping your bristles soft and pristine. After every bead of acrylic, gently wipe your brush on a lint-free cloth. This proactive habit keeps bristles free of product buildup before it can harden.
Product buildup also creates a ‘hidden contamination’ loop. An unclean brush can contaminate other products you use later. This means a contaminated acrylic brush will not only be harder to control but can also cause yellowing or discoloration of acrylic powders and transfer oils from skin contact, leading to premature service breakdown. So, brush care isn’t just about the brush itself; it’s a critical hygiene and safety measure that impacts your entire nail service and even client health.
Poor Brush Storage Habits
Once your brush is sparkling clean and perfectly reshaped, where it rests matters immensely. Proper storage acts as a protective cocoon, shielding it from damage and contaminants.
For acrylic brushes, horizontal storage is generally best. Storing them flat on their side prevents any leftover monomer from draining down into the ferrule (that’s the metal part holding the bristles). This drainage can damage the special glues that hold the bristles in place, weakening the area and potentially causing a “rust-like residue” to seep out and discolor your acrylic powders during use. While some general advice suggests vertical storage (bristles up) for gel brushes or general art brushes (if you’re curious about the differences, read our article as it doesn’t put pressure on bristles , for acrylics, the ferrule issue with monomer is paramount. And never store brushes with bristles pointed down without a cap—that will definitely push them out of shape.
Air exposure or crushed bristles also contribute significantly to wear. Leaving your brush uncapped or exposed to open air can cause natural bristles to dry out, losing their suppleness and becoming brittle. Just as leaving monomer bottles open leads to premature polymerization or contamination , constant air exposure can also allow dust and other airborne contaminants to settle into the bristles, leading to wear and potential issues. If your brush is left lying around unprotected or crammed into a drawer, the bristles can easily get bent, splayed, or misshapen.
What else? Avoiding excess light, heat, and moisture exposure is critical. Keep your brushes away from direct sunlight and UV light. UV exposure can degrade materials over time and even prematurely cure any residual gel on bristles if it’s a hybrid brush. While some snippets discuss UV damage to nail products or skin , the principle of UV degradation applies to brush materials over time. High temperatures should also be avoided, as they can alter the chemical properties of any remaining monomer or product, leading to evaporation, premature polymerization (think clumping and texture changes), or even damage to the glue in the ferrule.
So, definitely don’t store brushes near heat sources like radiators. Lastly, moisture is a big enemy. Never store your brushes in damp places. Moisture can severely interfere with the keratin in natural bristles, causing them to go ‘wacky and split.’ It also creates a perfect environment for mildew or unpleasant odors if your brushes aren’t fully dried. Maintaining indoor humidity between 35-50% is advised. For a deeper dive into how environmental factors impact your work, explore our article.
Low-Quality or Incorrect Brush Type
Sometimes, the problem isn’t your technique, but the tools themselves. Not all brushes are created equal, and choosing the right one is a foundational investment in your nail artistry.
| Feature | Kolinsky Sable (Natural Hair) | Synthetic (Nylon/Taklon) |
|---|---|---|
| Material Source | Hair of Siberian weasel (Kolinsky) or sable | Nylon or Taklon fibers |
| Liquid Absorption | Superior; natural cuticles absorb and distribute liquid perfectly | Good; has improved but may not hold as much liquid as natural |
| Bead Pickup | Superb; perfect bead formation | Good; improving |
| Precision/Control | Excellent; naturally pointed tip, firm yet flexible | Good; can be stiffer |
| Durability/Longevity | Incredibly sturdy; can last “eons” with proper care | Durable, but may not last as long as Kolinsky |
| Cost | Higher price point | More affordable |
| Ethics | Animal-derived (not cruelty-free) | Cruelty-free |
| Cleaning | Monomer only, very gentle care required | Easier to clean, more forgiving |
| Best For | Professionals, those seeking ultimate performance, precise bead pickup | Beginners, budget-conscious, cruelty-free users |
Kolinsky sable brushes are widely considered the ‘gold standard’ for acrylic applications. Made from the hair of the Siberian weasel, their natural cuticles are amazing at holding and distributing acrylic liquid evenly, allowing for superb bead pickup and precise application. They’re incredibly durable, lasting ‘eons’ with proper care, and maintain a full belly with a naturally pointed tip, offering an ideal combination of strength and suppleness. Just know they come with a steeper price tag and aren’t a cruelty-free option.
Synthetic bristle brushes, typically made from nylon or Taklon, offer a more affordable and cruelty-free alternative. While they used to be stiffer, synthetic brushes have seriously ‘upped their game,’ becoming more durable and easier to soften and clean. Although they might not hold monomer quite as well as natural hair, they can still deliver great results, especially for beginners. The ongoing evolution in synthetic materials means that choosing an ethical option is less of a compromise on performance, potentially leading to a market shift towards high-quality synthetics or hybrid brushes as we all become more ethically conscious. Hybrid brushes, which combine synthetic bristles in the center with Kolinsky sable on the outer edge, aim to offer the best of both worlds.
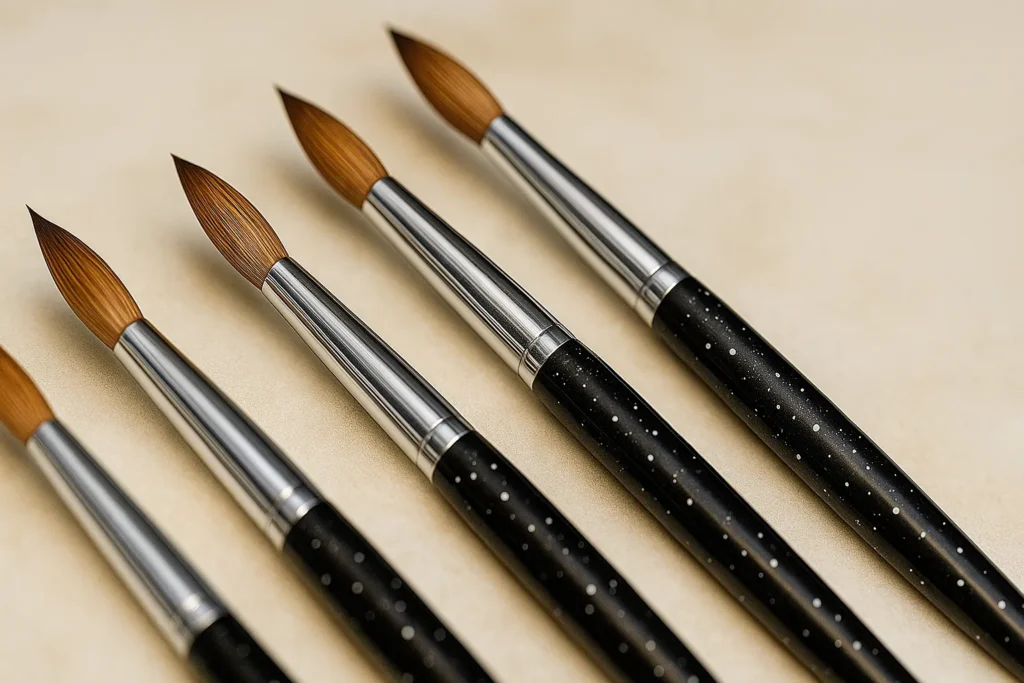
The size of your brush significantly impacts your application control, efficiency, and even the brush’s durability. Smaller brushes, typically sizes #6 or #8, are perfect for beginners, detailed work like 3D nail art, or for those with narrow nail beds. They give you greater precision and control. However, a smaller brush means you’ll need more beads to cover the nail, which can be time-consuming, and their bristles tend to flatten easily, potentially trapping the bead. This shows that brush size directly impacts the learning process and the ability to master fundamental techniques like the liquid-to-powder ratio. A beginner using a too-large brush might struggle with control, hindering their learning.
Medium brushes, sizes #8 or #10, offer a versatile choice for standard acrylic nails, striking a good balance between precision and coverage. Larger brushes, sizes #12 and up, are favored by pros for faster application, especially on longer or wider nail beds. They pick up bigger ‘pearls’ of product and cover more surface area quickly. But for beginners, a larger brush can soak up too much monomer, leading to runny beads or bumps if not controlled properly. So, if you’re just starting out, your initial investment should be in a smaller, more controllable brush, and you can progress to larger brushes as your skills develop.
Rough Handling During Application or Cleaning
Even the highest quality brush can be ruined by rough treatment. How you handle your brush during both application and cleaning is absolutely paramount to its longevity.
Pressing too hard on the nail surface is a super common mistake. Think of it like pressing down too hard with a pen—it ruins the tip, right? Same goes for your nail brush. Acrylic bristles are designed to glide over the nails, spreading product evenly. Applying too much pressure on the nail surface or even in the dappen dish stresses the bristles, causing them to splay, split, or lose their shape prematurely. This continuous ‘micro-trauma’ from repeated rough handling adds up over time, leading to significant structural damage.
Similarly, twisting or dragging your brush during cleanup can be severely damaging. When cleaning, it’s tempting to scrub, twist, or pull on the bristles to remove stubborn product. But this can severely damage the delicate bristle structure, pull hairs out, or manipulate them into changing shape, leading to irreparable fraying. It’s crucial to avoid ‘stippling’ or smashing your brush. If stray hairs appear, resist the urge to pull them! All bristles are bound tightly together in the ferrule, and pulling one can loosen others, compromising the entire brush’s structural integrity. Instead, use small scissors to snip only what’s needed close to the base, never the cleverly tapered ends.
Gentle technique also means avoiding contact with skin oils. Oils from your body can deteriorate natural bristles over time. This isn’t just a hygiene concern; it’s a chemical one, as skin oils can interact with the natural keratin of the bristles, breaking down their structure over time. This highlights the need for a ‘contamination barrier,’ like wearing gloves during application and cleaning, and using lint-free towels instead of your fingers to wipe the brush.
To maximize brush longevity, I highly recommend keeping a backup brush for practice or heavy-duty work. This strategy lets you dedicate a less expensive or older brush to tasks that might be harder on bristles, like mixing colors, practicing new techniques, or tackling stubborn hardened acrylic. This preserves your primary, high-quality brush for flawless application, ensuring it stays in pristine condition for precision work. This approach aligns with the ‘ergonomics of application,’ where optimizing your technique and tool choice reduces stress on the bristles and extends their lifespan.
When to Replace Your Acrylic Nail Brush (and What to Look for Next Time)
Just like any tool, your acrylic nail brushes have a natural lifespan. Even with the most meticulous care, there comes a time when your trusty companion needs to retire. Knowing when to say goodbye is crucial for maintaining the quality of your nail work. Think of it as reaching the ‘point of diminishing returns’ for brush repair. If you’re constantly trying to ‘nurse it back to health’ but it still performs poorly, it becomes a source of frustration and inefficiency, ultimately hindering your work.
There are clear warning signs that scream, ‘It’s time to retire this brush!’ If the bristles are severely frayed or splayed and no amount of cleaning or reshaping can bring them back, leading to uneven application, that’s a definitive sign. If your brush has permanently lost its original shape, making it impossible to create precise lines or achieve the effects you want, it’s time to move on. Consistent poor performance—like the brush no longer holding acrylic properly, struggling to create smooth, even strokes, or just making application difficult—also signals its retirement. If stubborn, hardened product remains embedded in the bristles despite thorough cleaning, affecting performance, that brush has likely reached its end. And finally, if your brush gets too soft or flexible, it can indicate significant wear and tear, making it harder to sculpt effectively.
The expected lifespan of a well-maintained brush varies based on its quality and how much you use it. Generally, you can expect a well-maintained brush to last between six months to a year. However, high-quality Kolinsky sable brushes, with meticulous care, can last significantly longer—potentially for years—especially if you use them primarily for fine detail work and meticulously cared for.
Some pros even report their best Kolinsky brushes lasting over a decade for fine detail work! Synthetic brushes, on the other hand, typically have a shorter lifespan, sometimes only a few months before they might be repurposed for other tasks. This difference in lifespan really highlights the ‘return on investment’ for quality brushes. While a Kolinsky brush has a higher upfront cost, its significantly longer lifespan and consistent high performance mean its total cost of ownership over time might actually be lower than repeatedly buying cheaper, less durable synthetic brushes. This encourages a strategic purchasing mindset, where you consider the expected utility and performance over the brush’s entire lifecycle.
Plus, understanding how brushes wear can lead to a smart ‘practice brush’ strategy. Since brushes wear out faster with heavy use (and smaller brushes wear faster than larger ones ), it’s smart to use a larger brush when possible and save your smaller, more delicate brushes for intricate work. This also means having a dedicated ‘backup’ or ‘practice’ brush for heavy-duty work or experimental applications. By using a less expensive or already-frayed synthetic brush for practice, mixing, or tasks that might be harder on bristles, you can preserve your primary, high-quality brush for precision work, significantly extending its life.
When choosing a new brush, it’s an opportunity to optimize your toolkit. When selecting a durable acrylic brush, several factors should be considered. For a comprehensive guide, check out. Consider the size based on skill level (smaller for beginners, larger for pros and speed) and the type of work (detail versus full coverage). The shape is also important: oval is versatile, round is excellent for bead pickup and shaping, and flat brushes are ideal for smoothing. For bristle material, Kolinsky sable offers premium performance and longevity , while high-quality synthetic options provide affordability and an ethical choice. Always look for durable materials, sturdy construction (especially the ferrule and handle), and good ‘snap and spring’.
Your Acrylic Brush Maintenance Checklist
For easy reference, here’s a quick checklist to keep your acrylic nail brushes in prime condition:
- ✅ Clean with monomer after each use.
- ✅ Shape bristles before drying.
- ✅ Store horizontally in a dust-free case.
- ✅ Avoid acetone, water, and soap (for natural hair acrylic brushes).
- ✅ Condition your brush regularly (with monomer or brush conditioner).
- ✅ Handle gently during and after use (avoid pressing hard, twisting, pulling stray hairs).
- ✅ Avoid direct sunlight, UV light, and extreme heat/dampness.
Still Wondering “Why Is My Acrylic Nail Brush Fraying or Splitting?” Here’s a Quick Recap
A quick recap of key culprits and fixes for fraying/splitting brushes.
Primary culprits: product buildup (hardens bristles), improper cleaning (harsh acetone damages bristles/adhesives), poor storage (vertical storage seeps monomer, air/light/heat/moisture degrade materials), low-quality/incorrect brush types (lack durability), rough handling (stresses bristles), and natural aging.
Solutions center on quality, care, and technique. High-quality brushes resist fraying and ensure flawless application, lasting longer. Consistent, gentle monomer cleaning and proper horizontal storage in protective cases are vital for longevity, preventing stiffness, splitting, and contamination. Gentle techniques (light pressure, mindful handling) protect bristles and ensure smooth application.
These elements form a ‘virtuous cycle’: quality tools ease care, good care preserves quality, and good technique reduces wear. Harmony leads to optimal brush performance, better results, and sustained good habits. View nail artistry as a comprehensive practice including tool mastery and maintenance.
You Deserve Tools That Work as Hard as You Do
Flawless nails result from a partnership between your skill and well-cared-for tools. Your tools deserve dedication; great results stem from care and consistency.
Consistent cleaning, mindful storage, and gentle techniques empower you to tackle brush dilemmas. Tool care extends product life, fosters self-respect, and leads to mastery, cultivating the discipline of true craftsmanship.
Armed with these insights, ensure your acrylic nail brushes stay in prime condition for every masterpiece. Create beautiful nails, confidently and consistently!