Hey there, nail enthusiasts! You know that undeniable allure of acrylic nails, right? They’re like a blank canvas for your creativity, offering strength and durability that truly makes a statement. If you’re someone who loves self-care and the artistry of beautiful nail enhancements, you might feel like getting that perfect, salon-quality finish is a bit of a puzzle. But here’s the secret: the true magic isn’t some elusive trick; it’s all about mastering the acrylic powder-to-liquid ratio.
This ratio? It’s the absolute bedrock of any acrylic masterpiece. It completely dictates how your acrylic behaves during application, how smoothly it spreads, and, most importantly, the strength and how long your finished nails will last. Get this ratio wrong, and you might face frustrating issues like weak nails, premature lifting, unsightly cracking, or just a less-than-polished look. But nail it (pun intended!), and you’ll create strong, flexible, durable, and non-lifting enhancements that truly stand the test of time. Consistently creating stunning acrylic nails comes down to understanding and controlling this fundamental chemical process. It’s about being able to troubleshoot effectively and adapt, rather than just memorizing steps.
This guide is here to demystify the world of acrylics for you. We’ll dive into the science behind the perfect mix, explore the essential tools that will become your best friends, walk through bead application step-by-step, and arm you with smart troubleshooting tips for common challenges. By the end, you’ll feel empowered, confident, and absolutely ready to create beautiful acrylic nails, consistently.
The Science of Synergy: Understanding Acrylics
Let’s get a little bit science-y, shall we? At the heart of every gorgeous acrylic nail is a fascinating chemical dance between two key players: your liquid monomer and your acrylic powder. Think of the liquid monomer as a sophisticated liquid filled with tiny building blocks, primarily ethyl methacrylate (EMA). Now, the acrylic powder? That’s made up of millions of microscopic polymer beads, and these aren’t just sitting there! They’re coated with an initiator, often benzoyl peroxide (BPO), which is the catalyst that kicks off the whole crucial chemical reaction.
When these two meet, a transformative process called polymerization begins. The initiator in the powder activates those monomer molecules, making them link up into long, tangled chains. This chemical transformation is what turns your liquid and powder into that strong, durable solid – your beautiful acrylic nail. This chemical choreography dictates everything about how your acrylic behaves, from how easy it is to work with to its final strength. An incorrect ratio? That leads directly to an incomplete or imbalanced chemical reaction, which fundamentally messes with the molecular structure of your hardened acrylic. This is precisely why you see issues like weakness, brittleness, lifting, and cracking – they’re direct signs of a compromised molecular bond.
Understanding this chemical foundation gives you a much more logical and precise way to troubleshoot, rather than just treating the symptoms. It also highlights why it’s so important to use compatible products from the same manufacturer; their chemical formulas are designed to work in perfect synergy for the best results.
The ratio of your liquid to powder is like the conductor of this chemical orchestra. It controls how easily your acrylic spreads, how quickly it sets, and ultimately, the strength and how long your finished nail will last.
- Too Much Monomer (A “Wet” Bead): If your mix has too much liquid monomer, there simply isn’t enough powder for it to bind properly. This can lead to a few frustrating outcomes:
- Your acrylic becomes super runny and tough to control, often seeping into your cuticles and sidewalls.
- It can cause excessive shrinkage as it cures, weakening the bond and leading to lifting, cracking, or premature breakage.
- Your drying time will be significantly longer.
- You might even trap tiny air bubbles , and sometimes, crystallization can appear on the surface of the cured product.
- Most importantly, unpolymerized (uncured) monomer, which is an allergen, can linger on the nail bed for weeks or even months. This prolonged exposure to the unreacted chemical can lead to overexposure and potentially severe allergic reactions, like contact dermatitis. This isn’t just about a pretty finish; it’s a critical health and safety concern. Precision in mixing truly protects your nail health.
- Too Little Monomer (A “Dry” Bead): On the flip side, a mixture that’s too dry means there isn’t enough liquid to properly bind all those powder particles. This results in:
- Acrylic that’s difficult to work with, prone to crumbling, and just won’t smooth out properly.
- Bumpy, uneven nails that definitely won’t give you that polished, professional finish.
- A brittle enhancement that’s prone to breakage and lacks internal adhesion.
The Golden Ratio: The Blueprint for Consistency
While applying acrylic is definitely an art, there’s also a scientific sweet spot for that liquid monomer to acrylic powder ratio. The most common starting point in the nail world is 1 part liquid monomer to 1.5 parts acrylic powder (you’ll often see it written as 1:1.5 liquid:powder). This means for every bit of liquid you use, you’ll need one and a half times that amount of powder. It’s also frequently expressed as 1.5 parts powder to 1 part liquid. Both mean the same perfectly balanced proportion. It’s important to remember that this “golden ratio” is a fantastic starting point, but it’s not a one-size-fits-all rule for every single product out there.
Some specialized products or techniques might even suggest a different ratio, like 1 part liquid monomer to 3 parts polymer powder. This just goes to show that while there’s a common guideline, it’s not rigid. Your ultimate goal is to achieve a “medium wet mix” that gives you the best workability and results. Understanding that this ratio can vary shifts your approach from rigidly chasing a single “magic number” to embracing the need for product-specific knowledge and adaptability. This empowers you to think critically and use products responsibly, preventing frustration and poor outcomes that can happen if you apply a generic ratio to incompatible products.
This is where your manufacturer’s guidelines become your absolute best friend. The ideal ratio can, and often does, vary slightly depending on the specific brand and product line you’re using. Each manufacturer formulates their monomer and powder to work in perfect chemical harmony. So, it’s absolutely crucial to always follow the manufacturer’s specific guidelines for the products in your toolkit. These instructions are custom-tailored to ensure their unique chemical combinations react correctly, giving you the best possible workability and long-term wear.
A really important caution: mixing products from different manufacturers is generally not recommended. While it might be tempting, different brands have distinct chemical compositions, and combining them can lead to unpredictable results, compromised strength, and even complete service breakdown. For example, an incorrect ratio can cause the product to not polymerize completely , and this incomplete polymerization, especially with excess monomer, is a known cause of allergic reactions.
This reinforces the critical understanding that acrylic application is a system where each component is chemically engineered to interact. Ignoring product compatibility, even if the general ratio seems correct, can lead to severe negative consequences, including compromised durability and, more importantly, adverse health reactions. Sticking to a complete system from a single manufacturer is essential for consistent, reliable, and safe outcomes.
The Essential Toolkit: Setting Up for Success
Achieving those flawless acrylics goes beyond just the perfect mix; it truly requires the right tools and meticulous preparation. These often feel like the unsung heroes of successful application, because even with a perfectly balanced ratio, your application can fall flat if your foundational steps or instruments aren’t up to par. Understanding this broadens what it means to “master acrylics,” showing you that success is multifaceted and needs attention to your entire application process.
Must-Have Products
- Quality Monomer and Powder: This is your absolute foundation for stunning nails. Always look for high-quality liquid monomer, typically ethyl methacrylate (EMA), and make sure your powders are MMA (methyl methacrylate) free, as MMA has been identified as potentially harmful. Quality products are inherently easier to work with and will consistently give you smoother, longer-lasting results. If you’re new to acrylic application, consider a monomer with a slower setting time; it gives you more control during the application process.
- Dappen Dish: This small but mighty tool is designed to hold your liquid monomer. It’s crucial for controlling the amount of liquid you use, which minimizes waste and keeps your workspace tidy.
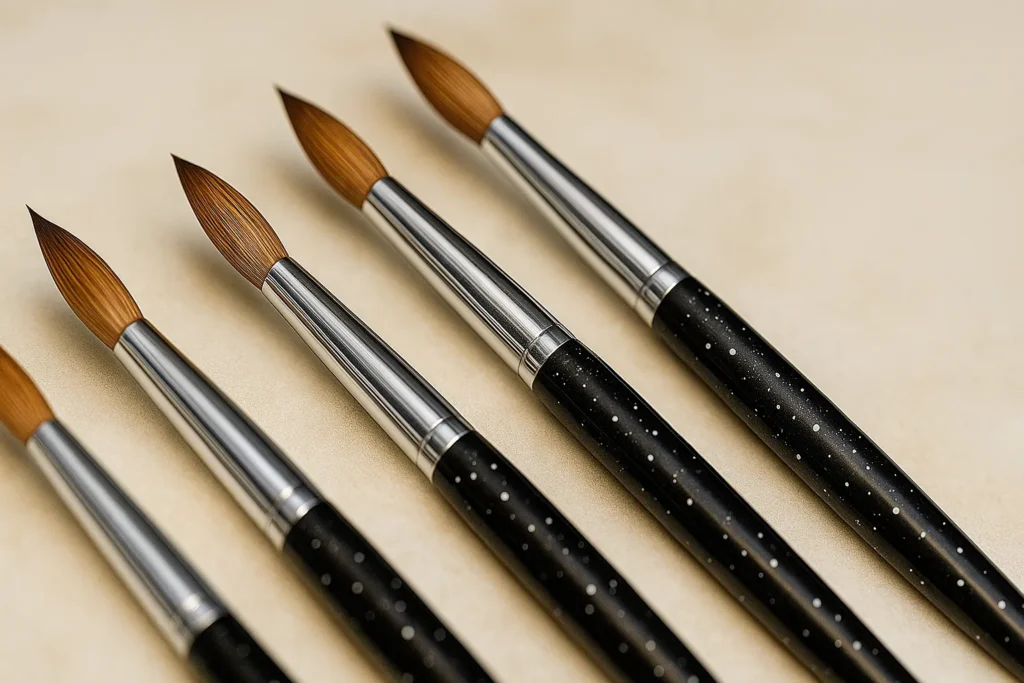
- Acrylic Nail Brush: This brush is your magic wand for creation! A high-quality acrylic brush, often made from 100% Kolinsky hair, is a worthwhile investment. For beginners, an oval, sharp size 8 brush usually offers the ideal balance of control and product pickup. Proper brush care is paramount to prevent product from sticking and ultimately ruining your tool.
Nail Preparation Essentials
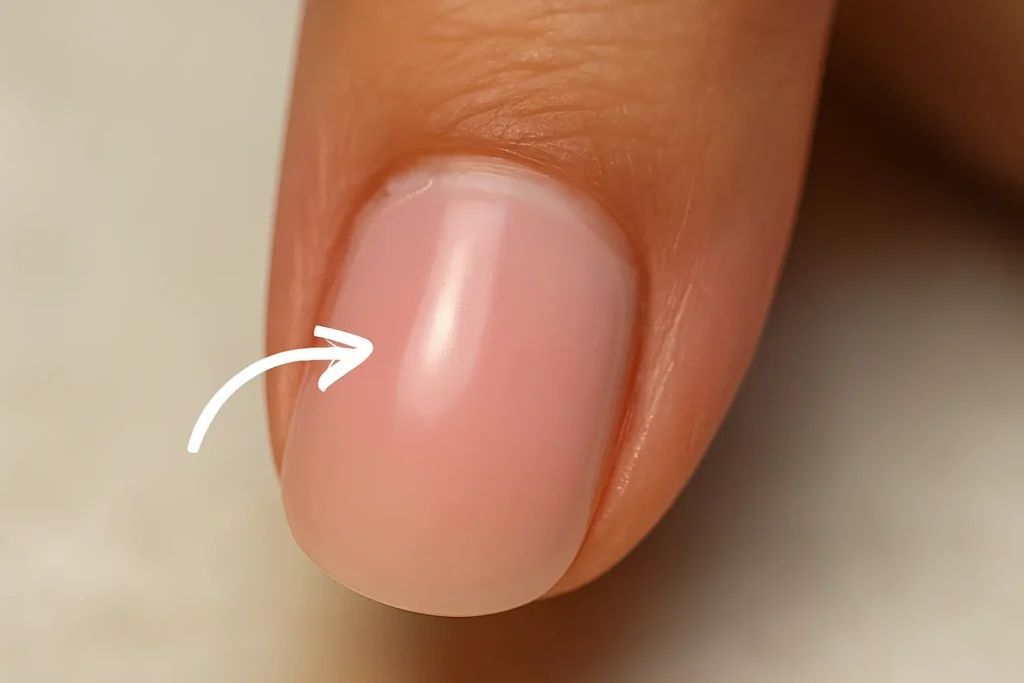
Meticulous nail preparation is a non-negotiable step, truly. It directly impacts adhesion and helps prevent common issues like lifting. This also ties into safety, because proper preparation, product choice, and hygiene are direct contributors to your personal nail health. Making informed choices and being diligently clean protects against common and uncomfortable issues like fungal infections or allergic reactions, ultimately ensuring a healthier and more enjoyable acrylic experience.
- Nail Files: You’ll need a variety of grits for different stages of the process. A 240-grit file is perfect for gently prepping natural nails by removing surface shine, while coarser 120-grit and refining 180-grit files are typically used for shaping and perfecting the acrylic after application.
- Cuticle Pusher and Cuticle Knife: These tools are used to gently push back cuticles and meticulously remove any non-living tissue from the nail bed, creating a clean, smooth canvas for optimal adhesion.
- Dusting Brush: A simple yet effective tool for sweeping away filing dust, keeping your nails clean and your workspace tidy.
- Dehydrator: This is a crucial step you absolutely shouldn’t skip! A nail prep dehydrator removes natural oils and moisture from the nail surface, which is essential for ensuring proper adhesion of your acrylic product.
- Primer: Applied after the dehydrator, a primer creates a slightly sticky base that significantly enhances the adhesion of the acrylic. Both acid-based and gentler acid-free formulas are available.
- Sculpting Forms or Tips: Your choice between sculpting forms and nail tips depends on whether you prefer to sculpt custom lengths and shapes or use pre-formed tips for quicker application.
- Top Coat: This is the final seal for your acrylic enhancement. A quality top coat protects your finished nails, gives them a beautiful glossy shine, and helps prevent chipping and peeling.
- Cuticle Oil: Don’t overlook this step! Finishing every nail session with nourishing cuticle oil hydrates your cuticles and adds that professional, polished touch.
The Art of the Bead: A Step-by-Step Guide to Perfection
The application of acrylic is truly an art form, and mastering the bead is absolutely central to this artistry. Your acrylic bead isn’t a static mix; it’s a dynamic, evolving substance that changes consistency as you work with it. Understanding this allows you to approach application with more intuition and responsiveness, moving beyond just mechanical steps to an artistic understanding of your material. This adaptability is key for maintaining consistency, especially when environmental factors subtly influence how your product behaves.
Preparing Your Brush
Your acrylic brush is an essential tool, and treating it with care is paramount. First, pour just enough liquid monomer into your dappen dish for the service you’re performing. This smart practice prevents waste and helps keep your product fresh.
Next, fully submerge your brush into the monomer. Give it a gentle “swish” to ensure all the hairs are thoroughly saturated and to help release any trapped air bubbles. If left, these can compromise the strength and appearance of your finished nail. As you remove the brush, gently wipe one side against the edge of the dappen dish. This action removes excess liquid and helps to flatten and shape the brush hairs, preparing them perfectly for sculpting.
If you’re using a brand-new brush, know that new brushes often contain glue to keep the bristles together. Gently break up any residue with your fingers, then submerge the brush in monomer and wipe repeatedly until all residue is gone and the monomer in the dish remains clean.
Picking Up the Bead: Your Technique for Small, Medium, and Large Beads
The amount of monomer on your brush directly influences the size of the bead you pick up: less monomer means a smaller bead, while more monomer creates a larger one. For a small bead, after flattening your brush, submerge only the very tips of the flags (the darkest hairs) into the monomer. For a larger bead, moisten the entire flag area of the brush.
Now, gently dip the tip of your liquid-saturated brush into the acrylic powder. The liquid on your brush will naturally draw the powder into a small bead. It’s important to allow the monomer to fully surround and absorb the polymer particles. Once you’ve picked up the bead, it’s beneficial to wait a few seconds (some technicians count to 5 or even 12) for it to polymerize slightly and develop a shiny appearance before applying it to the nail. This brief pause allows the product to stabilize, making it easier to work with.
Learning to “read” the bead is a skill that truly develops with practice, but specific cues can guide you:
- The Look (Visual Cues):
- Full Absorption: When you pull the bead from the powder, all the powder should be absorbed into the liquid. You shouldn’t see any dry, lingering powder around the edges.
- Smooth & Creamy: The bead should have a smooth, creamy consistency. It should have a beautiful satin-like appearance—neither too shiny (indicating too much liquid) nor too dull (indicating too little liquid).
- Slightly Dimpled: A perfectly formed bead often has a slightly dimpled look, resembling frosted glass.
- Stays on Brush: The bead should remain on your brush and not drip off. If it’s too wet, it will be runny and difficult to control. If it’s too dry, it will be hard to work with and prone to crumbling.
- Practice Leveling Test: For a quick assessment, you can drop a bead on a practice tip. A correct bead should dome out and level by approximately 25% within 5 seconds, with no ring of liquid around its base. If it drops by 50%, it’s too wet; if it holds a firm shape and doesn’t drop, it’s too dry.
- Consistent Color: When you’re working with pigmented powders, the correct mix ratio ensures consistent color from bead to bead and helps prevent any marbleizing effect.
- The Feel (Tactile Cues):
- Smooth Movement: Once you drop the bead on the nail and allow a few seconds to settle, it should feel as though it moves easily and smoothly when you press it out. A quality brush will retain enough liquid to keep the bead pliable for about 2 minutes, giving you ample working time.
- Setting Progression: The bead will initially feel wetter, but as you work and the product begins to set, it will require a firmer, more confident pressure.
Applying the Bead: Smooth Strokes, Working in Sections, Avoiding Cuticles
Once you’ve achieved that perfect bead, it’s time for application! The mixture should spread easily without running or crumbling.
It’s recommended to work in small, controlled sections. This approach gives you maximum control and helps prevent lumps. Application typically begins at the “smile line”—the bottom edge of the nail tip. The acrylic bead is flattened over this line and smoothly brushed down towards the tip.
For the cuticle area, pick up a second, smaller bead. Place it near the cuticle, but never directly on it. With small circular movements, gently guide the acrylic closer to the cuticle, ensuring it doesn’t touch the skin, then brush smoothly down to blend.
It’s crucial to leave a tiny margin all around the cuticle and sidewall area free of product. This vital step allows the product to properly shrink as it cures, creating an airtight seal to the nail plate and significantly reducing the risk of lifting. This meticulous cuticle application isn’t just about aesthetics or preventing lifting; it’s fundamentally about preventing allergic reactions and maintaining overall nail health by minimizing skin contact with uncured product. This elevates a technical detail to a significant safety measure.
Use small, single strokes in the same direction to avoid lumps and achieve a smooth finish. It’s often advised that “less is more,” and starting with smaller beads is generally easier for beginners. As you apply the product, press and smooth it firmly yet gently. This technique helps eliminate any trapped air bubbles and ensures complete contact with the natural nail. Throughout the application, hold your brush flat, keeping its flattened surface parallel to the section you’re working on. This means the angle of your brush will naturally change as it moves across the nail.
Troubleshooting Common Acrylic Challenges
Even with the most meticulous preparation and application, challenges can pop up. Understanding the causes and solutions for common acrylic problems is absolutely essential for maintaining your nail health and achieving consistent, beautiful results. The immediate consequences of an incorrect ratio (too wet or too dry) are issues like runny, crumbling, or hard-to-control acrylic. These initial application problems aren’t isolated; they directly lead to more severe, long-term headaches. For instance, acrylic that’s too wet causes excessive shrinkage, which results in lifting and cracking.
Plus, unpolymerized monomer from an overly wet mix can pool and cause allergic reactions. Similarly, improper application due to a bad ratio can lead to trapped air and bubbling. This shows a clear chain reaction where an initial error in your ratio cascades into multiple, compounding issues. This understanding encourages a proactive mindset, emphasizing that getting the ratio right from the very beginning is your most effective preventative measure against a wide array of future problems.
While our main focus here is on the acrylic ratio and application technique, it’s important to recognize that many problems are actually due to factors outside of the product itself. Lifestyle factors like repetitive trauma , smoking , tanning habits , and even specific food consumption can contribute to issues like cracking or yellowing. Environmental factors, including moisture exposure , are also significant contributors to problems like lifting and fungal infections.
This tells us that a comprehensive understanding of acrylic nail longevity extends beyond just the application process to the daily habits and surrounding environment of the wearer. This knowledge significantly expands your diagnostic capabilities, teaching you that troubleshooting isn’t solely about identifying flaws in the product or application technique, but also about considering the broader context, enabling more holistic advice and aftercare.
Environmental & Product Factors Influencing the Mix
Beyond the precise liquid-to-powder ratio, several external factors can significantly influence the behavior of acrylic products. It is important to recognize that environmental conditions are active “ingredients” in the acrylic application process. Temperature and humidity directly alter product chemistry and behavior, requiring technique adjustments to maintain consistency. Similarly, product integrity is dynamic; age, storage, and contamination can degrade products, leading to unpredictable results. Proactive product management is therefore as crucial as application technique.
Temperature: The Unseen Force
The temperature of the workspace, and even the products themselves, can dramatically impact how acrylic behaves. Acrylic products are highly sensitive to thermal changes.
- In Cooler Temperatures (Winter): In colder environments, acrylic may become more runny and take longer to set up. This can cause it to flow into the cuticle wells, which should be avoided. To compensate, it is advisable to use slightly less liquid monomer and work in thinner layers. A useful technique is to gently warm the liquid monomer by placing the bottle in a cup of warm water before use. Additionally, opting for faster-setting acrylic powders in colder months can help speed up the curing process. Ideally, maintaining a consistent room temperature between 68°-74°F (20°-23°C) in the workspace is recommended. While salon temperature is paramount, a client’s cold hands can also subtly slow down the curing process. If cold hands are noted, gently warming the product can help compensate for the temperature difference.
- In Warmer Temperatures (Summer): Conversely, in warmer conditions, acrylic tends to set up much faster. This can pose a challenge if the application is not swift enough. To manage this, consider using slower-setting powders to allow for more working time. Again, maintaining a consistent room temperature is the best defense against unpredictable setting times.
Humidity: The Moisture in the Air
Humidity, which is the amount of moisture present in the air, also plays a significant role in acrylic application. High humidity levels can slow the drying process of acrylic, making it take twice as long to dry compared to drier conditions. This delay can be beneficial for blending but may complicate layering and achieving sharp details. Furthermore, high humidity can make acrylic ink more fluid, which can enhance flow and spreading but may also lead to unintended color mixing and reduced precision. Increased moisture levels can also induce chemical reactions in acrylic, potentially decreasing opacity and vibrancy, and affecting pigment stability, leading to color shifts or fading over time.
To mitigate the effects of humidity, using dehumidifiers in workspaces to maintain optimal humidity levels (ideally between 40% to 50% relative humidity) is recommended. Applying sealants on finished artworks can protect against moisture and preserve color integrity. Monitoring humidity levels with a hygrometer and ensuring good ventilation and air circulation in work and storage spaces also help regulate humidity.
Product Age & Storage
The longevity and performance of acrylic products are also heavily influenced by their age and how they are stored. Using old monomer or powder, or mixing old product with new, can reduce the integrity of the product as the chemicals continue to react in their containers over time. Contamination from a dirty brush or brush cleaner can also lead to issues like yellowing. Similarly, an old sealer can itself cause acrylic to yellow.
To ensure optimal product performance, it is crucial to use fresh, high-quality products. Proper storage is key: products should be kept in a cool, dry place, away from direct sunlight and heat sources, and always capped or covered when not in use. Maintaining clean brushes and avoiding cross-contamination between products are also vital practices.
Conclusion
Mastering acrylic powder ratios is indeed a cornerstone of achieving flawless, long-lasting nail enhancements. It is a harmonious blend of understanding fundamental chemistry, employing precise techniques, and recognizing the subtle yet powerful influence of environmental factors and product integrity. From the initial chemical dance between monomer and powder to the final, polished result, every step is interconnected.
The journey to nail perfection is one of continuous learning and refinement. It involves not only diligent practice in picking up the perfect bead and applying it with precision but also a keen awareness of how temperature and humidity can alter product behavior, and how proper product care and hygiene are essential for both aesthetic success and nail health.
Embrace the process, trust the science, and allow confidence to grow with each perfectly sculpted nail. The tools and knowledge are now at hand to create stunning acrylic nails, empowering beautiful transformations. It is time to put this wisdom into practice and create the nail art that truly reflects individual style and care.