Welcome, beauty lovers! You’ve probably seen stunning manicures featuring both dip powder and acrylics, and perhaps you’ve wondered, “Is Dip Powder The Same As Acrylic Powder?” It’s a common question, and for good reason! While they share some family ties in the world of nail enhancements, they are indeed distinct systems with unique characteristics. Think of them as fabulous cousins, not identical twins.
The widespread confusion often arises from their shared foundational chemistry, as both belong to the “acrylic” family. However, the way these systems come to life on your nails, how they harden, and their specific chemical formulations are quite different. This means that while they are related at a high-level chemical classification, the practical experience and results for the user are distinct.
In this comprehensive guide, the aim is to dive deep into the fascinating world of long-lasting manicures. This report will explore what makes each system tick, how they are applied, how long they last, their impact on natural nails, and all the practical tips needed to make an informed choice. The goal is to empower readers with the knowledge to confidently choose the perfect manicure that fits their lifestyle and nail goals. Let’s get ready to rock those beautiful nails!
The Science Behind the Shine: What Are They Made Of?
To truly understand the differences between dip powder and acrylic nails, it is helpful to explore their fundamental ingredients. Understanding their chemical makeup is key to grasping why they behave so differently during application and wear.
The “Acrylic Family” Connection: Understanding the Shared Roots
At their core, both dip powder and acrylic powder belong to the broader “acrylic” family of polymers. This means that both systems are primarily composed of acrylic ester polymers, often making up over 90% of their composition. The most common polymers found in both are Poly(ethyl methacrylate) (PEMA) and Poly(methyl methacrylate) (PMMA). This shared chemical classification is the primary reason for the common misconception that these two nail systems are identical. It also explains why both offer similar benefits, such as impressive strength and durability, as they are built from similar foundational building blocks.
Dip Powder’s Unique Chemistry: The Glue-Like Bond and Polymer Blend
Dip powder systems are a fascinating blend of finely milled acrylic powder and a special liquid. The powder itself is typically based on Poly(ethyl methacrylate) (PEMA) or a copolymer of PEMA and Poly(methyl methacrylate) (PMMA). Beyond these core polymers, dip powders also contain ingredients like Benzoyl Peroxide, which acts as a catalyst, titanium dioxide to provide color (since acrylic polymers are naturally clear), cosmetic micas, and glitters.
The truly distinguishing factor for dip powder lies in its bonding agent: a resin-type glue, primarily Ethyl Cyanoacrylate. This is the main ingredient found in super glue, and its presence directly explains the unique application and curing process of dip powder. This “glue” allows the powder to adhere to the nail and then harden when exposed to air, completely eliminating the need for UV light. This air-curing mechanism is a direct consequence of the cyanoacrylate’s chemical properties. Furthermore, some dip powders may also include beneficial ingredients like vitamins and calcium, which are often marketed for their potential to support nail health.
Acrylic Powder’s Classic Formula: Liquid Monomer Meets Powder
Traditional acrylic powder also consists of acrylic polymers, predominantly Polyethylmethacrylate (PEMA) and Polymethyl Methacrylate (PMMA), though often in different ratios compared to dip powder. What fundamentally sets acrylic apart is its reliance on a liquid monomer, typically Ethyl Methacrylate (EMA), to create a malleable mixture. The magic happens when this liquid monomer mixes with the powder: a chemical reaction is initiated, causing the mixture to harden into a strong, protective layer. Benzoyl peroxide serves as the catalyst for this crucial chemical reaction. Like dip powders, acrylic powders can also incorporate pigments and glitters to achieve a wide array of colors and effects.
It is important to address a critical safety aspect regarding acrylics. In the past, some acrylic nail products utilized methyl methacrylate (MMA) monomer. However, MMA monomer has been determined unsafe for human use in nail products and is no longer allowed by the FDA. While Poly(methyl methacrylate) (PMMA) is a polymer of MMA, its large molecules are generally considered safe in solid or powder form because they do not penetrate the skin. Nevertheless, the monomer liquid form of MMA is indeed banned. Therefore, it is crucial for consumers to be vigilant and always look for products containing Ethyl Methacrylate (EMA) monomer, which is the safe and approved alternative for nail applications. This distinction is vital for ensuring user safety and highlights the importance of understanding product labels.
To summarize the chemical differences, here is a snapshot:
| Ingredient Name | Dip Powder Role/Presence | Acrylic Powder Role/Presence | Key Function |
|---|---|---|---|
| Polyethylmethacrylate (PEMA) | Primary polymer (base) | Primary polymer (base) | Forms the bulk of the nail enhancement |
| Polymethyl Methacrylate (PMMA) | Primary polymer (base), in some cases | Primary polymer (base) | Forms the bulk of the nail enhancement |
| Ethyl Cyanoacrylate | Primary bonding agent (glue-like) | Not present | Creates adhesion; enables air-curing |
| Monomer Liquid (EMA) | Not present (used with dip powder only if applied as acrylic) | Liquid activator for chemical reaction | Initiates chemical hardening with powder |
| Benzoyl Peroxide | Catalyst | Catalyst | Initiates hardening/curing reaction |
| Titanium Dioxide | Colorant | Colorant (may contain) | Creates deeper, solid color (acrylics are clear) |
| Vitamins, Calcium | Optional fortifiers | Optional fortifiers | Touted for nail health benefits |
| Pigments, Glitters | Colorants, decorative | Colorants, decorative | Adds color and sparkle |
From Powder to Perfection: How They’re Applied
The most striking difference between dip powder and acrylics often becomes apparent in their application methods. While both systems deliver incredibly durable results, the journey from powder to a stunning manicure is quite distinct for each.
The Dip Powder Dance: A Step-by-Step Guide to a Smooth Finish
Dip powder application is widely celebrated for its relative simplicity, making it a popular choice for both salon professionals and at-home beauty enthusiasts. The process is often described as a “dip and seal” method, which contributes to its accessibility.
- Prep Your Nails: The foundation of any long-lasting manicure is meticulous preparation. Begin with clean, shaped nails. Gently push back your cuticles and lightly buff the nail surface to remove any natural shine and create a subtle texture. This textured surface is crucial for the dip powder to adhere properly. Finish by cleansing thoroughly with isopropyl alcohol or a dedicated nail prep solution to ensure the nails are completely oil-free.
- Apply Base Coat: Apply a thin, even layer of a specialized dip base coat, which acts as an adhesive bonder. Cover approximately three-quarters of your nail, stroking towards the tip. It is vital to avoid getting the base coat on your cuticles or surrounding skin, as the powder will stick wherever this adhesive is applied, potentially leading to lifting later.
- Dip into Powder: Immediately after applying the base coat, while it is still wet, dip your nail into your chosen colored powder at a 45-degree angle, ensuring full and even coverage. For larger decorative elements like chunky glitters, you might find it more effective to lay your nail flat onto the powder to pick up the pieces.
- Tap Off Excess: Gently tap your finger to remove any loose or excess powder. This step is important for preventing a bulky appearance and ensuring a smooth finish.
- Brush Off: Allow a moment for the base coat to fully absorb the powder. Then, use a clean, fluffy brush to gently sweep away any remaining loose powder from the nail surface and surrounding areas. This action is not just for aesthetics; it also prevents unwanted powder from contaminating your liquid bottles.
- Repeat for Coverage: Apply a second thin layer of base coat, this time starting a hairline away from the cuticle. Dip your nail into the powder again. Repeat this process for 2-3 coats to achieve the desired color saturation, opacity, and strength. With each coat, remember to “cap” your free edges by brushing the base coat and dipping the very tip of your nail into the powder, which helps seal the manicure.
- Apply Activator: Generously apply an activator liquid to all nails. This is a crucial step as it initiates the chemical reaction that sets and cures the powder, hardening the layers without the need for UV light. Allow 1-2 minutes for the activator to dry completely.
- Shape and Buff: Once the powder has hardened, use a nail file to shape your nails to perfection and a buffer to smooth the surface. This step refines the nail’s contour and prepares it for the top coat.
- Second Activator Coat: Apply a second, thinner coat of activator to all nails using minimal strokes. Wait about 1 minute and then wipe the nails well with a lint-free wipe. This ensures all layers are fully cured and removes any sticky residue.
- Apply Top Coat: Finish with a thin, quick-stroking layer of a specialized dip top coat. Allow it to air dry for 2-3 minutes, then apply a second layer for a smooth, high-shine surface. It is important to avoid over-brushing, as this can lead to matte spots or an uneven finish.
- Hydrate: Once the top coat is fully dry, wash your hands thoroughly and moisturize with a nourishing cuticle oil. This helps to rehydrate the nails and surrounding skin after the application process.
Sculpting with Acrylic: The Art of the Bead and Brush
Acrylic application is more of a sculpting process, demanding a skilled hand and a keen eye to achieve a flawless finish. This method is often preferred by professionals due to the artistry involved.
- Prep Your Nails: As with dip powder, thorough nail preparation is paramount. This involves cleaning, shaping, pushing back cuticles, and lightly buffing the natural nail to create a slightly rough surface for optimal adhesion. A nail primer is then applied to dehydrate the nail bed, ensuring the acrylic bonds securely. If desired, nail tips can be glued on and shaped at this stage to add length.
- Prepare Your Workspace: Proper ventilation is crucial when working with acrylics due to the strong fumes produced by the monomer liquid. Pour the liquid monomer into a dappen dish and the acrylic powder into a separate dish, ensuring all tools are within easy reach.
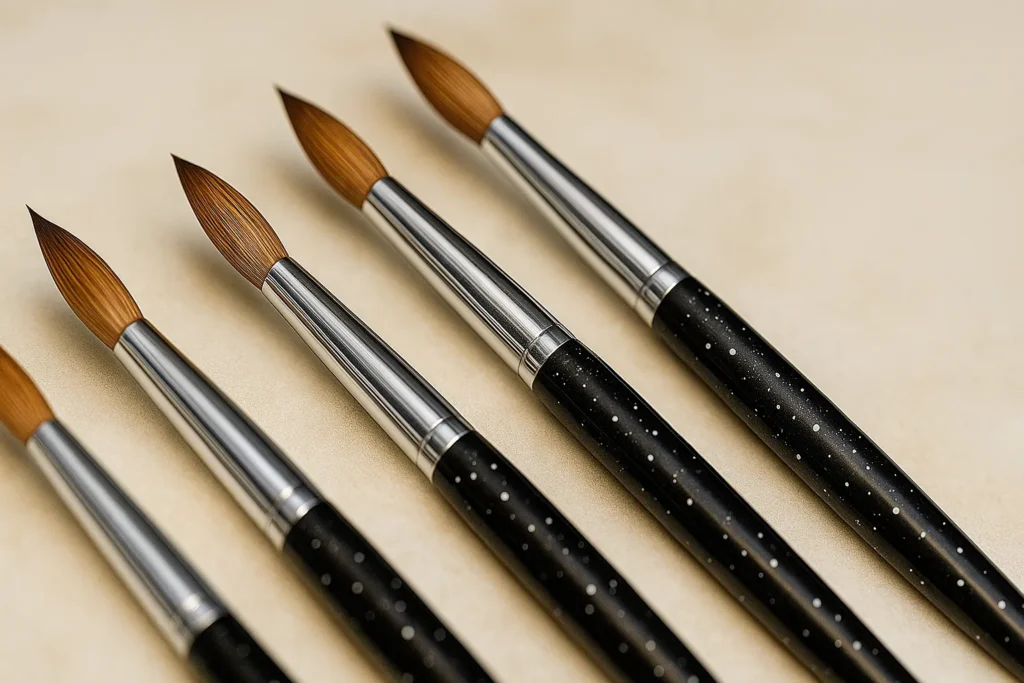
- Create the Bead: Dip your acrylic brush into the monomer liquid, pressing out any excess liquid against the side of the dish. Then, dip the brush into the acrylic powder to pick up a small, moist “bead” of product. Mastering the liquid-to-powder ratio is critical here; the bead should be moist and spreadable, not too wet (which can cause runniness) or too dry (which can make it crumbly). This balance is key to a smooth application.
- Apply and Sculpt: Place the acrylic bead onto the nail, typically starting at the free edge or the “smile line” where the natural nail meets any extension. Using small, smooth strokes, flatten and spread the acrylic over the entire nail, meticulously shaping it to your desired length and form. It is important to avoid applying the product too close to the cuticles, as this can lead to lifting as the natural nail grows out.
- Air Dry: Acrylic hardens through a chemical reaction that occurs as it is exposed to air, typically setting within a few minutes. A common test for dryness is to tap the surface of the nail with the handle of your acrylic brush; a hollow clicking sound indicates that it is fully dry and ready for the next step.
- Shape and Finish: Once the acrylic is fully hardened, file and buff the nails to refine the shape, smooth the surface, and remove any imperfections. The final step involves applying a top coat or nail polish to seal the design and add shine.
Ease of Application: DIY Dreams vs. Salon Savvy
When comparing the overall ease of application, dip powder generally presents a lower learning curve than acrylics, making it a more accessible option for many.
- Dip Powder: This system is often perceived as easier and faster to apply, especially for at-home manicures. The “dip and seal” process is more straightforward and requires less intricate sculpting skill, making it a great DIY option even for beginners. This simplicity empowers individuals to achieve salon-like results more easily in the comfort of their own home.
- Acrylic: In contrast, acrylic application demands significant skill, practice, and artistry to master the precise liquid-to-powder ratio and the delicate sculpting techniques. While it is possible to do at home, it is a more time-consuming process, and self-application can be particularly challenging if one is not ambidextrous. Due to its versatility and the expertise required for flawless execution, acrylic is often preferred and performed in professional salons.
It is also important to consider the hygiene implications of the application method, particularly in a salon environment. The “dipping” process for dip powder, where multiple clients might dip their nails into the same powder jar, can pose a risk of infection if strict hygiene standards are not followed. This highlights the critical importance of ensuring that salons maintain rigorous sanitation practices. For DIY users, this means always using clean tools and ensuring the powder remains uncontaminated. This aspect of the application method, beyond just the product chemistry, has significant practical and safety considerations.
Lasting Power & Look: Durability, Appearance, and Feel
When investing time and effort into a manicure, the expectation is for it to last and look fantastic! Both dip powder and acrylic nails are renowned for their impressive longevity, significantly outlasting traditional nail polish. However, they offer different aesthetic and tactile experiences.
Durability Showdown: How Long Can You Rock Your Mani?
Both dip powder and acrylic nails are celebrated for their strength and ability to withstand daily wear and tear.
- Dip Powder: This system generally provides excellent durability, with manicures lasting between 2 to 4 weeks without chipping or peeling. Some users have even reported their dip powder manicures lasting up to 5 weeks with diligent care. This makes dip powder a highly reliable option for those seeking a long-lasting manicure with minimal fuss.
- Acrylic: Acrylic nails are also known for their robust strength and typically last around 3 weeks before requiring infills or replacement. While acrylics can technically last for an impressive 6 to 8 weeks, this extended longevity is contingent upon regular salon visits for “fills” every couple of weeks. These fills address the natural nail growth, preventing lifting and maintaining the integrity of the enhancement. Without these routine fills, lifting can occur as the natural nail grows out, compromising the manicure’s lifespan.
It is important to understand the nuance in claims about which system lasts longer. While some sources might suggest acrylics last longer , this often refers to their potential for extended wear with regular maintenance (fills). Dip powder’s stated longevity (3-5 weeks) typically refers to the duration of a single application before a full removal and reapplication is necessary or recommended. This distinction is vital for managing user expectations regarding the true commitment in terms of time and cost for maintaining each type of manicure. Ultimately, the durability of both systems heavily relies on meticulous nail preparation and precise application techniques.
Appearance & Feel: Thickness, Flexibility, and Finish
The final look and tactile sensation of a manicure can vary quite a bit between these two popular options.
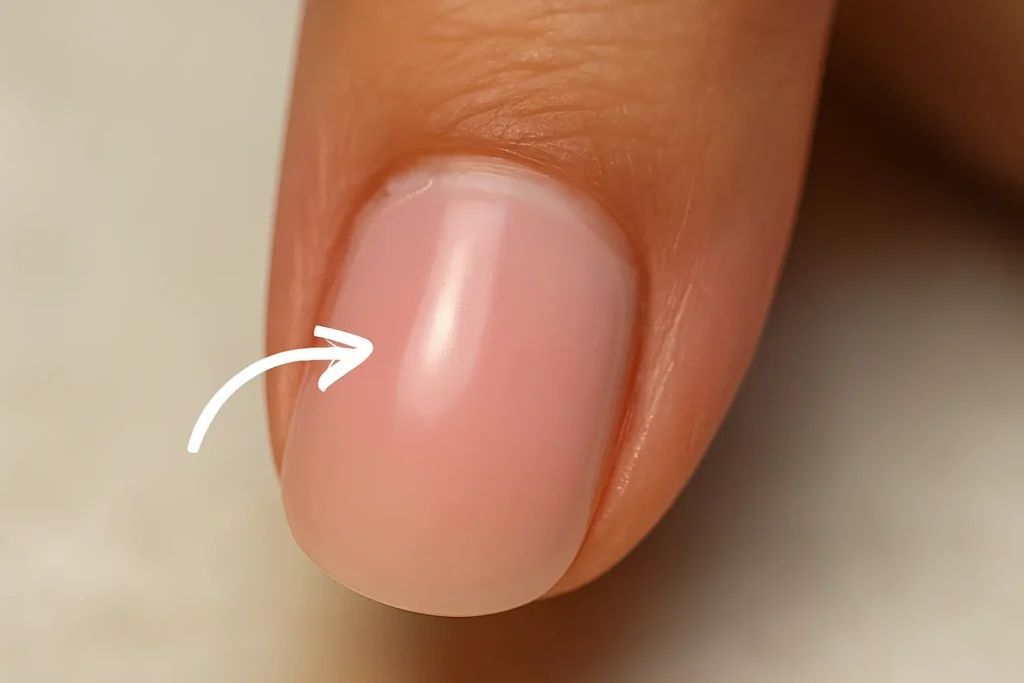
- Dip Powder: When applied correctly, dip powder creates a strong, protective layer that is typically thicker than regular nail polish but often thinner than traditional acrylic extensions. It offers a lightweight, flexible finish that can beautifully mimic the natural texture and feel of the nail. This flexibility can contribute to a more comfortable wear experience. However, it is possible for dip nails to feel thick and bulky if too many layers are applied during the process. The result is usually a smooth, durable, and vibrant finish with a noticeable shine.
- Acrylic: Acrylic nails often result in a thicker, more rigid feel compared to dip powder. While this thickness contributes to their strength and protective qualities, it can sometimes feel heavier on the natural nails. The inherent rigidity of acrylics makes them less flexible than dip powder.
Design Versatility: What Each System Offers for Nail Art
Both dip powder and acrylic systems provide an excellent canvas for creativity, but they excel in different aspects of nail artistry.
- Dip Powder: This system offers a wide variety of colors, finishes, and design options, including bold shades, glitters, and subtle neutrals. While beautiful and vibrant looks can certainly be achieved, intricate nail art designs, especially those requiring detailed sculpting or 3D elements, might be less detailed or more challenging to execute compared to what is possible with traditional acrylics. Dip powder can be applied over nail tips to add length, but generally, the ability to create extreme extensions or highly customized shapes is more limited by the length and shape of the natural nails compared to acrylics.
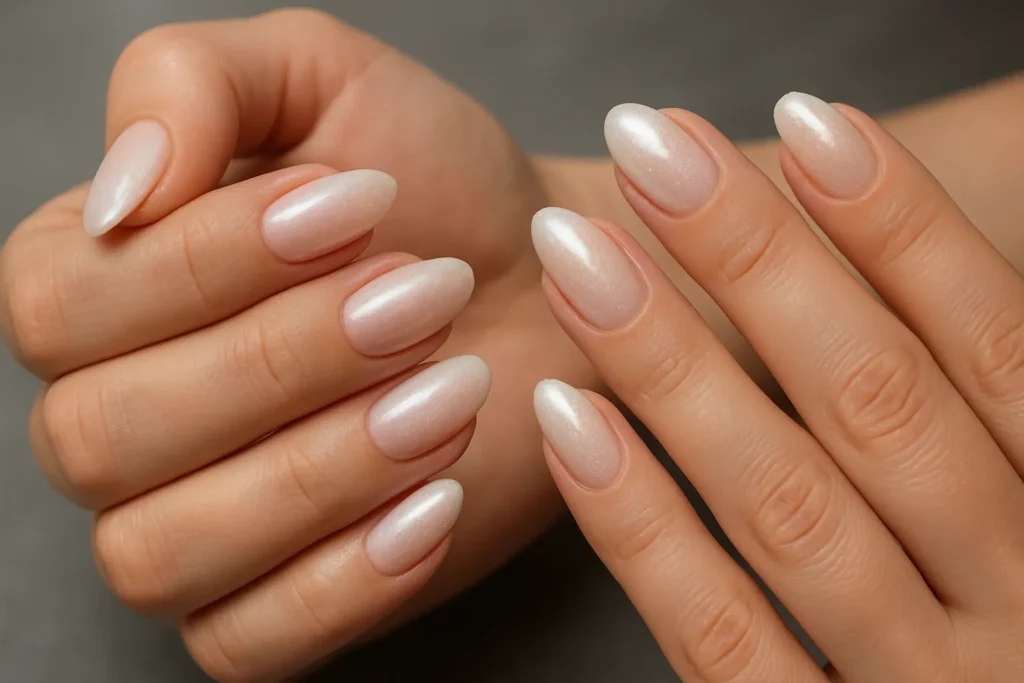
- Acrylic: Acrylic truly excels in design versatility, offering unparalleled opportunities for bold customization, intricate designs, and the creation of various nail shapes and lengths. From subtle extensions to dramatic almond or stiletto styles, the possibilities are virtually limitless. If the goal is significant length, complex 3D nail art, or highly sculpted designs, acrylics are often the preferred choice for experienced nail technicians due to their moldable nature before curing.
This highlights a key trade-off: the ability of acrylic to create “different nail shapes and lengths” and “intricate designs” often comes at the cost of being “thicker” and potentially “heavier” on the nails. Conversely, dip powder generally offers a thinner, more natural-feeling application but with less extreme customization for length and shape, even when applied over tips. This understanding helps individuals weigh their priorities between aesthetic versatility and a more natural feel.
Nail Health & Safety: What’s the Impact on Your Natural Nails?
Beyond the beautiful finish, it is natural to wonder about the long-term impact these nail enhancements have on natural nails. Understanding what is generally considered gentler and what requires a bit more caution is essential for informed choices.
The Gentle Touch of Dip Powder: No UV Light, Less Filing, and Nourishing Ingredients
Dip powder systems are frequently highlighted as a “healthier” alternative to other nail enhancements, and there are several compelling reasons for this perception.
- No UV Light Required: A significant advantage of dip powder is that it cures in the air, eliminating the need for UV or LED light exposure. This directly addresses concerns about potential skin damage or premature aging associated with UV lamps, making it a preferred choice for many.
- Less Aggressive Filing: The application process for dip powder typically does not involve the same level of harsh filing or drilling to the natural nail bed that can be associated with traditional acrylics. This gentler approach helps preserve the integrity and natural thickness of the nails.
- Gentler Bonding Agents: The bonding agents used in dip powder systems are often formulated to be gentler on the natural nail bed, contributing to a less invasive application experience.
- Nourishing Ingredients: Many dip powder formulas are formaldehyde-free and may contain beneficial ingredients such as vitamins and calcium. These additions are designed to contribute to overall nail health and strength, further supporting the “healthier” claim.
- Less Dehydrating: Dip powder is generally considered less dehydrating for the nails compared to traditional acrylics, which can be quite drying.
It is important to clarify the nuance behind the “healthier” claim for dip powder. While dip powder is marketed as healthier and indeed avoids UV light and often contains beneficial ingredients, the core powder itself is still an acrylic polymer. The “healthier” aspect largely stems from the application and curing process (no UV, less aggressive filing, gentler bonding agents) and the absence of certain harsh chemicals like methyl methacrylate (MMA) monomer. It is not that the powder itself is inherently “natural,” but rather that the system is often less invasive and utilizes a safer chemical profile by avoiding banned substances. While dip powder is generally considered less damaging, it is crucial to remember that improper application or removal techniques can still cause harm to the natural nail.
Understanding Acrylic’s Considerations: Chemicals, Odors, and Proper Ventilation
Traditional acrylics, while undeniably strong and versatile, do come with a few more considerations regarding nail health and safety.
- Strong Chemicals and Odors: Acrylics involve a chemical reaction between the liquid monomer and powder, which can produce strong fragrances and fumes. These chemicals, such as methyl methacrylate (MMA), have the potential to cause irritation or allergic reactions in some individuals.
- The MMA Story: As previously discussed, Methyl Methacrylate (MMA) monomer has been banned by agencies like the FDA for use in nail products due to significant safety concerns. Its use can lead to severe allergic reactions and permanent nail damage. Therefore, it is absolutely crucial to ensure that any acrylic products used contain Ethyl Methacrylate (EMA) monomer, which is considered safe for nail applications.
- Potential for Nail Damage: Improper application or removal of acrylic nails can unfortunately lead to damage to the natural nail. The aggressive filing process often involved during application can thin the natural nails, making them more prone to breakage. Additionally, the chemicals used in the acrylic mixture and the removal process can cause dehydration and weaken the nail bed. Among nail enhancement methods, acrylic nails carry the highest potential for nail bed damage if not handled correctly and professionally.
- Ventilation is Key: Due to the strong chemicals and fumes emitted during application and removal, it is absolutely essential to work in a well-ventilated room. Proper air circulation is not just about comfort; it is a fundamental safety measure to minimize inhalation exposure and reduce the risk of irritation or allergic reactions. This practical tip is a direct consequence of the chemical nature of acrylics.
The Great Unveiling: Safely Removing Your Manicure at Home
Just as important as applying a flawless manicure is knowing how to remove it safely, without causing damage to the natural nails. Patience and the correct technique are essential allies in this process.
Dip Powder Removal: The Acetone Soak-Off Method
Dip powder systems utilize a cyanoacrylate-based glue that is quite sensitive to solvents, which generally makes its removal easier compared to gel manicures. The most effective and widely recommended method involves soaking the nails in acetone.
- File Down the Top Layer: Begin by gently filing or buffing off the shiny top coat of the dip powder manicure. This crucial step creates micro-abrasions on the surface, allowing the acetone to penetrate and dissolve the product more effectively.
- Acetone Soak: Saturate a cotton ball or pad thoroughly with 100% pure acetone. Place the acetone-soaked cotton directly onto the buffed nail. To ensure maximum contact and prevent evaporation, wrap the fingertip tightly with a piece of aluminum foil, securing the cotton ball in place. Repeat this process for all nails.
- Wait and Dissolve: Allow the nails to soak for approximately 10-20 minutes. During this time, the acetone works to break down the dip powder. The product should begin to soften and flake or crumble off the nail.
- Gently Scrape: Once the product has softened, gently lift off the foil from one nail. Use a wood stick or a stainless steel cuticle pusher to carefully scrape away the dissolved product. If any areas of the powder are still hard or resistant, re-wrap the nail and soak for an additional 5-10 minutes to allow the acetone more time to work.
- Cleanse and Hydrate: After all traces of dip powder are gone, thoroughly wash your hands to remove any acetone residue. Finish by applying a nourishing cuticle oil and a rich hand cream to rehydrate your nails and the surrounding skin, as acetone can be significantly drying.
It is important to avoid DIY removal methods that do not involve acetone, such as soaking nails in scalding hot water, vinegar, or baking soda. These alternatives are generally less effective at dissolving the product and are more likely to cause irritation or damage to the nails and skin.
Acrylic Removal: Patience and Protection for Your Natural Nails
Acrylic removal also relies on acetone, but it often requires more time and a more rigorous approach due to the product’s strong chemical bond and thicker application.
- Clip and File: Start by clipping any excess length from your acrylics. Then, use a coarse nail file to thin the acrylic layer, removing any top polish and roughing up the surface. This step is crucial for allowing the acetone to penetrate the thick acrylic more efficiently. Exercise caution not to file too deep into your natural nail, as this can cause damage.
- Protect Your Skin: Before the acetone soak, apply a generous layer of petroleum jelly or cuticle oil to the skin around your nails and cuticles. This creates a protective barrier, preventing the potent acetone from excessively drying out or irritating your skin.
- Acetone Soak (Foil Method): Saturate cotton balls thoroughly with 100% pure acetone. Place one acetone-soaked cotton ball directly on each nail, ensuring it completely covers the acrylic. Wrap each fingertip tightly with aluminum foil to secure the cotton in place. Leave the wraps on for at least 20 minutes.
- Flake and Scrape: After the recommended soaking time, gently lift the foil from one nail. The acrylic should appear soft and flaky. Use a wood stick or a cuticle pusher to gently scrape off the softened acrylic. If the acrylic is still hard or resistant, re-wrap the nail and allow it to soak for an additional 5-10 minutes. Repeat this process for each nail until all acrylic is removed.
- Never Force It: This is a critical warning: it is incredibly tempting, but never pull, cut, or bite the acrylic off your nails! This is the quickest way to cause severe damage, including thinning, weakening, and even tearing of your natural nails. Significant nail damage is often a direct result of improper user actions during removal, rather than solely the product itself. This emphasizes that adhering to proper, gentle soak-off methods is paramount for preserving natural nail integrity.
- Cleanse and Hydrate: Once all acrylic is removed, thoroughly wash your hands. Follow up by applying a high-quality nail strengthener and a rich cuticle oil to replenish lost moisture and support the health and recovery of your natural nails.
While some alternative methods suggest soaking in acetone-free remover, these typically take much longer (30-40 minutes) and may not be as effective. Dental floss can be used for acrylics that are already significantly lifted, but this method carries a high risk of causing damage if forced. For the safest and most effective removal, especially for thick or stubborn acrylics, seeking professional removal at a salon is always the best option.
The reliance on acetone for removing both dip powder and acrylics highlights a dual nature of this solvent. While it is highly effective at dissolving these strong nail enhancements, it is also a powerful chemical that can be significantly drying to the nails and surrounding skin. This means that immediate and thorough post-removal hydration and aftercare are not merely optional steps, but a non-negotiable part of the process to mitigate potential damage and support nail health.
Cost & Convenience: Salon vs. DIY Manicures
When deciding on a nail enhancement, the choice between a salon visit and a DIY project often comes down to a balance of cost, time, and convenience. Both dip powder and acrylics offer options to suit various preferences and budgets.
Professional Prices: What to Expect for Each Service
When opting for a professional manicure at a salon, the pricing for dip powder and acrylics can be quite comparable, though there are important nuances in their long-term cost implications.
- Dip Powder: A professional dip powder manicure typically ranges from $30 to $60 , with some sources citing an average of $50 to $60. The final price can be influenced by several factors, including the salon’s location (e.g., higher prices in metropolitan areas), its reputation, the experience level of the nail technician, and any additional amenities or services offered (such as nail art or cuticle treatments).
- Acrylic: An average acrylic manicure usually costs between $35 and $80. While the initial cost of a full set of acrylics might be similar to a dip powder manicure, acrylics generally require regular infill appointments every 2-3 weeks to maintain their appearance and prevent lifting as the natural nail grows. These ongoing maintenance fills typically cost between $30 and $50. These recurring costs for fills can add up significantly over time, making the long-term professional maintenance of acrylics potentially more expensive than dip powder, which is often fully removed and reapplied.
DIY Kits: Your Budget-Friendly Path to Beautiful Nails
For the beauty-savvy individual who enjoys self-care and is keen on long-term savings, DIY kits offer a compelling alternative to salon visits.
- Dip Powder: Dip powder is frequently highlighted as a highly cost-effective solution for home use. The initial investment in a dip powder starter kit can range from under $20 for smaller, basic kits to $50-$80 for larger kits with more color options. However, the cost per manicure becomes incredibly low once the initial kit is purchased. For example, a kit costing around $50 could yield approximately 40 manicures, which breaks down to a remarkably low cost of roughly $1.20 per manicure. This represents hundreds of dollars in annual savings compared to consistent salon visits, making DIY dip powder a highly attractive and empowering option for budget-conscious self-care.
- Acrylic: While DIY acrylic kits are also available, the higher skill requirement for mastering the liquid-to-powder ratio and sculpting techniques, combined with the necessity for proper ventilation due to strong fumes, can make it a more challenging and potentially less convenient DIY option for beginners. The learning curve is steeper, which might deter some from attempting it at home.
Refills vs. Fresh Sets: Understanding Maintenance and Longevity
The maintenance model for each system is a key differentiator in terms of overall long-term cost and convenience.
- Acrylic: Acrylic nails are specifically designed for refills (or “fills”) every 2-3 weeks. This process involves filling the gap created by natural nail growth at the cuticle area, effectively extending the life of the existing enhancement without needing a complete reapplication. Fills are generally cheaper than getting a brand new set of acrylics. This maintenance model allows for continuous wear with regular upkeep.
- Dip Powder: For dip powder, while some debate exists within the nail community, it is often considered better to apply a fresh set each time rather than attempting refills. This typically means a full soak-off and reapplication is needed every 3-4 weeks. This influences the overall budget and time commitment for the user, as each maintenance session is essentially a full new manicure process.
The fact that acrylics typically require “infills” every 2-3 weeks, while dip powder is often a full soak-off and reapplication, means that even if the initial salon price is similar, the ongoing maintenance cost structure differs significantly. Acrylic fills are less expensive than a new set, but dip typically necessitates a new set each time. This distinction directly influences the overall budget and time investment required for the user to maintain their desired nail aesthetic.
Troubleshooting & Aftercare: Keeping Your Mani Flawless
Even with the best intentions and careful application, sometimes things don’t go perfectly. Knowing how to troubleshoot common issues and practice consistent aftercare can significantly extend the life of a manicure and maintain the health of natural nails.
Common Dip Powder Challenges & Solutions
- Lifting or Chipping: This is a common concern. It often occurs due to improper nail preparation, such as residual oils or unpushed cuticles, applying the product too close to the cuticle, layers being too thin, or insufficient activator application. Failing to seal the free edges of the nail with the top coat can also contribute.
- Solution: Prioritize meticulous nail preparation: ensure nails are clean, buffed, dehydrated, and cuticles are properly pushed back. Apply thin, even layers of base coat and powder. It is crucial to ensure all powder layers are thoroughly saturated with activator. Blend the edges of the application smoothly and always seal the free edge with the top coat. For added strength, especially if chipping has been an issue, consider applying 1-2 extra layers of dip powder.
- Bumpy or Thick Nails: This issue typically arises from uneven application, product build-up, using old or clumpy powder, or applying the base coat too thickly. A common culprit is not tapping off all excess powder after dipping.
- Solution: Before use, loosen powders by shaking or stirring the jar to ensure a fine, even consistency. Apply thin, even layers of both base coat and powder. After each dip, tap off all excess powder thoroughly. Gently buff the surface with a nail buffer after the final dip and before applying the top coat to smooth out any bumps and achieve a flawless finish.
- Top Coat Not Hardening or Sticky: This problem can be frustrating. It is often caused by improper curing (not enough activator applied or insufficient drying time), using old or improperly stored products, applying the base or top coat too thickly, or environmental factors like excessive moisture or humidity.
- Solution: Ensure the activator is applied generously and allowed sufficient drying time (1-2 minutes) before applying the top coat. Apply the top coat in thin, quick strokes, allowing 2-3 minutes for each layer to dry completely. If a sticky “inhibition layer” remains, it can typically be removed by wiping with a lint-free wipe soaked in alcohol. Always check product expiration dates, as old products may not cure properly.
- Discoloration or Fading: This can occur if the manicure comes into contact with problematic formulas, such as certain sunblocks or household cleaners, or if the protective sealer layer is skipped.
- Solution: To prevent this, wear gloves when performing household chores or handling chemicals. Ensure the protective sealer (often Step 4 Dip Nail Liquid in many systems) is consistently applied.
- Chipping or Cracking: This can often be caused by too few or too thin dip layers. Cold weather can also be a factor.
- Solution: Add 1-2 extra layers of dip powder during your next manicure session. Some users even prefer more than two layers, as it comes down to personal preference as long as an additional layer is applied.
- “Dip Flu” (Flu-like symptoms): Some individuals report experiencing flu-like symptoms after dip powder application, often attributed to inhaling fumes or dust from the products.
- Solution: Work in a well-ventilated room to ensure good air circulation. Keep your hands at a safe distance from your face during application. Wear a face mask and protective goggles to minimize inhalation and eye irritation. Use an old towel or cloth to trap dust particles, and thoroughly clean up the entire area after application, including vacuuming and tightly sealing all bottles and jars. It is important to note that this information is not medical advice; individuals experiencing symptoms should seek medical counsel.
Acrylic Nail Fixes & Prevention
- Lifting: This is arguably the most common issue with acrylic nails. For a deeper dive into this common challenge, explore our detailed guide. It is primarily caused by improper nail preparation (e.g., oils, dust, or moisture left on the nail), applying acrylic too thickly near the cuticle area, an incorrect liquid-to-powder ratio, or product contamination.
- Solution: Begin with thorough nail preparation: ensure the natural nail is clean, dry, oil-free, lightly buffed, and cuticles are properly pushed back. Mastering the correct liquid-to-powder ratio is crucial for a strong bond. Apply a thinner layer of acrylic near the cuticle and ensure the edges are properly sealed. Avoid flooding the cuticles with product. If lifting does occur, gently file away the lifted area with a fine-grit file, clean the area, and reapply a small amount of acrylic, blending it smoothly into the existing enhancement. For minimal lifting, nail glue can serve as a temporary fix.
- Bubbling: Air bubbles trapped within the acrylic can mar the finish. To master preventing this, check out our tips. This is often caused by an incorrect liquid-to-powder ratio (either too wet or too dry), whipping air into the liquid with the brush during pickup, or overworking the product after it has been placed on the nail. Additionally, if the acrylic cures too fast, the top layer can plasticize before air bubbles have a chance to escape.
- Solution: Maintain a balanced liquid-to-powder ratio, typically 1.5 parts liquid to 1 part powder. Ensure brush hairs are fully saturated in monomer by gently submerging them to the bottom of the liquid dish to release trapped air before picking up powder. Press and smooth the product onto the nail to remove air bubbles. If using a fast-set powder, consider switching to a standard-set to allow more time for bubbles to naturally escape before the top layer cures.
- Cracking: This issue can stem from an incorrect liquid-to-powder ratio. Too much liquid can lead to excess shrinkage, while too little liquid results in a lack of internal adhesion, both weakening the enhancement. Over-filing the enhancement can also compromise its molecular structure, leading to cracking.
- Solution: Adhere strictly to the correct liquid-to-powder ratio. Avoid using coarse or electric files aggressively, and instead use a gentle touch when filing to preserve the integrity of the acrylic.
- Yellowing: Acrylic nails can sometimes develop a yellowish tint. check our comprehensive guide. Common causes include product contamination (e.g., storing liquid and powder too close together, using a dirty brush) or applying acrylic before an acid-based primer has completely dried.
- Solution: Store liquid and powder products separately to prevent cross-contamination. Use a dedicated, properly cleaned sculpting brush for acrylics. Ensure the dappen dish is cleaned between each service to use fresh monomer. If using an acid-based primer, allow it to dry completely before applying acrylic.
- Irritation: Skin irritation can occur if monomer liquid comes into contact with soft tissue, if the natural nail is damaged during filing (e.g., friction burns), or due to chemical damage from certain ingredients, particularly HEMA.
- Solution: Absolutely avoid all soft tissue contact with professional-use products. Use a light-handed technique when filing the natural nail to prevent friction burns. Ensure the appropriate liquid-to-powder mix ratio to prevent monomer from flooding the sidewall and cuticle area.
A pervasive theme across both dip powder and acrylic troubleshooting is the critical importance of proper nail preparation (ensuring nails are clean, dry, oil-free, and cuticles are pushed back) and correct product ratios (the liquid-to-powder ratio for acrylic, and sufficient base/activator saturation for dip). This suggests that many perceived “product failures” are, in fact, “application failures.” Understanding this empowers the user by showing them precisely where to focus their efforts for successful, long-lasting manicures. Additionally, environmental conditions play a subtle but significant role. The mention of cold weather causing chipping and cracking in dip powder and temperature/humidity affecting acrylic curing speed implies that ambient conditions can influence nail enhancement performance. This adds another layer of sophistication to understanding nail care, extending beyond just technique.
Essential Aftercare for Both: Hydration, Protection, and Smart Habits
Regardless of the chosen nail enhancement system, consistent aftercare is vital for maintaining healthy natural nails and significantly extending the life of the manicure.
- Hydrate Daily: Both acetone removal processes and the products themselves can be drying to the nails and surrounding skin. Regularly apply a high-quality cuticle oil or a nourishing hand cream to your nails and cuticles. Well-hydrated nails are more flexible and less prone to breaking, peeling, or lifting.
- Protect Your Mani: Wear gloves when performing household chores, especially those involving prolonged water exposure, cleaning agents, or harsh chemicals. This simple step creates a physical barrier that prevents lifting, discoloration, and overall damage to your manicure.
- Avoid Hand Sanitizer: Alcohol-based hand sanitizers can be detrimental to your manicure. The alcohol can dry out your nails and potentially damage the top layer of your enhancement, leading to dullness or chipping. Opt for washing your hands with mild soap and water instead, which is gentler on your nails.
- Regular Maintenance: Adhere to recommended maintenance schedules. For acrylics, this means regular fills every 2-3 weeks to prevent excessive lifting as your natural nails grow. For dip powder, plan for full removals and reapplications every 3-4 weeks to maintain appearance and integrity.
- Professional Repairs Only: If a nail breaks or experiences significant lifting, resist the urge to attempt a quick DIY fix. Seeking professional repair is crucial to avoid causing further damage to your natural nail and to ensure the enhancement is properly restored.
- Proper Product Storage: To ensure the longevity and performance of your nail products, store them upright, away from direct light and heat. Always ensure that lids are tightly closed after use to prevent thickening, contamination, or premature curing.
Here is a quick reference table for common issues and their solutions:
| Issue | Dip Powder Causes | Dip Powder Solutions | Acrylic Nail Causes | Acrylic Nail Solutions |
|---|---|---|---|---|
| Lifting/Chipping | Improper nail prep (oils, unpushed cuticles), too close to cuticle, thin layers, insufficient activator, unsealed free edge | Meticulous prep, thin/even layers, thorough activation, blend edges, seal free edge, add layers | Improper nail prep, thick application near cuticle, poor liquid-to-powder ratio, contamination | Thorough prep, correct ratio, thin application at cuticle, seal edges, file/reapply |
| Bumpy/Thick Nails | Uneven application, product build-up, old/clumpy powder, thick base coat, not tapping excess | Shake/stir powder, thin/even layers, tap off excess, buff surface | Incorrect liquid-to-powder ratio (too dry), overworking product | Maintain balanced ratio, smooth product, buff |
| Not Hardening/Sticky Top Coat | Insufficient activator/drying time, old products, thick layers, humidity | Generous activator, thin top coat layers, sufficient drying time, wipe inhibition layer, check expiration | Curing too fast (trapped air) | Adjust curing speed (standard-set powder) |
| Yellowing | Contact with problematic formulas, skipping sealer | Wear gloves, apply protective sealer | Product contamination, wet acid-based primer | Store products separately, clean tools, ensure primer dries |
| Bubbling | (Not common for dip powder) | (N/A) | Incorrect liquid-to-powder ratio (too wet/dry), whipping air with brush, overworking product | Balanced ratio, saturate brush, press/smooth product |
| Cracking | Layers too thin, cold weather | Add 1-2 extra layers, protect from cold | Incorrect liquid-to-powder ratio, over-filing | Balanced ratio, gentle filing |
| Irritation | (Not common for dip powder, but “Dip Flu” possible from fumes/dust) | Work in well-ventilated area, wear mask/goggles, clean up thoroughly | Monomer contact with soft tissue, natural nail damage, chemical sensitivity (HEMA) | Avoid soft tissue contact, light filing, correct ratio |
Making Your Choice: Which Nail Enhancement Is Right For You?
Having explored the intricate details of both dip powder and acrylic nails, it is now time to consider which option aligns best with individual needs and desires. There is no single “best” choice; the ideal selection is all about finding the perfect match for a specific lifestyle, nail goals, and personal preferences.
Considering Your Lifestyle and Nail Goals
When making a decision, it is helpful to reflect on daily activities and what is truly desired from a manicure.
- For the Active & Hands-On: If one leads a very active lifestyle or works in a hands-on profession that puts stress on nails, both systems offer robust protection. Acrylics are particularly known for their exceptional strength and durability, making them an ideal choice for those who need nails that can withstand significant daily wear and tear.
- For Length & Customization: If the dream is to achieve significant nail length, intricate designs, or specific, highly sculpted shapes (such as stiletto or coffin), acrylics offer unparalleled versatility and customization capabilities. The moldable nature of acrylic before it cures allows for extensive creative freedom.
- For a More Natural Feel: If a lighter, less bulky feel on the nails is preferred, one that closely mimics the natural texture of the nail, then dip powder is often the preferred choice. Its thinner application (when done correctly) contributes to this more natural sensation.
- For Minimal Upkeep (between full sets): While both require maintenance, dip powder generally requires less frequent salon visits for ongoing maintenance compared to acrylics, as it is typically a full removal and reapplication rather than fills. This can be a convenience factor for those with busy schedules.
Personal Preferences: What Feels Best for You?
Beyond practical considerations, personal comfort and aesthetic preferences play a significant role in determining the right nail enhancement.
- Application Experience: Consider the application process itself. Is a quicker, simpler dipping method preferred, or is one comfortable with the more intricate, sculpting process required for acrylics?. The ease of DIY application for dip powder can be a major draw for many.
- Odor Sensitivity: Acrylics are known for producing strong chemical odors during application, which can be a significant factor for individuals sensitive to smells. Dip powder systems, in contrast, generally have less strong odors, offering a more pleasant experience.
- UV Light Concerns: If there is a preference to avoid UV light exposure due to concerns about skin damage or premature aging, dip powder is the clear choice, as it cures without any lamps.
Budget and Time Commitment: Finding Your Perfect Fit
The financial investment and time commitment for maintenance are also crucial factors in the decision-making process.
- DIY Enthusiast: For those keen on saving money in the long run and who enjoy the process of self-care, DIY kits offer substantial savings. Dip powder, in particular, is highlighted as a highly cost-effective solution for home use. While an initial investment in a starter kit is required, the cost per manicure becomes drastically lower over time. For example, a kit costing around $50 could yield approximately 40 manicures, breaking down to roughly $1.20 per manicure. This represents a potential saving of hundreds of dollars annually compared to regular salon visits, making DIY dip powder an incredibly empowering and budget-friendly option.
- Salon Regular: If convenience and professional expertise are top priorities, salon services for both options are available. While initial costs might be comparable, it is important to factor in the ongoing maintenance. Acrylics typically require refills every 2-3 weeks, which, while cheaper than a new set, are still a recurring expense. Dip powder usually involves a full soak-off and reapplication every 3-4 weeks, which means paying for a “new set” each time. This difference in the maintenance model significantly influences the overall long-term budget and time commitment.
Embrace Your Nail Journey!
So, is dip powder the same as acrylic powder? The answer, as we’ve explored, is a nuanced “no.” While they share common chemical roots in the acrylic family, their distinct formulations, application methods, curing processes, and maintenance routines set them apart. Dip powder offers a simpler, often DIY-friendly application that cures without UV light and tends to feel lighter on the nail. Acrylics, on the other hand, provide unparalleled versatility for length and intricate designs, though they require more skill to apply and come with considerations regarding fumes and removal.
The beauty world is all about empowering you to express yourself, and your nails are a fantastic canvas! Whether you gravitate towards the ease and natural feel of dip powder or the bold customization of acrylics, the most important thing is to choose what makes you feel confident and beautiful. Remember to prioritize proper nail preparation, meticulous application, and consistent aftercare to keep your natural nails healthy and your manicure flawless.
Now that you’re armed with this knowledge, why not explore the vibrant world of nail enhancements for yourself? Experiment with different colors, try out some nail stickers, or even dive into a DIY dip powder kit. Your perfect manicure awaits, and you’ve got all the tools (and knowledge!) to make it happen. Go on, get creative, and let your nails shine!