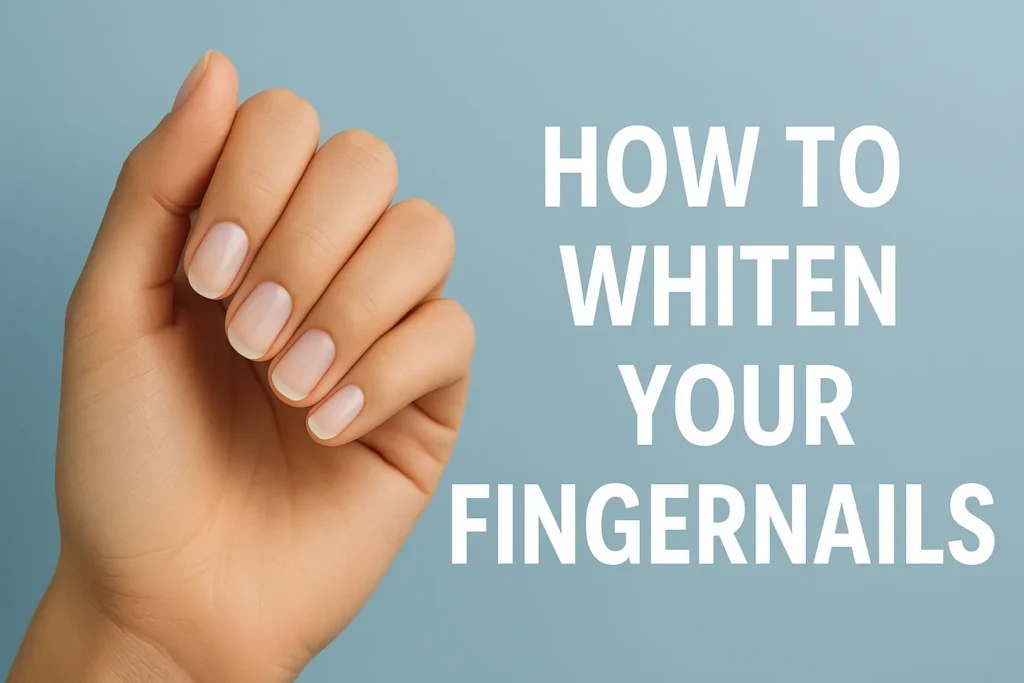
Have you ever taken off dark nail polish and found your nails stained yellow or just kind of “blah”? If yes, then you are not alone! Many of us have wondered, how do you whiten your fingernails after they have become stained or discolored? Fortunately, there are many easy tips for whitening nails – natural home remedies and handy store-bought solutions – that can help you get your nails back to a healthy, bright white shine! In this ultimate guide, you will learn everything you ever wanted to know about whitening your nails, in a laid back, step-by-step way! Just like Pat Flynn’s teaching style, this will be easy to follow, conversational, and actionable! So let’s jump into these fixes for fingernail discoloration so you can show off those nails with confidence!
Common Causes of Nail Discoloration (Why Do Nails Turn Yellow?)
Before we dive into the fixes, it’s good to have a sense of why nails become discolored. Fingernails can be yellow or stained from a variety of typical habits and products:
- Dark Nail Polish & Harsh Removers: Wearing a dark or pigmented color (reds, oranges, etc.) nail polish frequently can leave yellowish tint to your nails if you don’t use base coats, and harsh polish removers can also cause discoloration over time. Nails are porous and actually soak up nail polish pigment and other stains.
- Smoking: Nicotine from cigarette products are notorious for staining the tips of your fingers and nails. Eventually, smoking can cause “smoker’s nails” or, yellowing fingernails. (Another reason to quit!)
- Dyes & Chemicals: Have a look at your fingernails after you color your hair, or clean your house. Chemicals; hair dyes, cleaning products, or even spices (turmeric!) can leave residues or even stains on your nails. Not to mention any chemicals you aren’t aware of that might be on your hands and easily transferred to your nails. If you don’t wear gloves, then these stains may be absorbed in the nails.
- Natural Aging: Occasionally, nails can become slightly darker or yellowed with age, maybe a tarnished stain. Years of wear and tear on using things up on your nails can dull their natural brightness. It happens to everyone, and it’s completely normal, but you can fight against it.
- Underlying Health Causes (Less Common): Sometimes, nail discoloration is more than a cosmetic issue. Vitamin deficiencies, certain infections or nail fungus, or diseases like diabetes or psoriasis can all become yellow nails. These are much rarer, but you may want to see a doctor if your nails are thick, a lot of yellow, or don’t change with good nail hygiene to rule out any health issues. But for the average person, nail stains are usually superficial and based on outside differences rather than health problems.
The takeaway: More times than not, yellow nails are cosmetic problems we can address in some simple ways. So now that we know what makes fingernails lose their sheen, let’s get to the fun part, how to get your fingernails waxed and shining again!
Easy Home Remedies to Whiten Nails Naturally
The wonderful part about nail care is that, oftentimes, you don’t have to invest in fancy products to brighten nails- you can simply use the ingredients that are already in your home! Below are some white nail hacks and homemade treatments that actually work. We’ll discuss gentle scrubbing methods, as well as some natural ingredients that can remove stains from nails without using harsh chemicals.
Lemons and baking soda are two kitchen items that can whiten your nails in a natural way. The citric acid in lemon can act as a mild bleach, and baking soda is mildly abrasive, which is helpful when scrubbing stains away.
- Gentle Buffing: Sometimes the fastest way to whiten your nails is to buff them. If the stains are strictly on the surface layer, a very light buffing with a fine-grit nail file can safely remove that yellowed surface layer. Use a 240-grit or higher (really fine) buffer and use caution – only apply a slight amount of pressure in a very light circular motion. This removes stained keratin cells and allows for a fresh, clear nail plate underneath. Pro Tip: Do not over-buff the surface, or apply too much pressure while buffing. Over-buffing is an aggressive action that can thin and weaken nails. As with any product, a little can go a long way in brightening the nail plate. Once you see the healthier color underneath the surface layer, leave it there and move on to the next nail.
- Lemon Juice and Baking Soda Paste: Lemon is naturally acidic which makes it a great option for whitening nails while baking soda provides a gentle abrasive element. Nail professionals say mixing fresh lemon juice with baking soda creates a potent cleansing paste that works immediately to whiten and brighten dull, discolored nails. Squeeze half a lemon into a small bowl, and add 1–2 tablespoons of baking soda until it becomes a thick paste. Apply this paste to your nails and let it sit for about 5–10 minutes. After that, using an old toothbrush, gently scrub each nail in a circular motion. The citric acid in the lemon will lift stains and the mild abrasive of the baking soda will scrub the stains away. Finally rinse with warm water and mild soap. You probably will be amazed—this DIY nail brightener just may noticeably brighten your nails in one session. (Don’t forget to moisturize, this pass may be dry.)
- Whitening Toothpaste Scrub: Yes, you can use the same whitening toothpaste that makes your smile look nicer, to help brighten your nails! Many whitening toothpastes contain a gentle abrasive (such as baking soda) as well as gentle bleaching agents, such as a touch of hydrogen peroxide that will work on surface stains. To test this hack: apply a coat of whitening toothpaste to bare nails (gel pastes may not work as well as the white opaque variety), then let it sit for 5-10 minutes. Using a nail brush or soft toothbrush, scrub at your nails, and underneath the tips. Rinse off the whitening toothpaste, and within a short time your nails should look cleaner and lighter. This trick is basically providing your nails with a minty-fresh exfoliation. It’s easy and relatively gentle, but if you have super brittle nails take care not to scrub too vigorously.
- Hydrogen Peroxide Soak: Hydrogen peroxide is a well-known antiseptic used in homes that also acts as a whitening solution. A peroxide soak in a diluted form can aid in lifting some stubborn stains (from hair dye, extended wear polish stains, etc.). In fact, DIY beauties often refer to hydrogen peroxide as the “best stain removal” for nails. This is how to do it safely: combine 1 teaspoon of 3% hydrogen peroxide (common brown bottle from a pharmacy) with 1/2 cup of warm water in a bowl. If you wish, you can add a teaspoon of baking soda which helps to create a mild effervescent bleaching solution. Soak your finger tips in this solution for 5 minutes. Rinse your hands thoroughly. You should see that some of the residual stains are lightened. Note: Don’t use high-concentration peroxide – 3% is sufficient. And, because peroxide can dry out your nails, limit this treatment to about once a week. Always follow with hand lotion or cuticle oil to replace moisture.
- Denture Cleaner Soak: Surprisingly, those fizzy tablets your grandmother uses to clean her dentures can work magic on stained nails! Denture-cleaning tablets (like Polident or Efferdent) contain mild bleaching agents (usually diluted sodium hypochlorite) to help lift stains from surfaces. To do this method drop one tablet into a bowl of warm water (using the amount of water stated on the package). After the tablet dissolves and the fizzing starts, soak your fingertips in the water solution for about 5-10 minutes. The same ingredients that removed stains from dentures will remove stains from nails (and will even kill bacteria). In fact, denture cleaners were even used to treat “green nail” syndrome, which resulted from bacterial growth in nails, due to the disinfecting properties and ability to lift stains. After soaking, rinse and dry hands. Your nails should be significantly brighter! This fingernail discoloration solution could not be simpler, and you could do it while watching TV, it does not even require scrubbing.
- White Vinegar Rinse: Good old kitchen vinegar is another natural nail whitening solution. Not balsamic vinegar, or apple cider vinegar since those could further stain your nails. White vinegar (distilled) contains acetic acid, and it can help to loosen up superficial stains on your nails. To start, mix 1 tablespoon of distilled white vinegar to one cup of warm water, which helps with dissolving stains. Soak your nails for 10-15 minutes, then rinse them with water. The smell is not great, but if you have no lemons or other chemicals you can also use in the kitchen, vinegar can work too. The vinegar is mild and safe – just make sure to wash your hands after to rid them of the vinegar smell. You can also repeat the soak a few times a week if needed.
- Tea Tree Oil (to address Stain or Mild Fungus): If you have yellowed nails because of a little fungus growth or a stubborn stain, tea tree oil may help out. Tea tree oil is a natural antiseptic and antifungal. Place a drop or two of concentrated tea tree oil on each affected nail, and leave facilitate food contact to bring an egg and place counteraping for 5 minutes, or place a few drops in a bowl of warm water, and disperse the drops and soak or rinse your nails, to which you were doing by awakening in. The discoloration may not disappear instantly like lemon or peroxide, but multiple applications may allow for some lifting of the top layer of nails that appear discolored under these products. Those consultor whitening products as well, have tea tree oil mentioned as a potential benefit for stain-busting and nail flipping. Important note: Tea tree oil is strong and potent, if you can have iritated skin, don’t want to use it that often to dry you.
These home remedies are inexpensive and generally effective on most superficial stains. You can even mix a couple of methods together (for example, quick buff, then soak in lemon). Just go slow and be gentle with your nails. If the first method doesn’t completely whiten your nails, wait a few days and try again. Natural methods really require some patience. And when you’re experimenting with these white nail hacks, remember to moisturize your nails and cuticles afterward (lemon, peroxide, etc. can dry your nails out). When you maintain healthy hydration, your nails will stay smooth and shiny, along with everything else looking nice and white.
Best Store-Bought Nail Whitening Products and Solutions
Many store-bought products are engineered specifically for whitening and brightening nails, and while it can be convenient, the good news is that they can also save you time, and some of them aren’t expensive either. Here are some common ones and descriptions of one way they work:
- Nail Whitening Pencil: This is a quick cosmetic fix that can whiten nails in an instant! A nail whitening pencil is a white chalk-like pencil that you run underneath the tip of your nail (on the underside of the free edge). It deposits a white substance that makes the nail tips look fresh, like a French manicure. It doesn’t remove the stains, but it’s a quick trick for a fast, clean look – a great option if you’re heading out somewhere and realize you could use a brighter nail. Nail pencils are generally affordable and come in packs (i.e., you can buy packs of white nail pencils so you’ll have one for your purse). Wet the tip of the pencil and colour under each nail tip. The result is brighter, looking nails in seconds!
- Whitening Nail Polishes and Base Coats: There are a variety of nail care companies that offer nail whitening polishes/treatments. Most of these will be clear or slightly milky but should contain mild bleaching substances or optical brighteners. For example, the Orly brand offers a nail whitener made with citrus and tea tree oil to help brighten nails and reduce yellowing. You apply it like a normal nail polish; as long as you allow it to dry, it will whiten the nail surface. Another example is the OPI Nail Envy line, which has made it very popular. The OPI Nail Envy line also has polishes that work to strengthen and brighten nails. There are also illuminating base coats that are clear with a hint of purple or blue; utilizing colour-correcting principles, the bluish-tinted clear coat works to neutralize yellowing on the nail (similar to how purple shampoos are used to tone down yellowing in blonde hair). Sally Hansen offers the Double Duty Base & Top Coat, which provides the most basic protection for nails while retaining colour well, thereby lessening stains. Additionally, Sally Hansen provides an illuminating treatment that helps disguise yellowing. Using a whitening base coat underneath your coloured polish is a good idea to protect your nails from staining and brighten their appearance.
- Nail Whitening Treatments & Kits: In addition to polishes, you’ll find whitening kits or treatments available in many beauty supply stores. These kits typically include a special effervescent soak, a whitening paste or powder, or a brush-on gel. For instance, some manufacturers make nail brightening scrubs or masks that you apply to your nails for a few minutes and then rinse off, much like you would use toothpaste, but for your nails. Dermatologists often recommend products like Nail Tek Intensive Therapy 2, a protein and lemon-seed extract formula that nourishes and builds healthier nails. It will also whiten nails that are yellow from too much polish. These treatments can be used by themselves or as a base coat. It even strengthens your nails while helping to remove discolourations. Cuccio Sicilian Nail Whitening Paste works like an exfoliant paste by gently using peroxides and polishing agents to scrub stains away and attach itself to the stains and instantly remove them (after wearing dark polish, it’s good to have this option). When shopping for a nail whitening product, look for words like “whitening,” “brightening,” or “nail bleach” in the nail care section. Look for water-based products with safe levels of hydrogen peroxide, citrus extracts, or mild acids that dissolve the discolourations.
- Nail Soak Tablets: In the same vein as the denture tablet concept, there are also pedicure and manicure fizz tablets designed to brighten nails. For example, Sani Soft offers an effervescent pedicure tablet that helps whiten nails (intended for feet but suitable for use on hands). They are easy to use – drop a tablet in water and soak. Many also contain gentle bleaching agents, making it a one-step refresh treatment with nourishing oils.
- Cuticle Oils and Hydrators: Keeping your nails hydrated can indeed help them stay clear and bright. Dry, brittle nails not only look dull but the rate of developing yellowish tints or white spots is increased. So, using a good nail and cuticle oil (like CND Solar Oil with jojoba and vitamin E) will moisturize and protect your nails, but it will also help prevent the brittleness of nails [and yellowing]. Oils are not designed to bleach them but rather to provide health improvements for nail conditions. They drastically change the appearance and health of the nail itself. Keeping the nail surface smooth and rosy, as well as preventing staining, all contribute to improving the overall appearance of your nails. Most experts will agree that hydrated nails look healthy (and whiter-looking nails). Adding a cuticle oil or nail cream to your daily routine is relatively easy and will yield significant long-term advantages for nail color and strength, giving you a reason to be optimistic about your nail health.
When you choose a store product, read reviews and choose one that fits your needs. If you want instant optical brightening, you may prefer a violet-tinted clear coat. If you want a treatment that lifts stains, look for ingredients that gently bleach nails (for example, lemon extract, peroxide, or citric acid). Pro tip: Always follow up by applying a clear top coat or strengthener after the toenail whitening treatment. Some manicurists even recommend applying a nail strengthener every day during the nail whitening process to strengthen any new nail growth while treating the stain. Alternating between treating the stain and strengthening new growth will yield the best results from both products.
In conclusion, always follow the instructions for these products as they admonish. If a whitening polish suggests you use it once a week, respect that timing. More is often not better; you don’t want to dry out or weaken your nails by over-applying the chemical whiteners. We will discuss daily habits and precautions to keep your nails bright in the next section, which will enhance the effectiveness of the product you use.
Daily Habits for Long-Term Nail Brightness
Whitening your nails is often a two-part strategy: you remove the current stains, then you change a few habits to keep them from coming back. For long-term nail brightness, consider adopting these everyday practices and preventive tips. They’re simple habits that make a big difference over time:
- Always Use a Base Coat: This is rule number one for people who love nail polish. If you apply a clear base coat before adding on any colored polish, you create a protective stain-free barrier between the pigments and your nail. Just one time, skipping the base coat could allow a rich color (like the Merlot red polish that is so super trendy right now) to stain your nail top layers. Given that we apply a base coat every time we get a manicure, we will not allow nail stains to become a problem. A base coat creates a protective barrier over your nails that helps keep them free from stains, increases the longevity of your manicure, and is a win-win, even if it’s a simple layer. Many base nails today already include strengtheners or ridge fillers, so think about it like bonus mileage and double benefits. Never underestimate the importance of a simple base coat – it keeps nails from turning yellow under dumb old polish and ensures your manicure lasts longer and looks better!
- Limit Prolonged Dark Polish Wear: You should also pay attention to how long you wear colored polish in addition to base coats. Wearing the same dark polish for weeks at a time can also lead to additional staining. Try not to go longer than 7-10 days with the same polish. As soon as it starts chipping, or after around a week, take the opportunity to refresh your nails. Either repaint with a color (after removing the previous polish and applying a base coat) or allow them to go bare for a day or two. The longer a colored polish sits on your nails, the longer its pigments have to seep into your nails and stain the keratin. So, enjoy those colors, but consider changing them up often and allowing your nails to have a break in between manicure sessions.
- Let Your Nails Have “Breathers” (Days Without Polish): You’ve probably heard, “Your nails need to breathe.” Technically, that’s a myth – nails don’t “breathe” because they’re not a living tissue. However, there are certainly good reasons to take breaks from polish regularly, and this is the explanation. Without polish, you can clean them and moisturize them, plus check out the true color and health. Dermatologists also recommend breaks, not because nails need air, but to help identify nail fungus or other hidden problems (which polish will only hide). A break also prevents constant exposure to drying chemicals. So try to incorporate a few days each month when you are polish-free. During this time, treat yourself with oils or a nail strengthener. Think of it as a “spa day” for your nails. When you resume manicures, your nails will be better off – and likely brighter – after the break.
- Shield Your Hands (Gloves Are Your Ally): For any home activity that could discolor your nails, it’s a good idea to wear gloves. For instance, when cleaning, if you are using bleach or other harsh cleaners, make sure you wear rubber gloves for the protection of your nails (and your skin). If you dye your hair at home, definitely wear the disposable plastic gloves provided in the box, as hair dye can stain your nails a funky color unless you pay close attention. Even things like gardening or chopping foods like beets can leave your nails looking dirty. A simple pair of vinyl or latex gloves is an easy solution to preventing lots of fingernail stains. No one wants dingy nails. Putting those gloves on will also help with nail damage or dryness, which is an added benefit toward healthier and whiter nails.
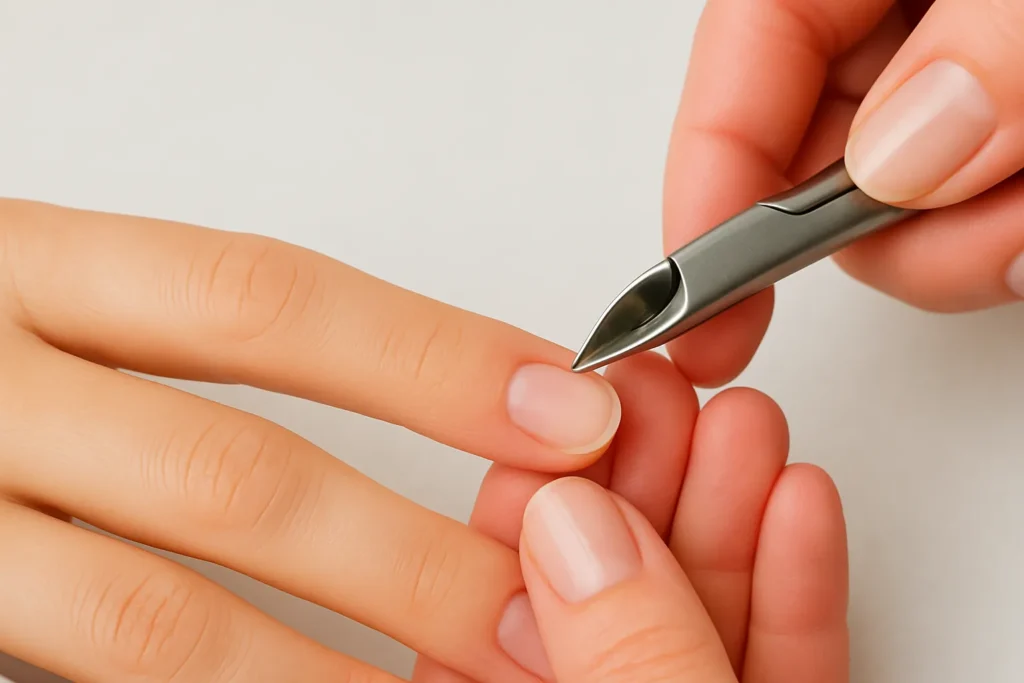
- Practice Good Nail Hygiene: It may seem self-evident. Nevertheless, basic nail maintenance can make a significant difference in achieving bright nails. It is important to keep nails clean and dry. Once you’ve finished showering or doing the dishes, make sure to dry under your nails thoroughly – if they languish in wetness for as long as they do in your toes, the fungus can develop, or they may appear cloudy. Use a soft nail brush and gently brush, getting under the nail to ensure you have removed any build-up. Dirt is not only the most common cause of staining nails, but it can also discolor the underside. When cleaning under the nail, you should never use metal tools to scrape because separation of the nail can occur, and then you will have damaged the health of your nail matrix (underestimated if one has nailed it like a white patch). If your nails won’t bristle at the hash of the underside rather, use an orange stick or the soft under-nail pick that is on most nail clippers (you can file the nail and clean the underside in one step with those in addition to actually clipping the nail). Trim or file your nails regularly to remove possible snags/pulls (ragged or unlocked nails are commonly yellow at the tips as they were once uneven). And even though it is the same as a nail plate, it is also a nagging afterthought, as I’m good at chomping mail segments back down to shape, explaining good hygiene. You should also be meticulous with cuticles. The healthier your cuticles are, the better sealed your nails will be, which reduces the likelihood of problems such as contamination, staining, and cracking at the base. You can merely use your nails, as opposed to pushing the cuticles back, if they are soft from a warm shower and a general moisture treatment. Let’s face it – your nails will always appear to be more pristine, beautiful, and brighter than nothing.
- Moisturize Nails and Cuticles Every Day: We’ve mentioned this several times, and I’ll reiterate it – hydration is crucial for maintaining nail brightness. Dry nails will break more easily, but in addition to that, they can also become yellow with a chalky cast or ridging. Using cuticle oil or hand cream around your nails every day makes the nail plate pliable, allowing it to remain translucent. Experts even say that moisture is essential to help prevent yellowing and brittleness, so you should make it a habit to rub a drop of cuticle oil (e.g., jojoba or almond oil) on each nail before bed. This will also assist in the longevity of any recent whitening treatments (by rehydrating the nail after probably dehydrating processes) and even create a beautiful natural shine that makes nails look less discolored.
- Stop Smoking (or Wash Up After): We talked about smoking previously as a cause – the tar and nicotine in cigarettes will stain just about everything, including nails. The ultimate answer for whiter nails is to simply stop Smoking (and be healthier all around!). If you can’t stop yet, be sure to wash or scrub your hands and nails thoroughly after you’re finished. You may want to carry a light nail brush with you to scrub any tobacco or tar residue off your nails after smoking a cigarette. It can’t hurt, and it might even help reduce the staining a little. Short nails can also help minimize the area stained by smoke. Once you eliminate the staining factors of Smoking, you will start to see a much brighter nail as the stains will diminish over time.
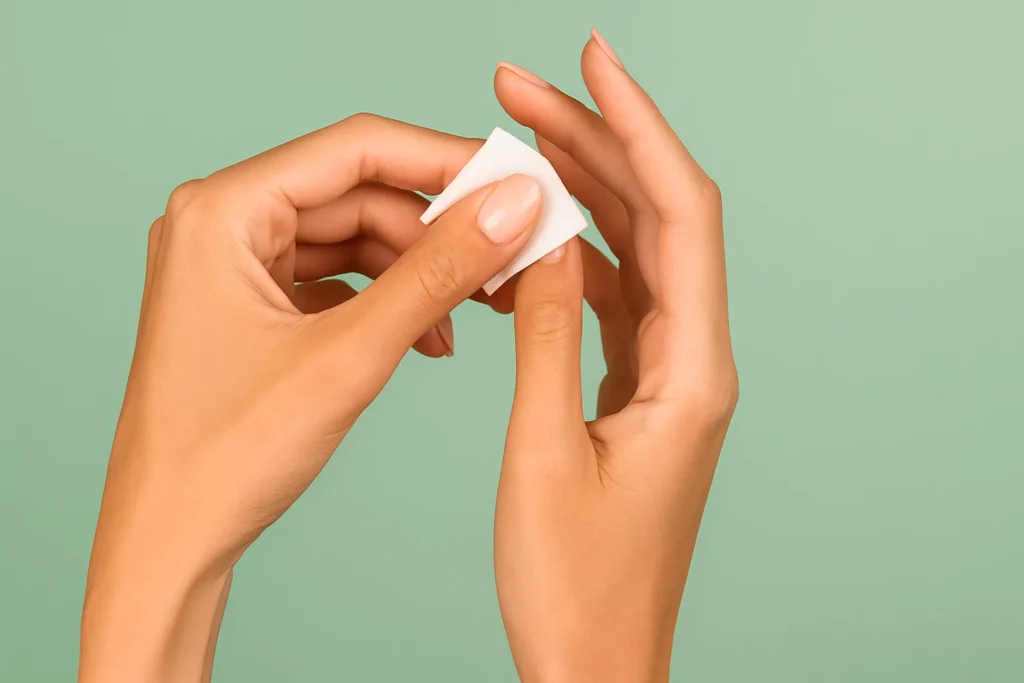
- Opt for Gentle Products and Processes: Whenever possible, choose acetone-free polish removers as they tend to be a little less dehydrating than pure acetone (though make sure you use acetone-based removers correctly; just not too much, too often). When removing polish, don’t scrape the color off with a tool; instead, simply soak a cotton ball in the remover and then press it onto the polish for ten seconds. The polish is melted away, and this is a good way to prevent scratching the nail surface. Also, try not to use your nails as tools (such as opening cans or stripping labels), as this creates micro-tears and roughness that can hold pigments. When you pamper your nails a little here and there, they will return the favor with clearer and prettier looks.
When you take these habits and preventive tips and put them into practice, you are setting yourself up for success. Think of it this way: just like you brush and floss your teeth to keep them white and clean, your nails deserve a little TLC to keep them white. The smallest habits, such as using a base coat or moisturizer, add up over time. And, like your teeth, consistency is key. Whitening is not a one-and-done effort; it is a continuous practice with your nails. The more you protect your nails from stains and damage, the less you have to whiten your nails in the future.
Nail Whitening Myths vs. Facts
When it comes to beauty tips, it’s sometimes hard to separate fact from fiction. Let’s clear up a few myths about nail whitening (and nail care in general) so you can make informed choices:
- Myth: “Nails need to breathe, so you should leave them bare often to get them white.”
Fact: The truth is that nails are made of dead keratin, so they do not breathe, nor do they take in oxygen from the air. You are not harming your nails by wearing polish because, unlike skin cells, nails don’t breathe. They get their nutrients and oxygen from your bloodstream – not your environment! The real reason this myth persists is that by taking breaks from polish, you are given the ability to monitor the condition of your nails and rehydrate them, not because nails need to breathe. If your nails are stained, taking a break from polish (and using some of the remedies above) can certainly help. With that said, you are not suffocating your nails by wearing polish; you are just taking a break for the sake of the nail’s health. To sum it up, nails do not breathe, but they do enjoy a little time away from polish for cleaning and moisturizing. - Myth: “If my nails are yellow, I should just cover them with more polish.”
Fact: Hiding the situation is not fixing it. While adding a coat of dark polish over yellow nails might cover the nail stains for now, this will only allow the stain to possibly set in further, potentially changing the color of the stain. So, you should fix the stain first. Remove the polish, then try using a whitening technique or at least buff out the stains before adding a coat of polish. If you need your nails to look good for an event in a hurry, using a good opaque light polish or quick whitening pencil is not too bad. Just don’t keep applying additional coats of polish to constantly cover up your stained nails without ever treating the underlying issue. Over time, your nails may develop a greater potential for discoloration, breaking, or brittleness. Yes- take the time to fix it, and then have fun with a fresh coat of color. - Myth: “Whitening home remedies like lemon, peroxide, or baking soda are 100% safe to use as often as I want because they’re natural or common products.”
Fact: Even everyday or natural remedies can be harmful when used excessively. Lemon juice is a natural product, but its acid weakens your nails if you soak them every day and don’t take a break (and it dries out your skin). Baking soda is mild, but it is abrasive – scrubbing with it too much or too hard can cause the nail plate to become thinner. Hydrogen peroxide from the pharmacy or store is also a reasonably safe cleaning tool, but it can also cause dehydration (and brittleness) if you overuse it. The bottom line is moderation and after-care usage. These remedies do work, but most experts advise against overdoing any whitening treatment and always hydrating after each manicure, as it can strip the nails of their natural oils. A lemon or peroxide soak is only needed once a week, not every day. Think of it like an exfoliating mask on your face; if you use it all the time, it’s not treating the skin gently. If you think this through and moderate and give your nails some extra TLC in between treatments (such as cuticle oil and nail strengtheners), home remedies can be effective. - Myth: “I should use bleach or stronger chemicals to whiten nails for faster results.”
Fact: You should never use household bleach or an overly strong chemical on your nails. Chlorine bleach (in your laundry or household use) is simply too harsh for your skin and nails – and may even cause burns, serious drying, and result in chalky or green-colored nails. Unless you are using diluted peroxide or denture tablets, if you are looking to bleach your nails, stay away. These are not recommended, as we have previously discussed, and are based on current knowledge that would whiten your nails without damaging them. The only time to consider bleach is when you are so mad at your nails for staining that it’s worth considering bleach; it’s probably a stain that needs to grow out or be addressed by a professional. Always be gentle with your nails when performing nail care! It would enforce the idea that it may take a couple of extra visits to see the full action, but the nails will be grateful that you did not inflict a harsh chemical, as they want to be treated gently.
Familiarizing yourself with the facts behind these myths can help you navigate common traps. Healthy nail whitening is a process that requires patience and care. This is not solved by gimmicks that can do damage. Now that you know, let’s move on to some final tips for safe processes and a gentle reminder to start implementing some of these tips!
Safe Practices for Nail Whitening and Maintenance
We have discussed a great deal of just like remedies, habits, myths, but before you go and dip your nails in lemon juice, or reach for that whitening pencil, let’s go over a few basic practices to help ensure that you are whitening your nails numerous, without hurting, your nails:
- Be Gentle and Patient: Whether you’re buffing, scrubbing, or soaking, always treat your nails gently. Use mild abrasives (fine buffers, soft toothbrushes), and don’t rush the process. If a stain doesn’t lift fully the first time, give it a few days and try again. Gentle repetition is safer than one aggressive treatment.
- One Thing at a Time: It might be tempting to do all the remedies at once (like buff, then lemon, then peroxide, then toothpaste – yikes!). Overloading your nails can backfire. Instead, pick one method and see how it goes. You can rotate methods over weeks, but don’t pile them on in the same day. Your nails can only take so much at once.
- Moisturize, Moisturize, Moisturize: We cannot stress this enough – always follow any whitening or cleaning treatment with hydration. Nails may not “feel” dry like skin does, but they do lose moisture. Applying a nourishing cuticle oil after whitening is a must-do step, according to nail experts. This keeps the nail plate flexible and prevents that dried-out look that can make nails appear chalky. It also helps any new stain-fighting you did last longer because a hydrated nail is less porous to new stains.
- Don’t Overdo Nail Whitening with Thin Nails: If your nails are super thin or damaged (for example, your nails are still fragile from previous gels or acrylics), take extra time to be careful. Whitening products can cause stinging or weakening of already thin nails, and you don’t need to add another source of discomfort to the situation. You should concentrate on restoring strength first (through a strengthening coat or biotin supplements, etc.) and gentle whitening, such as light buffing or color-correcting polish. Intensive whitening will have to wait until your nails have healed a bit.
- Test Store Products First: When using new whitening products for the first time, trying a test patch on one nail is a good option. Watching for unusual reactions, such as redness around your nail or burning sensations, will help. Each person’s body chemistry is different, so testing just one nail will keep you from potentially irritating all ten nails. If you see no reaction after waiting a day or so, repeat the test with a second nail or start again.
- Clean Your Kits: If you’re using brushes, buffers, or hand and manicure tools during your whitening routine, keep them clean, too—there’s no point in greasing the wheels by using a dirty tool and introducing bacteria or fungus. Cleaning reusable tools by proper washing (with soap and warm water) or disinfection with alcohol is a straightforward process. As long as you are keeping things clean, you can go a long way to prevent the ending of a beautiful moment with an infection or green nails. Don’t forget, when whiteness maintenance arrives, health is attractive too.
- Determining When to Get Professional Help: Finally, if you have tried a few things and your nails are still discolored, or you are noticing other symptoms (such as thickening, crumbling, a green tinge, pain, or swelling), it might be a good idea to see a dermatologist or a professional manicurist. Sometimes. What appears to be a stain may be an infection that requires medical attention. Or you may just need a professional-level cleanup. There is nothing wrong with getting professional help; many salons offer nail-brightening services. New growth should be clear and healthy; if it is not, an expert can help identify the problem. Safety first! If you have tried to resolve stubborn nail discoloration, expert evaluation is a good option rather than continuing to try random things without success.
By following these safe practices, you’ll ensure that your journey to whiter nails is a positive one. Now, with all this knowledge in hand (pun intended!), you’re ready to put it into practice.
Conclusion: Put These Nail Whitening Tips into Action!
You’ve made it to the end of this thorough guide – well done! By now, you will have learned exactly how to whiten your fingernails and maintain brightness with a combination of smart solutions, products, and habits. Now, it is time to get started. Pick one or two tips from above and try them this week. For example, you may want to start this evening by doing a lemon-baking soda scrub and then ordering a good base coat for your next manicure. The littlest actions will create the biggest differences in how your nails look.
Remember, beautiful, clear nails are within reach with a little routine and care. You will no longer need to hide discolored nails in your pockets or under gloves – after using these nail-whitening tips and tricks, you will be able to show off your hands confidently. And if one technique does not eliminate the staining overnight, give it time – stains will sometimes fade gradually, especially if you combine treatments with smart behaviors, such as using base coats and moisturizers.
Now it’s your turn to reveal bright, healthy nails! Try these foolproof hacks for removing nail stains, and let those little fingertips shine! If you loved these tips, please share this article with a friend who’s been trying to invest in those nail-whitening home remedies. Or do you have your own clever white nail hacks or questions about your nail care? Please leave a comment and join the discussion; we’d love to hear your experiences! Here’s to your nails looking naturally stunning and confidence-inducing! You’ve got this – enjoy those adorably whitened nails while maintaining the amazing care for a long-lasting result. Cheers to happy, healthy nails!