Hey friend! Ready to level up your at-home manicure with a chic new nail shape? If you’ve been wondering how to file a squoval nail shape for that perfect salon-worthy look, you’re in the right place. In this friendly, step-by-step squoval nail tutorial, I’ll walk you through everything you need – from prepping your nails to the final flourish – so you can confidently create DIY squoval nails at home. We’ll cover nail filing tips, handy home remedies, and even a few store-bought product recommendations to make your journey easier. By the end, you’ll see why squoval nails are the little black dress of nail shapes (versatile, classy, and always in style). Let’s get started on shaping those gorgeous nails!
What Is the Squoval Nail Shape?
Squoval nails are exactly what they sound like – a perfect mix of square and oval. In other words, you get the straight, flat tip of a square nail combined with the softer, rounded edges of an oval nail. Basically, it’s the best of both worlds! The result is a balanced, universally flattering look that’s durable and easy to maintain. Squoval nails have no sharp corners to snag on things, yet they still give a clean, modern outline to your fingertips.
This hybrid shape has become a classic in the nail world. In fact, squoval is often called the “little black dress” of nail shapes because it works with any polish color or design and never goes out of style. It’s a shape that looks great on pretty much everyone, from those with narrow nail beds to wider ones. Whether you prefer short, neat nails or longer, elegant tips, squoval can be tailored to fit – and flatter – your personal style. No wonder it’s a go-to for beginners and pros alike!
Why Choose Squoval? – Benefits of the Squoval Shape
What makes squoval so special? Let’s break down the benefits of choosing a squoval nail shape for your next manicure:
- Universally Flattering: Squoval nails are known to be universally flattering on all hand and finger types. The shape’s balanced mix of straight edge and subtle curve can complement both short and long fingers, making your hands appear elegant without emphasizing any width. Basically, anyone can rock squoval nails with confidence!
- Works on Short or Long Nails: One great advantage of squoval is that it looks stunning whether your nails are kept short or grown long. If you love a short, low-maintenance mani, squoval gives you strength and a neat look (short squovals are less likely to break than long, pointy shapes). Prefer longer nails? Long squoval tips can elongate your fingers visually, giving the illusion of more length without the fragility of super sharp corners.
- Strong and Easy to Maintain: Unlike some extreme nail shapes (looking at you, stiletto ), squoval nails have no ultra-sharp points. The corners are rounded off just enough so that they’re less prone to snagging or breaking in daily life This makes squoval an everyday-friendly shape that holds up well. Plus, it’s easy to file and DIY at home – perfect for beginners still practicing their nail-filing skills.
- Versatile, Classic Style: Squoval is a true classic. It isn’t just a passing trend – it’s been popular for years because it’s so versatile. Every nail polish color and nail art design looks great on a squoval base. From bold reds to nude shades, from French tips to glitter designs, the squoval shape is a neutral canvas that lets your polish shine. Trends come and go, but squoval nails always feel polished (pun intended) and chic.
- Beginner-Friendly: If you’re new to shaping your nails, squoval is a forgiving style to start with. It’s pretty straightforward to achieve – essentially just filing a square then rounding the corners. Even if it’s not perfect, it will still look good because the shape is soft and natural. With a little practice, you’ll find it’s super easy and quick to get this shape right. And don’t worry, I’m about to show you exactly how!
Ready to give squoval a try? Let’s gather our tools and get everything prepped for a flawless squoval manicure.
What You Need to File Squoval Nails
Before we file, make sure you have the right tools on hand. Having a good setup will make shaping squoval nails much easier. Here are the essentials, with both store-bought options and a few DIY alternatives:
- Nail Clippers: A sturdy pair of nail clippers is key for cutting your nails to the desired length. In fact, experts say about 90% of your shaping can be done with clippers (only the last 10% with a file). Tip: Use the clippers to cut your nail straight across (flat tip) as a starting point for squoval. If you don’t have clippers, you can also carefully use scissors designed for nails, but clippers are easier for a clean, straight cut.
- Nail File (180–240 grit): The MVP of shaping! Choose a fine-grit nail file – around 180 to 240 grit is ideal for natural nails. A finer file means you’ll take off length gradually and avoid tearing. Store-bought pick: Try a glass/crystal nail file (they’re gentle and last virtually forever – popular brands like Mont Bleu or GERmanikure have great options on Amazon). DIY alternative: In a pinch, a piece of fine-grit sandpaper wrapped around a popsicle stick can work to file edges, but a proper nail file is highly recommended for best results.
- Buffer Block: A nail buffer (sanding block) isn’t for shaping the free edge, but for smoothing the nail surface and edges once you’ve filed. It helps give a neat, salon-quality finish by polishing away any little snags or rough spots. Store pick: a 4-way buffer block (with different grits from coarse to super-fine) is inexpensive and handy. If you don’t have one, you can use the fine side of your nail file gently on the nail’s edge to smooth it out, or even a piece of plain printer paper can do a minor buff in a pinch (paper has a subtle grit to it!).
- Cuticle Pusher and Cuticle Trimmer (Nipper): Cuticle care is the secret to a clean shape. Pushing back your cuticles exposes the full nail plate and makes shaping easier and cleaner around the base. Use a cuticle pusher (metal or wood orange stick) to gently push back the cuticle skin. If you see any hanging dead skin (the white-ish bits), you can trim those carefully with cuticle nippers. Home remedy: If you don’t have cuticle remover solution, soak your fingertips in warm soapy water for 5-10 minutes to soften the cuticles naturally, then push them back with a towel or stick. Remember: never cut live cuticle skin, only trim the dead excess – be gentle to avoid any ouchies or infections.
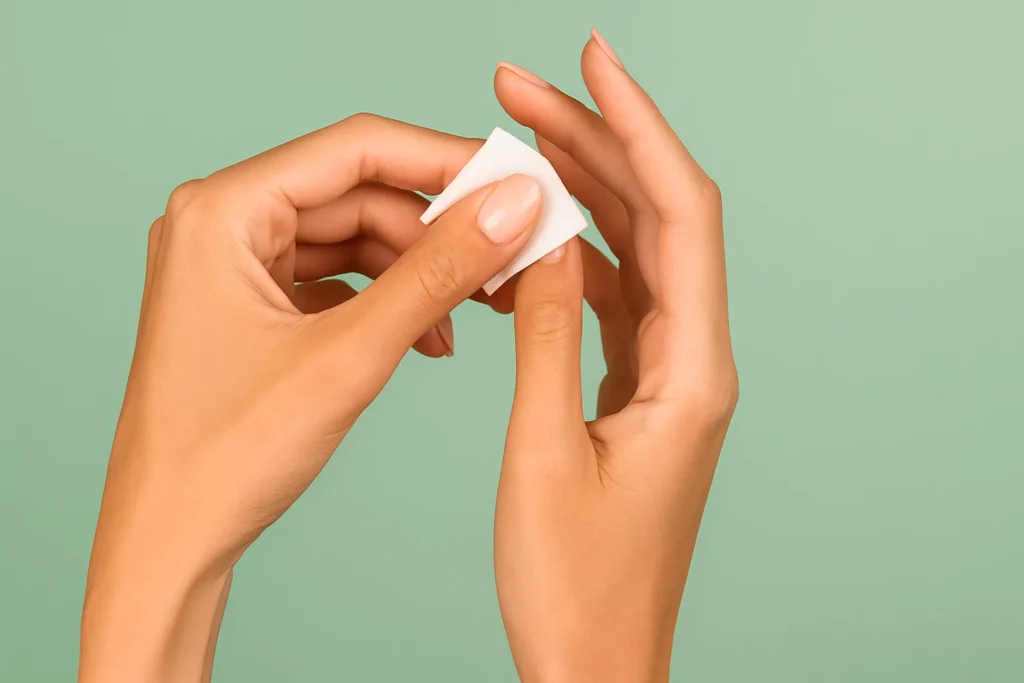
- Nail Polish Remover (if needed): If you have old polish on, grab some remover and cotton balls to clean your nails before shaping. Starting with bare, clean nails helps you see the shape clearly. This isn’t specifically for squoval shaping, but it’s a good prep step for any manicure.
- Good Lighting: Not exactly a product, but make sure you have decent lighting where you’re filing. You want to see your nail shape as you work to ensure both sides are even. Natural daylight or a bright lamp works great.
- **Optional – ** Goodies for Aftercare: Once your squoval shape is on point, a little TLC will make them look even better:
- Cuticle Oil or Cream: After filing, your nails and surrounding skin can be a bit dry. A nourishing cuticle oil keeps them moisturized and healthy. Store faves: Sally Hansen Vitamin E Cuticle Oil (an affordable classic) or CND SolarOil (a salon favorite with jojoba oil) are great choices. DIY option: Simply use olive oil or coconut oil from your kitchen – massage a drop into each nail and cuticle for instant hydration. (Olive oil is an excellent natural moisturizer for nails and cuticles!)
- Nail Strengthener or Clear Polish: Sealing your freshly filed nails with a coat of clear polish or a nail strengthener can protect the edges and add shine. Look for a strengthening formula with vitamins if your nails are prone to breaking. This step is optional but recommended, especially if you took off a lot of length.
- Hand Cream: Don’t forget to finish with a nice hand cream to keep your hands soft. All that filing can leave some dust; after you wash or wipe your hands, a moisturizer will make your mani picture-perfect.
Now that you’ve got your toolkit ready, let’s roll up our sleeves and shape those nails!
Step-by-Step: How to File a Squoval Nail Shape
Time for the main event – shaping your nails into a flawless squoval. Follow this squoval nail tutorial step by step. I’ll include nail filing tips along the way so you get salon-quality results, even if you’re a total beginner. Ready? Let’s do this!
- Prep Your Nails (Clean, File & Soak): Start with clean, dry nails. Remove any old nail polish using remover. If your nails are on the longer side and you plan to shorten them, grab those clippers. Clip your nails straight across to get a basic square shape as your foundation (remember that 90:10 rule – most of the shaping comes from trimming). If your nails are already at a good length or you only need to shape the edges, you can skip the clipping and go straight to filing. Now, take a moment to soak your fingertips in warm water (plain water or add a few drops of cuticle oil/olive oil). A quick 5-minute soak softens the nails slightly and makes cuticles pliable, which helps with shaping and prevents cracks. Pat your hands dry before the next step – nails are easier to file when they’re not too soggy (over-soaked nails can bend and tear more easily).
- Push Back Cuticles: Gently push back your cuticles using a cuticle pusher or an orange stick (wrap the tip of the stick in a bit of cotton if your cuticles are sensitive). This step ensures the shape of your nail (especially the sides) is fully visible and not hidden under any skin. If you see any excess dead skin after pushing back (often at the sides or base of the nail), use a cuticle nipper to carefully trim it off. Pro tip: Do not force or cut any live skin – trimming only the dead bits that come off easily. With clean cuticles, your squoval shape will look neat and professional, and you’ll have less risk of painful hangnails later.
- File the Top Edge Straight (Square it up): Now the real shaping begins! Take your nail file (180–240 grit) and file the top edge of your nail flat, straight across. This will create that square-top shape which is half of the squoval look. Important filing tip: avoid “see-sawing” the file back and forth in a harsh way. Instead, use gentle, one-direction strokes across the nail edge. You can file in one direction and lift, then repeat, or do very light back-and-forth if using a glass file – the key is to be gentle to prevent splitting. Keep your file perpendicular to the nail (or at a slight downward angle) to ensure the tip remains flat and even. If your nails are short, be extra careful not to scrape the file against the skin under the nail tip – that can cause soreness or uneven filing. After shaping all your nails straight, do a length check: hold your hand out at arm’s length or align it with your face (palm toward you) to see that each nail’s free edge is even and the nails match each other. If one nail is longer, file it down a tad more until all nails look even. It’s easier to fix length now before we round the corners.
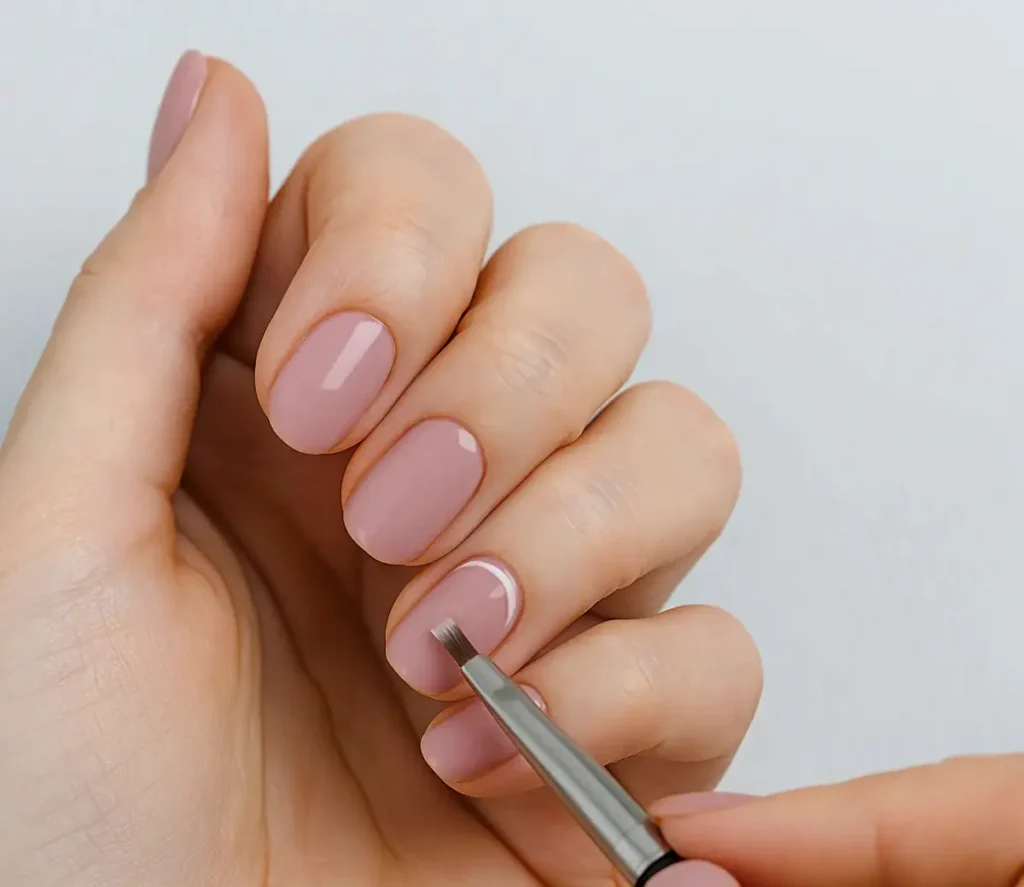
- Round the Corners into the Squoval Shape: Here’s where the square becomes squoval! To get that oval-esque softness on the edges, hold your nail file at a 45° angle to the corner of the nail. Gently file the corner in a smooth, rounded motion, moving the file from the side of the nail toward the center. It’s like you’re shaving off just the sharp tip of the corner. The goal is a subtle curve, not a heavy oval – you basically want to “soften” the corner until it’s no longer pointy. Go slow: after a couple of swipes, pause and check your work. It’s a good idea to check the corner after each stroke to make sure you’re not over-filing and losing the flat tip completely. You still want the top of the nail to look mostly straight across, with just the ends tapered into a nice curve. Repeat this on the other corner of the same nail. Voilà – a squoval shape is forming! Now, do the same for each nail: file each corner at an angle, rounding it out bit by bit. Remember to keep the angle consistent and compare nails to each other so they all have a similar curve. By the end of this step, your nails should have that signature squoval silhouette – straight on top with pretty, rounded-off corners. If at any point you file too much and it looks more oval than squoval, don’t fret. Your nails will grow out, and you can maintain the squoval by keeping the top flat. It may take a little practice, but you’ll get the hang of achieving that perfect balance.
- Refine and Buff: Now that the basic shape is done, it’s time to fine-tune. Go over each nail and ensure the shape is just right. Are the two sides symmetrical? Is the tip nicely centered (not lopsided)? If needed, do a tiny bit more filing on any areas that look uneven. Once you’re happy, use a buffer block to smooth the nail edges. Lightly buff the tip of each nail – this removes any roughness left by filing and seals the keratin layers of the nail tip, which can help prevent splitting. (If you’re using a glass file, your edges might already feel smooth, but a quick buff never hurts.) Also, run the buffer gently over the surface of the nail if you see any scratches or if you used a high-grit file – this will give a nice even finish. After buffing, wipe your nails with a soft cloth or rinse your hands to get rid of any dust. Pat dry and admire the fruits of your labor – your squoval nails should be looking fabulous by now!
- Moisturize & Finish: Filing can be a bit drying, so let’s hydrate those nails and make your manicure pop. Massage a drop of cuticle oil into each nail’s base and along the sides. This not only nourishes your cuticles (preventing dryness and cracks) but also gives your nails a healthy sheen. If you don’t have a store-bought cuticle oil on hand, no worries – coconut oil or olive oil from your kitchen works beautifully as a natural remedy. In fact, soaking your nails in warm coconut oil for 10 minutes is a wonderful treat to strengthen nails and soften cuticles. After moisturizing, consider applying a layer of clear nail strengthener or top coat. This will protect the freshly filed edges and add a glossy finish. It’s an optional step, but if you’re aiming for a longer-lasting manicure or you want to grow your nails out, a strengthening polish can help prevent breakage on those new squoval tips. Finally, clean up and admire: wipe away any excess oil, wash your hands if they feel greasy, and then show off your squoval nails! You can leave them natural or go ahead and paint them with your favorite color now – squoval is a perfect canvas for any polish.
That’s it – you’ve successfully filed your nails into a squoval shape! Give yourself a high-five (carefully, you just did your nails ) because they look amazing.
Extra Nail Filing Tips for the Perfect Squoval
Filing nails is as much an art as it is a science. Here are some additional nail filing tips and tricks to help you achieve and maintain the perfect squoval manicure:
- File in One Direction: We mentioned this, but it’s worth repeating because it’s that important. Always file gently, in one direction (especially on natural nails). Aggressively sawing the file back and forth can fray the nail’s edge and lead to peeling or cracks. A gentle touch keeps your nails strong and smooth.
- Use the Right Grit: Coarse files (100 grit or lower) are meant for acrylics or gel extensions, not natural nails. Stick to 180–240 grit for natural nails so you gradually shape without damage. If you’re not sure, err on the side of a higher number (finer grit) – it might take a bit longer to file, but your nails will thank you.
- Don’t Over-File the Sides: When shaping squoval, be careful not to file too deeply into the sides of your nails. You want to maintain a bit of the straight sidewall. If you over-file the sides trying to round them, you might end up with more of an oval shape or weaken the nail at the sides. Keep most of your filing to the corners and top edge.
- Check Your Progress Frequently: After every few strokes of the file, pause and take a look at the nail shape (like we did during the corner-rounding step). It’s easier to take a conservative approach – you can always file a little more, but you can’t add back length once it’s gone! Also, step back and compare all nails when you’re done. They don’t have to be 100% identical (nails naturally have slight differences), but you want a consistent look.
- Keep Your Tools Clean and Fresh: If you use an emery board (the cardboard nail files), replace it once it’s worn out. A dull file makes ragged edges. For metal or glass files, wash them occasionally to remove built-up nail dust. Clean tools ensure a smoother file and also keep things hygienic.
- File When Nails Are Dry: While a brief soak before starting is okay, avoid prolonged soaking of your nails before an intense filing session. Overly wet nails are softer and more prone to tearing. It’s usually best to file dry nails – they’ll be firmer and you’ll get a cleaner shape. (If your nails are very hard or you have super thick nails, a short soak can help, but pat them dry before filing.)
- Maintain Your Shape Regularly: Squoval is pretty easy to maintain – just touch up the shape about once a week or whenever you notice your nails growing out or getting uneven. Regular minor filing will prevent you from having to do a big reshaping later. Plus, routinely filing can actually help your nails grow nicer by preventing splits (since you’re removing any starting frays before they worsen).
By following these tips, you’ll keep your squoval nails looking consistently salon-worthy.
Home Remedies vs. Store-Bought Solutions for Nail Care
We all love a good DIY beauty trick, but sometimes a store-bought product can be a game-changer. Here’s a quick take on when to use handy home remedies and when to invest in store-bought solutions for your nail care needs:
Nail Strength and Growth: If your nails are weak or prone to breaking, try a home remedy like the coconut oil soak we talked about (10-15 minutes in warm coconut oil does wonders to strengthen and hydrate). Some people also swear by biotin-rich foods (like eggs, nuts, avocados) to support nail growth from the inside – just remember changes won’t happen overnight. On the flip side, store-bought nail strengtheners (clear polish treatments) can provide a protective layer. Products with ingredients like keratin or calcium can fortify the nail plate. For example, OPI Nail Envy or Sally Hansen Hard as Nails are popular strengthener polishes you can find on Amazon or at the drugstore. You can use both approaches: nourish from within (or with oils) and protect from the outside with a strengthener coat.
Cuticle Care: DIY route: As mentioned, plain olive oil, coconut oil, or vitamin E oil massaged into your cuticles daily keeps them soft and healthy. It’s an inexpensive, natural way to prevent hangnails and dryness. You can even create your own DIY cuticle oil blend by mixing a few oils (for example, jojoba + sweet almond + a drop of lavender essential oil for a nice scent). Store-bought: If you want something formulated especially for nails, look for cuticle oils with nourishing ingredients. A few great ones: CND SolarOil (contains jojoba and almond oil), Bliss Kiss Simply Pure (a cult-favorite on Amazon), or budget-friendly Burt’s Bees Lemon Butter Cuticle Cream (smells amazing and comes in a little tin). These products often absorb a bit faster than raw oils and can be less messy, so they’re great for on-the-go use. Either way, keeping up with cuticle moisture is key to a neat squoval look – dry, ragged cuticles can detract from your beautiful shape.
Filing and Tools: For shaping your nails, a good file is worth the investment. A high-quality glass nail file may cost a bit more upfront than an emery board, but it can last for years and provides a super smooth finish. Similarly, a solid metal cuticle pusher or a set of nail tools can make the process easier and more professional. That said, you can achieve the same squoval shape with basic tools at home – even the emery board that cost a dollar can do the job if used carefully. Just be prepared to replace cheaper tools more often. Home hack: If you’re ever caught without a file and need to fix a snag, you can very gently use the fine side of a matchbox striker or an emery surface (it’s a trick in a pinch!). But for regular nail care, having the right tools (whether home DIY or store-bought) will save you time and frustration.
Finishing Touches: Lastly, when it comes to polishing off your squoval manicure, you can choose a simple DIY approach – buffing your nails to a natural shine – or go full glam with polish. If you want that extra shine without color, a two-minute buffing session with a fine buffer can make your nails look glossy naturally. If color is your thing, store-bought base coats, top coats, and quality polishes will ensure your squoval mani looks salon-quality and lasts longer. Always apply a base coat (to prevent staining and smooth the nail surface), then your fave color, then a top coat for durability.
In summary, mix and match home remedies and store solutions to suit your lifestyle and budget. You might do daily DIY oil treatments for maintenance, but use a store-bought strengthener once a week. Or you may shape with an affordable file but splurge on a nice cuticle oil pen for convenience. There’s no wrong answer – as long as your nails are healthy and you love how they look, you’re doing it right!
Rock That Squoval Shape! (Conclusion & Call to Action)
Congratulations – you’ve learned how to file a squoval nail shape like a pro! By combining the best of square and oval, you’ve got a strong, flattering, and oh-so-stylish set of nails. Now it’s time to put this knowledge into action. Go ahead and give yourself a squoval manicure this week – DIY squoval nails are totally doable with a little practice and the tips we covered.
I’d love to hear from you: Have you tried the squoval shape? Do you have any personal nail filing tips or favorite products that elevate your at-home mani? Let me know in the comments! Share your experiences or even a photo of your fresh squoval nails – it would make my day to see your results.
If you found this guide helpful, don’t keep it to yourself! Share it with your friends who are always looking for nail inspiration, or pin it on Pinterest so you can reference it next time you need a quick refresher on technique. Remember, beautiful nails are as much about the journey as the result – so enjoy the process, have fun with it, and don’t stress about getting it perfect. Your nails will look lovely because you put love into them.
Now grab that nail file, put on your favorite tunes, and enjoy a little self-care time shaping the perfect squoval nails. You’ve got this! Happy filing, and can’t wait to see you sparkle with those gorgeous squoval tips.