Ever scrolled through Instagram, eyeing those intricate nail art designs and thinking, “Ugh, I could never do that without a professional kit?” Well, let me tell you, you absolutely can! Today, we’re going to talk about How to Do Nail Art at Home Without Tools, transforming your nails into miniature masterpieces using bits and bobs you already have lying around. No fancy gadgets, no intimidating contraptions – just pure, unadulterated creativity.
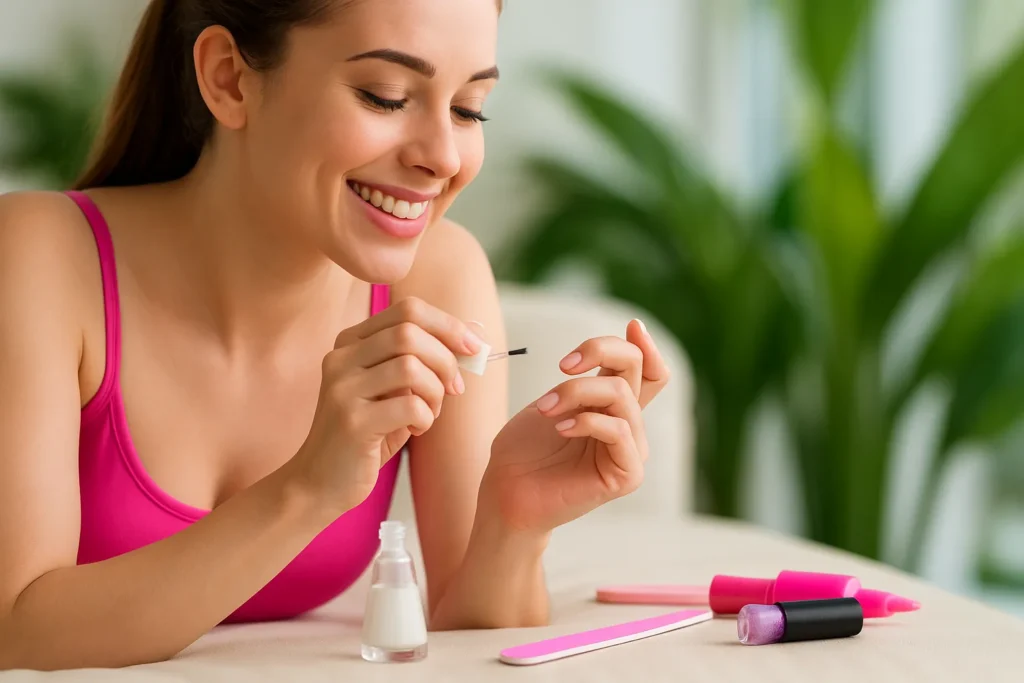
The journey of creating stunning nail art at home is more than just a beauty hack; it is a truly satisfying self-care ritual. Imagine it as a mini meditation, a moment carved out just for personal expression and relaxation. The satisfaction derived from crafting something beautiful with one’s own hands, especially when it adorns the fingertips, is truly priceless.
This approach empowers individuals to take control of their beauty routines, demonstrating that salon appointments are not a prerequisite for achieving stunning results. The very act of engaging in DIY nail art becomes a meaningful self-care practice, aligning perfectly with the growing appreciation for accessible beauty routines in modern self-care narratives. It emphasizes that the value lies not only in the final aesthetic outcome but also in the mindful, creative, and empowering process itself.
The Foundation First: Nail Prep for Pro-Level Results
Just as an artist would never begin a masterpiece on a dirty, crumbling canvas, nail art demands a pristine foundation. Skipping proper nail preparation is the quickest route to a chipped, sad-looking manicure. Proper preparation ensures optimal adhesion of polish, promotes longevity of the design, and provides a smooth, unblemished surface for the art to truly shine.
These seemingly basic steps are not merely about hygiene or aesthetics; they are fundamental technical requirements that directly impact the success and durability of any nail art. Without this crucial groundwork, even the most creative designs are prone to premature wear and an unprofessional appearance.
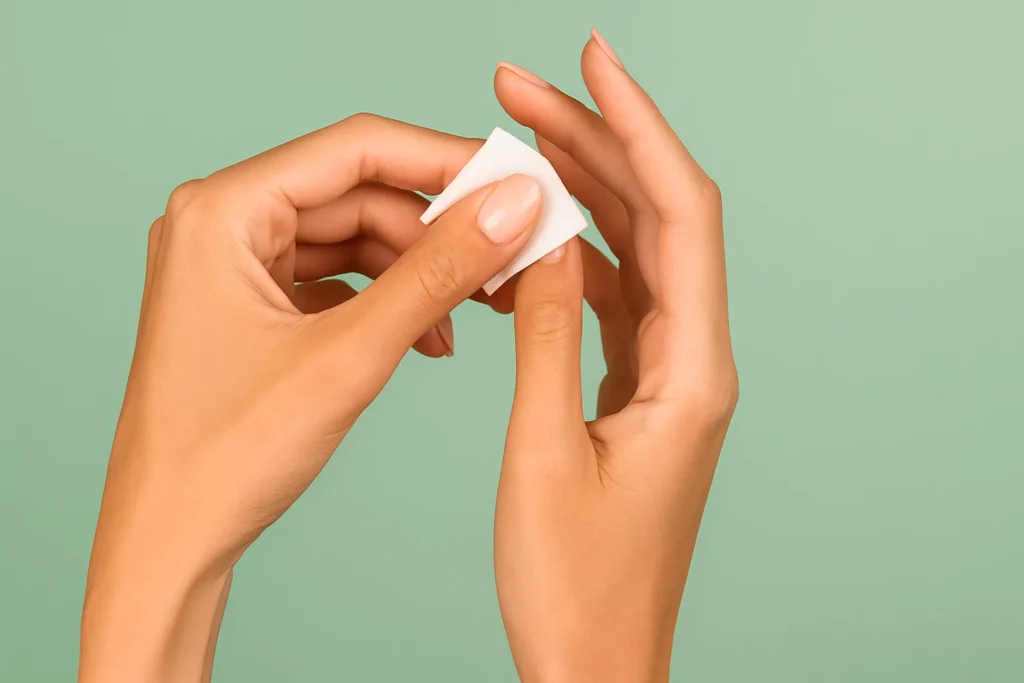
The initial steps are straightforward yet non-negotiable for achieving salon-worthy results. First, cleanliness is paramount; always begin with nails that are thoroughly clean and free of any oils or old polish. Using a nail polish remover to wipe down the nail plate ensures a fresh, clean slate.
Next, shaping the nails to the desired form is essential. When filing, it is important to move the file in one direction only, rather than a back-and-forth motion, as this technique helps prevent the nail from weakening and splitting. Think of it like filing wood – you wouldn’t saw back and forth if you wanted a smooth, strong edge, would you?
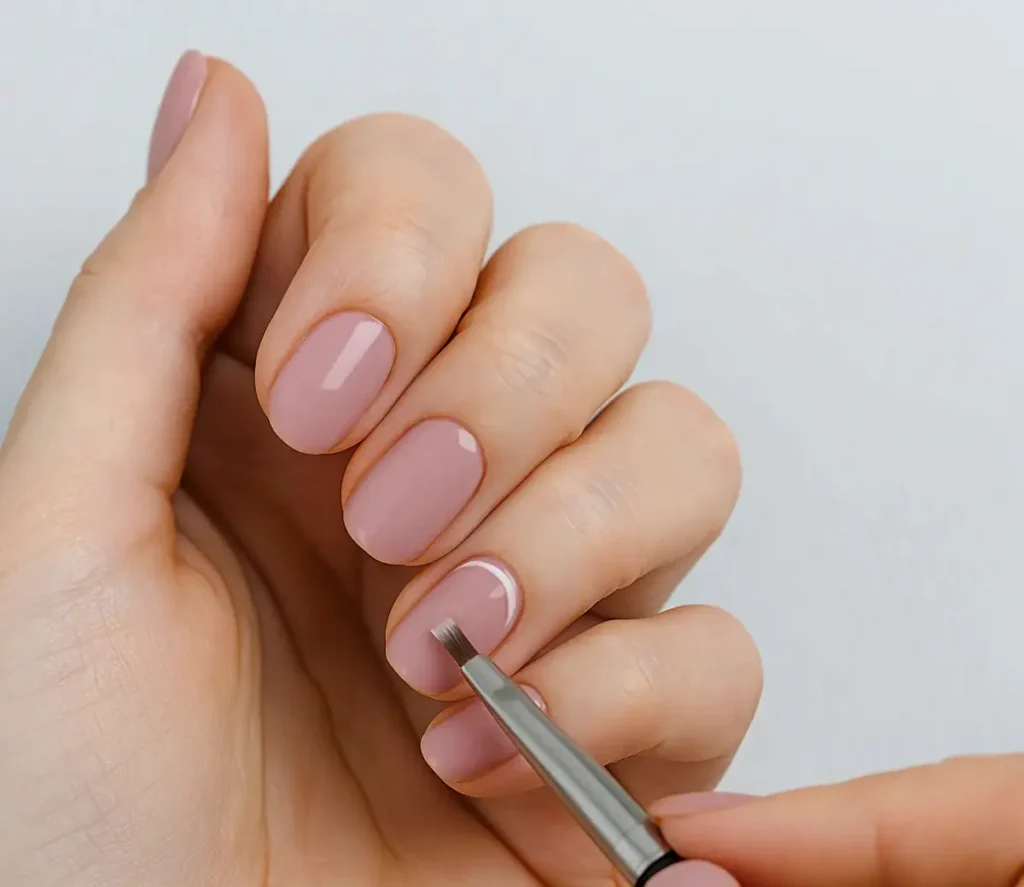
Finally, gentle cuticle care plays a significant role. Softening the cuticles with warm water or a dedicated cuticle oil before carefully pushing them back helps prevent uneven polish application and contributes to a tidier, more polished overall look. This isn’t just about aesthetics; overgrown cuticles can actually interfere with polish adhesion, leading to premature chipping.
The application of a good base coat stands as a critical and non-negotiable step in the nail art process. This layer functions as a protective shield for the natural nail, preventing staining, particularly when using darker polishes. Beyond protection, a base coat significantly enhances polish adhesion, creating a smooth, slightly tacky surface that allows subsequent layers of polish and intricate designs to grip firmly.
It acts as the essential primer for the nail canvas, ensuring that the art applied on top has a stable and receptive foundation. For a “no-tools” approach, where precision might be less inherent due to the improvised nature of the instruments, having a perfectly prepped canvas becomes even more critical. This foundational step silently supports the entire artistic endeavor, compensating for potential imperfections in the design itself and enabling the final look to appear professional and last longer.
To ensure every masterpiece has the best start, here’s a quick checklist:
| Step | Why It Matters (Benefit) | Quick Tip (No-Tools Focus) |
|---|---|---|
| Clean Nails | Removes oils/residue | Use polish remover/cotton pad |
| File Nails | Prevents weakening/splitting | File in one direction |
| Push Back Cuticles | Ensures even application | Use warm water/cuticle oil to soften |
| Apply Base Coat | Prevents staining/improves adhesion | Don’t skip this step! |
Polish Perfection: Getting Your Formulas Just Right
The consistency of nail polish is an often-overlooked yet critical factor in achieving flawless nail art. When polish is too thick, it becomes gloopy, streaky, and incredibly difficult to work with, especially for intricate designs. Conversely, if it is too thin, the polish can be watery, lacking opacity and vibrancy.
The correct consistency is an unsung hero, ensuring smooth, even application and enabling the precise execution of various techniques. This variable directly dictates the success of all nail art techniques, particularly those performed without specialized tools. A thick polish, for instance, inevitably leads to a sticky mess, visible streaks, uneven patches of color, and unsightly bumps. These issues directly hinder the ability to create clean lines, smooth gradients, or precise dots, which are the very essence of effective “no-tool” nail art. Imagine trying to paint a delicate watercolor with mud – it just won’t work, will it?
Fortunately, checking and adjusting polish consistency is a simple process that can significantly enhance results. To check, simply roll the bottle between the palms of the hands; shaking should be avoided as it can introduce air bubbles. After rolling, unscrew the cap and lift the brush above the bottle. If the polish is of the correct consistency, it will form a smooth, continuous stream dripping down from the brush into the bottle.
If, however, the polish clings to the brush in a thick, unmoving blob, it indicates that it is too thick. The solution for thickened polish is straightforward: add a couple of drops of a dedicated nail polish thinner, such as ZOYA Renew. After adding the thinner, reseal the cap tightly and roll the bottle between the palms again to thoroughly mix the product. Re-test the consistency using the drip test, and repeat the process by adding more drops if necessary, until the desired flowing consistency is achieved.
This simple adjustment can save considerable frustration and instantly elevate the quality of any nail art endeavor. For beginners relying on household items, where achieving precision might already present a challenge, ensuring optimal polish consistency removes a significant barrier to success. It is a foundational observation that empowers the user to achieve superior results with minimal effort, aligning with the practical and empowering nature of effective beauty advice.
Also Read: How To Do French Tips At Home
Unleash Your Inner Artist: DIY Nail Art Techniques
This is where the magic happens, my friends! Everyday items will be transformed into a personal nail art arsenal. Remember, patience is the most valuable tool in this creative process.
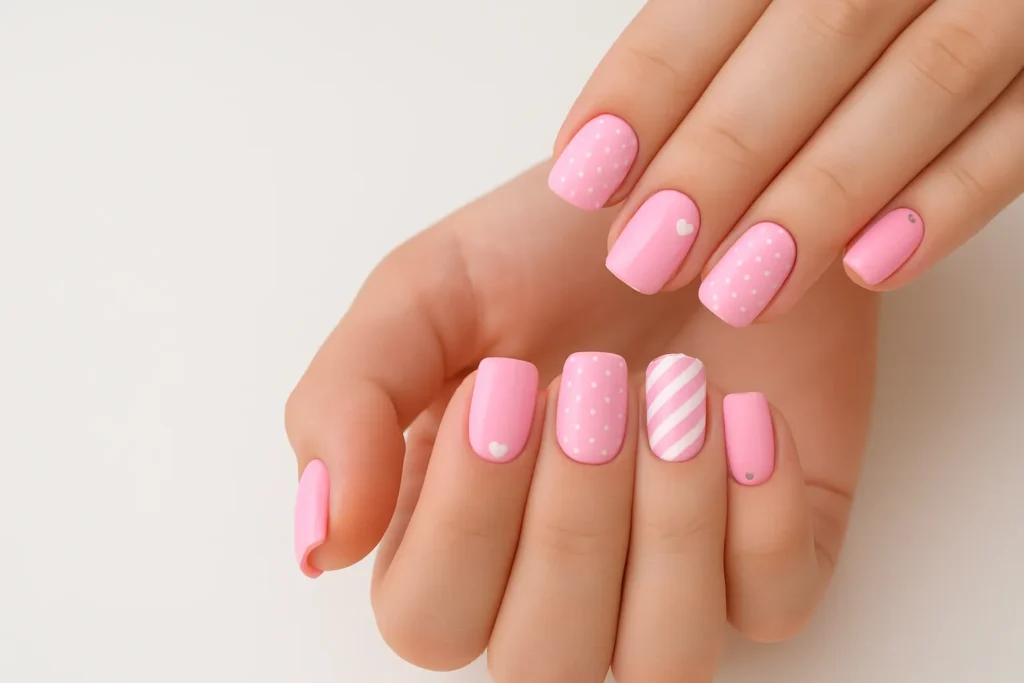
Polka Dots: The Playful Classic, Made Easy
Creating polka dots, a playful classic, is surprisingly simple without specialized tools. The secret lies in household heroes like toothpicks and bobby pins. Forget about fancy dotting tools; the kitchen drawer and bathroom cabinet hold the key. A simple toothpick is ideal for crafting small, delicate dots, while the rounded end of a bobby pin serves as an excellent alternative for creating slightly larger dots.
The versatility of these common items allows for surprising precision and variety in dotting, making intricate-looking designs accessible without requiring any specialized equipment. The difference in size between the tip of a toothpick and the rounded end of a bobby pin means that one can create dots of varying dimensions, enabling a broader range of patterns—from small, intricate details to bolder, more playful designs. This demonstrates how resourcefulness can overcome perceived limitations, making sophisticated-looking nail art achievable for everyone.
Achieving perfect dots, whether big or small, involves a few simple steps. First, apply a base coat and the chosen base color, allowing it to dry completely. This step is crucial for preventing smudging and ensuring a clean design. Next, prepare a small palette by dispensing a blob of the dotting color onto a disposable surface; a piece of aluminum foil, plastic wrap, or even disposable contact lens packaging works wonderfully.
Then, dip the toothpick or bobby pin into the polish blob, picking up a small amount. Gently dab the tool onto the nail to create the dots. This technique allows for the creation of uniform rows, a random confetti effect, or even a charming flower design by placing three dots close together with a smaller one in the center. If any minor mistakes occur, a toothpick dipped in nail polish remover can be used as a precision clean-up tool, ensuring a flawless finish.
Ombre & Gradient: Seamless Blends, Stunning Effects
For achieving seamless blends and stunning color melts, a humble makeup sponge serves as a powerful secret weapon. The wedge-shaped makeup sponges are particularly effective for creating a smooth, salon-quality gradient on nails. The success of ombre nails executed with a makeup sponge largely depends on two key elements: the strategic overlap of colors on the sponge itself and the specific dabbing motion employed during application. Without these precise actions, the desired gradual, blended effect would be replaced by distinct, unblended lines. It’s like blending eyeshadow – you don’t just slap it on, do you? You layer and tap to get that seamless transition.
To achieve smooth transitions and vibrant color melts, begin by preparing the palette. Paint two or three complementary nail polish colors directly onto the edge of the makeup sponge, placing them side-by-side with a slight overlap where they meet. This slight overlap is crucial for facilitating the seamless blend.
Next, gently dab the sponge onto the nail, rocking it slightly back and forth to blend the colors. It may be necessary to reapply polish to the sponge and dab a few times to build opacity and achieve a truly seamless transition. As this technique can be a bit messy, it is advisable to protect the surrounding skin by applying petroleum jelly or liquid latex around the nail before sponging; this barrier will make cleanup significantly easier.
For a more intense gradient, allow the first layer to dry slightly before repeating the sponging process. Finally, finish the design with a generous top coat to smooth out any texture created by the sponging and to seal the vibrant color melt. This detailed approach, moving beyond simply “using a sponge” to explaining how to use it for optimal blending, provides practical and informative guidance for beginners.
Tape Art: Crisp Lines, Geometric Glam
Scotch tape proves to be an invaluable precision tool for creating crisp lines and geometric patterns in nail art. There is no need for specialized striping tape when a roll of ordinary Scotch tape is readily available. This common household item excels at producing sharp, clean lines, zig-zags, and various geometric shapes.
The most critical aspect of successful tape art is adhering to the golden rule of drying time: the base color must be bone dry—absolutely, unequivocally dry. If the base coat retains even the slightest tackiness, the tape will inevitably peel off the polish, resulting in a sticky mess and a frustrating outcome.
To avoid this common pitfall, it is imperative to allow the base coat at least an hour to dry, or even longer to be completely safe. This is not merely a suggestion but a critical preventative measure against the most common and frustrating failure point in tape art. The explicit warning that “else the paint would peel off” or “the sticker will pull up polish” clearly establishes the direct negative consequence of insufficient drying time. Trust me, you don’t want to spend all that time on a perfect base just to have it ripped off! This understanding transforms a potential disaster into a manageable challenge, empowering the user to avoid frustration.
Once the base is completely dry, the process for sharp designs is straightforward. First, apply the base color and allow it to dry thoroughly. Next, cut pieces of Scotch tape into the desired shapes, whether thin strips for lines or triangles for geometric patterns. Craft scissors with wavy or zigzag edges can also be used to create more intricate patterns with the tape. Carefully place the tape onto the dry nail, pressing down firmly to ensure no polish seeps underneath.
Apply the contrasting polish over the exposed nail area. Crucially, remove the tape while the top polish is still wet. This prevents the polish from drying and creating a jagged or uneven edge when the tape is pulled off. Finally, once everything is dry, apply a top coat to protect the crisp lines and enhance the longevity of the design.
Splatter & Splash: Artfully Chaotic Chic
For those seeking a truly unique and expressive nail art look, splatter nails offer an artfully chaotic chic. This dynamic effect can be achieved using a simple straw. While seemingly chaotic, splatter nail art relies heavily on creating a controlled mess, which is made possible through strategic skin protection and immediate cleanup. This careful management transforms a potentially intimidating technique into a viable and enjoyable “no-tool” option.
To execute this technique, begin by applying a base color, such as white, which provides a fantastic canvas for splashes of contrasting colors, and allow it to dry. This is where the process can get messy, so attention to skin protection is vital. Apply Scotch tape , petroleum jelly, or even liquid latex around the nail, ensuring all exposed skin is covered. This barrier is essential for facilitating easy cleanup later.
Think of it as putting down newspaper before a painting project – you’re protecting your workspace! For the splatter action, dip one end of a straw into a chosen nail polish color. Hold the straw close to the nail, but without touching it, and gently blow through the other end, directing the polish onto the nail. Repeat this process with different colors to create a multi-dimensional effect. Immediately after splattering, carefully remove the tape or wipe away the petroleum jelly.
For any stray splatters that may have occurred, a cotton swab or a clean brush dipped in nail polish remover will effectively clean them up. Finally, seal the artistic chaos with a top coat to smooth out any texture and ensure longevity. This detailed approach, explaining how to manage the inherent mess, empowers the user to successfully achieve this expressive nail art.
Marbled Masterpiece: Swirls of Sophistication
Marbled nails offer a stunning and unique swirled pattern, achievable with just a cup of water and a toothpick. The success of both water and dry marbling techniques fundamentally depends on precise control over polish drying times. For water marbling, this means manipulating water temperature, while for dry marbling, it requires working while the polish is still wet on the nail.
For water marbling, the water temperature is key: room temperature water is ideal. If the water is too cold, the polish will dry too quickly on the surface, preventing proper spreading and swirling. If it is too warm, the polish might become too runny. Some experimentation with slightly warmer or cooler water may be necessary if the polish does not spread correctly. Filtered water can also aid in slowing the drying process.
To begin, apply a base coat and a light base color (white makes colors pop!) and allow it to dry. Crucially, protect the skin around the nails with petroleum jelly, Elmer’s glue, or Scotch tape; this barrier will significantly reduce cleanup time. Fill a small, disposable cup with room temperature water. Drip one polish color onto the water surface; it should spread out. Quickly drop a second color into the center of the first, and continue alternating colors to create concentric rings.
Use a toothpick to gently drag through the colors, creating the desired marble pattern, working quickly before the polish dries on the water surface. Slowly lower the protected nail onto the pattern and hold it for a few seconds. While the nail is still submerged, use another toothpick to clear away any excess polish from the water surface around the finger. Then, carefully lift the finger straight up. Remove the protective barrier and clean up any stray polish with a cotton swab or brush dipped in remover. For the next nail, use a toothpick to swirl and remove the remaining polish from the water surface, creating a fresh canvas.
Dry marbling offers a quicker and less messy alternative to water marbling, perfect for achieving a swirled effect without the extensive setup. For this technique, apply the base color, but do not let it dry. This wet base is crucial for the marbling effect. While the base is still wet, place small blobs of contrasting polish colors directly onto the wet surface. Immediately use a toothpick or a sewing needle to gently mix and drag the colors together on the nail, creating a marbled pattern.
Speed is essential here, as the polish must remain wet enough to swirl before it sets. After creating the design, clean up any edges with a brush dipped in remover, and once completely dry, apply a top coat to seal the design. Understanding this nuanced difference in drying time management for each marbling technique provides a deeper comprehension for the user, preventing common pitfalls and empowering them to choose the most suitable method based on their polish and desired outcome.
Here’s a comparison to help you choose your marbling adventure:
| Feature | Water Marbling | Dry Marbling |
|---|---|---|
| Key “Tool” | Toothpick | Toothpick/Needle |
| Polish State | Floats on water | Wet on nail |
| Clean-up | Messier (skin protection vital) | Less messy |
| Best For | Intricate, organic swirls | Quicker, fluid swirls |
| Key Challenge | Water temperature sensitive | Must work very fast |
Freehand Fun: Embracing Your Unique Touch
Do not underestimate the inherent power of the nail polish bottle brush itself. With a little practice, surprisingly chic freehand designs can be created. Consider abstract lines, simple swirls, or even elegant half-moon shapes at the cuticle area. Freehand nail art, particularly when working with the non-dominant hand, is less about an innate artistic talent and more about the development of muscle memory through consistent practice and the application of simple stabilization techniques.
Mastering the non-dominant hand requires a strategic approach. Begin with designs that are less geometric and more organic or “wiggly,” as imperfections in abstract art often appear intentional. When painting with the non-dominant hand, a useful technique is to anchor the pinky finger on the table or on the other hand to provide a stable point of support.
Experimentation with finger bending or hand rotation can also help in finding the most comfortable and stable angle for painting; sometimes, working “upside down” can even prove easier. Applying thin layers of polish is highly recommended, as they dry faster and are more forgiving if corrections are needed. Ultimately, consistent practice is where the true transformation occurs. Initial attempts may not be perfect, and that is entirely acceptable.
The key is consistency in effort. Practicing on paper before applying to nails can also be beneficial. This approach shifts the focus from a perceived lack of drawing ability to the development of technique through repetition, making freehand nail art less intimidating and more achievable.
Troubleshooting & Triumphs: Common Challenges Solved
Even seasoned professionals encounter challenges. Nail art can present a few curveballs, but with the right knowledge, these can be navigated like an expert. Many common nail art “mistakes” are not failures of artistic skill but rather preventable issues stemming from improper application techniques or the condition of the polish itself, all of which have straightforward “no-tool” solutions.
Addressing common issues like smudging, extended drying times, and uneven application is crucial for a smooth nail art experience. Smudging often results from applying excessively thick coats of polish or failing to allow previous layers to dry completely. The solution lies in applying thin coats and exercising patience; each layer must dry fully before the next is applied. While quick-dry top coats can assist, they should not be used to rush the underlying layers. Endless drying times are also typically a consequence of applying too much polish.
Again, thin coats are key, and ensuring the polish consistency is correct (as discussed earlier) is vital, as thicker polish naturally takes longer to dry. Uneven application can stem from thick polish, neglected cuticle care, or rushing the process. Proper nail preparation, including clean and pushed-back cuticles, provides a smooth canvas. Working with thin, even coats of polish is essential. If polish is old or clumpy, it should either be revived with thinner or replaced entirely.
Effective cleanup hacks are essential for achieving a flawless finish. When a mistake occurs, it is best to address it immediately while the polish is still wet. Painting over errors should be avoided, as this only leads to bumps and unevenness. For precision, household items can serve as excellent tools. Toothpicks are perfect for tiny corrections around the cuticle or for removing misplaced dots; simply dip the tip in a small amount of nail polish remover. Cotton swabs or Q-tips are ideal for larger cleanups around the edges of the nail, particularly after messy techniques like splatter or water marbling, when dipped in remover. For dry marbling, if excess polish remains on the skin, a warm shower can sometimes help it peel right off.
The ultimate solution to overcoming nail art challenges lies in consistent practice, patience, and maintaining a positive mindset. No one is born a nail art wizard; it requires time and dedication. Beginners should start with simpler designs and gradually challenge themselves as their skills develop. It is important not to become overly focused on achieving perfection, but rather to enjoy the creative process itself. Remember, nails are miniature works of art, and art is inherently subjective. By reframing “mistakes” as “challenges with clear solutions,” individuals can build confidence and understand that improvement is a direct result of effort and smart technique, rather than an innate talent.
Here’s a quick reference for common challenges and their smart solutions:
| Challenge | Root Cause | Smart Solution (No-Tools Focus) |
|---|---|---|
| Smudging/Bubbling | Thick coats, Rushing | Apply thin layers, Allow full drying |
| Long Drying Times | Too much polish | Ensure polish consistency is correct |
| Uneven Application | Old/thick polish, Neglecting prep | Proper nail prep (clean, pushed-back cuticles), Thin, even coats |
| Painting Over Mistakes | Rushing, Lack of precision | Clean up immediately with toothpick/Q-tip and remover |
The Grand Finale: Sealing Your Stunning Creation
The application of a top coat is the non-negotiable final step for ensuring the longevity and brilliance of any nail art design. Consider the top coat as an invisible shield for the artistic masterpiece. It provides crucial protection against chipping, fading, and the wear and tear of daily activities.
Additionally, it smooths out any textures, which is particularly important for designs involving glitter or splatter, and imparts either a gorgeous, salon-worthy shine or a chic matte finish, depending on the product chosen. Skipping this step is akin to baking a cake and forgetting the icing; the creation remains incomplete and vulnerable. The top coat is not merely an aesthetic touch but a critical functional component that safeguards the DIY nail art, extending its lifespan and enhancing its perceived quality, thereby maximizing the user’s effort.
When selecting a top coat, consider the desired finish. A glossy top coat is the classic choice for a high-shine, polished look, and most standard top coats offer this finish. For a sophisticated, velvety appearance that instantly elevates any design, a matte top coat is ideal; look for products specifically labeled “no wipe matte top coat”. Some top coats are also infused with glitter, allowing for the addition of sparkle to any base color, providing versatility and an extra touch of glamour.
Regardless of the chosen finish, it is paramount to ensure that the nail art is completely dry before applying the top coat to prevent any smudging or disruption of the intricate design. For individuals investing their time and creativity in DIY nail art without professional tools, the top coat serves as the ultimate, non-negotiable payoff for their patience and effort, ensuring their hard work endures and shines.
Final Thoughts: Your Nails, Your Rules – Go Create!
So there you have it, my beauty-savvy friends! The knowledge to conquer How to Do Nail Art at Home Without Tools has been thoroughly explored. Everything from the foundational preparation to the clever hacks using everyday items and how to troubleshoot common challenges along the way has been covered.
Remember, beauty is fundamentally about self-expression and the joy of creation. It is important not to strive for unattainable perfection on the first attempt. Instead, embrace the process, savor the creativity, and celebrate every unique design that emerges. Nails serve as a personal canvas, a reflection of mood, style, and incredible resourcefulness. So, gather those polishes, locate a toothpick, and allow the inner artist to shine! The capability is certainly within reach.