Alright, let’s get real for a moment. You’ve poured your heart into creating those gorgeous acrylic nails, dreaming of that perfectly smooth, salon-worthy finish. Then, bam! Tiny, infuriating bubbles pop up, ruining the vibe and even making your beautiful manicure less durability. It’s a common little hiccup that can make anyone feel a bit deflated, but here’s the good news: it’s absolutely, completely avoidable!
This guide is your secret weapon, packed with practical, easy-to-follow tips straight from those who know nails inside and out. We’re cutting through all the noise to give you the actionable steps you truly need to achieve those smooth, professional-looking acrylic nails, right there in your own space. Get ready to master the art of bubble-free application and feel genuinely confident in your nail artistry! This guide will show you exactly How to Avoid Bubbling in Acrylic Nails with seven straightforward, powerful tips.
Understanding the “Why”: What Causes Those Pesky Bubbles?
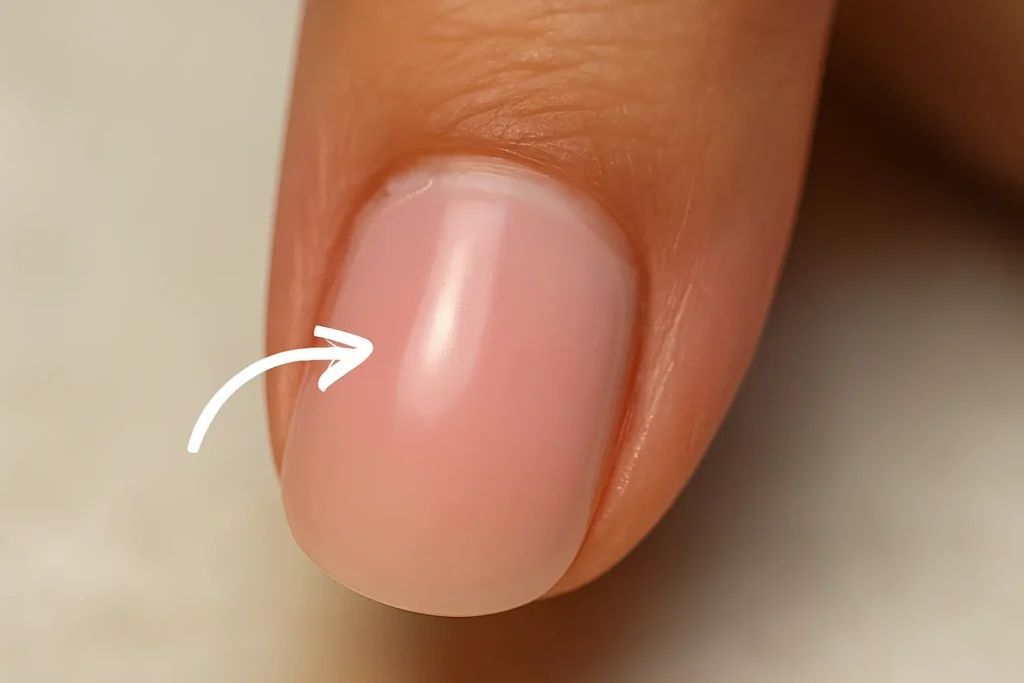
Think of bubbles in acrylic nails as tiny pockets of air that get trapped inside the acrylic mixture as it sets. When your liquid monomer and polymer powder come together and are applied to your nail, these little air pockets can create those unsightly bumps, mess with the aesthetic, and even weaken the whole structure of your nail enhancement. This “porosity,” or the presence of these voids, is a real concern, especially with paler shades where bubbles are instantly noticeable, giving an uneven look when the light catches your nails.
Common Culprits at a Glance
So, what usually causes these frustrating air pockets to appear? Let’s break it down:
- Getting Your Ratios Wrong: This is foundational, truly. The balance between your liquid monomer and powder polymer is absolutely critical. If you have too much liquid or too much powder, your acrylic can become tricky to work with, leading to trapped air and an uneven cure. Specifically, if you don’t use enough monomer, the powder beads might not dissolve completely, giving you a white, frosted appearance. On the flip side, if you use too much monomer, that excess liquid can actually vaporize during the setting process, creating voids or bubbles in your finished product.
- Application Technique That Needs a Little Love: Rushing your application, pressing too hard with your brush, or forgetting to properly de-air your brush can all introduce and trap air within the acrylic. And here’s a big one: overworking the product, or constantly fiddling with it after you’ve placed it, is practically an open invitation for bubbles.
- Product Quality & Your Environment: The quality and freshness of your products play a huge role. Old or low-quality acrylic powder and liquid can be harder to mix smoothly and might not cure consistently, significantly increasing the chance of bubbles. Beyond that, environmental conditions like high humidity or extreme temperatures can interfere with the curing process, leading to trapped air or uneven drying.
- Brush Blues: Even your most beloved acrylic brush can be a source of bubbles if it’s dirty, frayed, or has air trapped deep within its bristles.
It’s important to understand that bubbles rarely come from just one isolated mistake. More often than not, they’re the cumulative result of several smaller issues compounding. Imagine a slightly off liquid-to-powder ratio, combined with a rushed application, and a brush that wasn’t properly de-aired – that creates a perfect storm, making bubble formation almost inevitable. If your liquid-to-powder ratio isn’t quite right, the acrylic mixture becomes a challenge to manage, which then makes it more likely for you to apply the product too quickly or unevenly, thereby trapping air.
Similarly, a brush that hasn’t been properly prepared will inherently introduce air, no matter how perfectly you mix your bead. This interconnectedness means that a minor flaw in one area can trigger or amplify problems in another, leading to a more pronounced bubbling issue. So, to truly achieve that bubble-free application, you need a holistic approach – optimizing everything from your preparation and product handling to your application technique and even your workspace environment.
Your 7 Easy Tips to Avoid Bubbling in Acrylic Nails
Let’s dive into the practical steps that will transform your acrylic application from frustrating to absolutely flawless. You’ve got this!
Tip 1: Master Your Nail Prep for a Flawless Foundation
Think of your nail prep as laying the perfect groundwork for your masterpiece. A clean, properly prepped nail is absolutely crucial for strong adhesion and that coveted bubble-free finish.
- Cleanse, Buff, and Dehydrate: Why it’s non-negotiable. Start by giving your natural nails a thorough cleanse. This means getting rid of any old polish, oils, lotions, or debris. Washing your hands with warm, soapy water and cleaning beneath each nail will banish moisture and oil that could spoil your manicure. Next, gently buff the nail surface to create a smooth, slightly textured canvas. This helps the product grip better and prevents bubbles from forming by ensuring a perfectly smooth surface. Finally, and this is key, dehydrate the nail plate. A quick swipe with an alcohol pad or acetone swab will remove any lingering natural oils and moisture – these are common culprits for lifting and bubbles. Do this immediately before application, and here’s a pro tip: avoid touching anything between dehydrating and applying your primer.
- The Power of Primer: Ensuring superior adhesion. For acrylic nails, primer is your absolute secret weapon. It’s distinctly different from a base coat, which is typically for gel or regular polish. Primer is essential for creating a strong bond between your natural nail and the acrylic. It purifies the nail, eliminates natural oils and grease, and ensures a clean canvas for your nail application. Some primers even create microscopic holes in the natural nail plate (acid primers) for superior adhesion, which prevents lifting and, crucially, air bubbles. Apply a small, thin amount of primer onto a lint-free applicator or brush, then gently brush it onto the natural nail, covering the entire nail plate while carefully avoiding contact with the surrounding skin. Allow it to air dry for a few seconds according to the manufacturer’s instructions.
While many focus on application technique, proper nail preparation, especially the use of primer, is a foundational step that directly impacts bubble prevention. Without proper dehydration and priming, even a perfectly mixed bead can lift or trap air due to poor bonding. Bubbles often form in acrylics when there’s an inadequate bond between the acrylic product and the natural nail plate, or between successive layers of acrylic. If the natural nail isn’t thoroughly dehydrated and primed, residual oils, moisture, or debris create a weak interface.
This poor adhesion leaves microscopic gaps or voids where air can become trapped during application or seep in later as the acrylic cures or experiences stress. The primer’s role is to chemically prepare the nail surface to maximize the acrylic’s grip, thereby eliminating these potential air pockets. This highlights that the success and flawlessness of the visible acrylic application are heavily dependent on the quality and thoroughness of the unseen groundwork. Investing time and effort in proper prep is a direct investment in a bubble-free result.
Tip 2: Mastering Acrylic Powder Ratios
This, my friend, is the very heart of bubble-free acrylics! The ratio of monomer (liquid) to polymer (powder) dictates the consistency, how easily you can work with it, and ultimately, the strength and clarity of your acrylic.
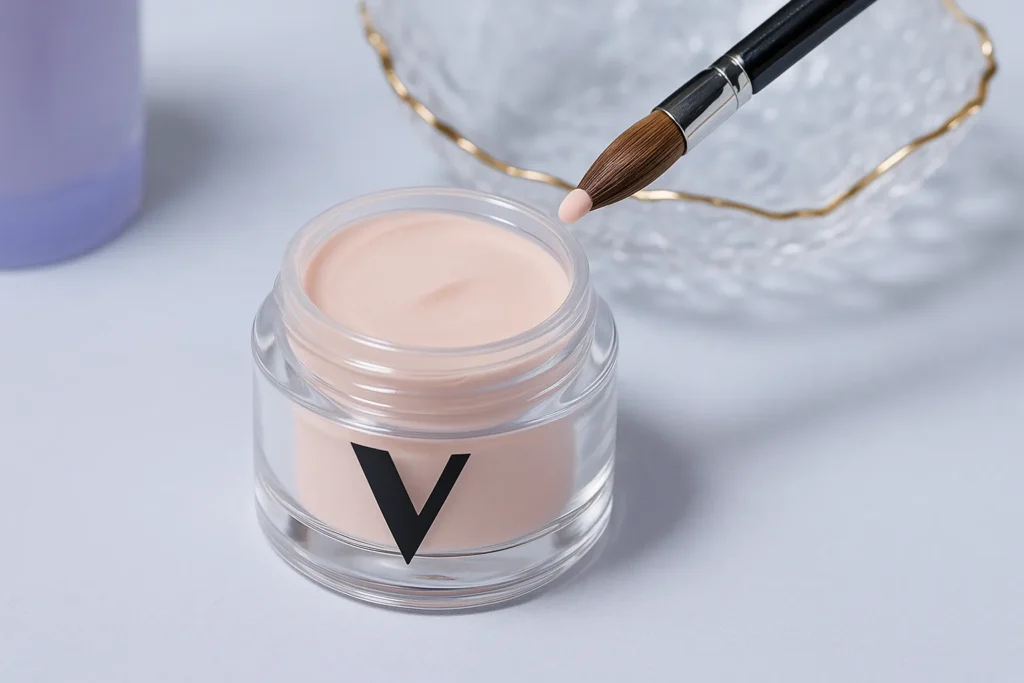
- Finding the “Wet Pearl” Consistency: The visual cue for success. The ideal bead of acrylic should look like a “wet pearl”. It should be moist enough to flow gently but firm enough to hold its shape without running into your cuticles or sidewalls. This visual cue is actually more important than trying to memorize exact measurements, as ratios can vary slightly by brand. If your bead is too wet, it will be runny and weak, prone to excessive shrinkage and lifting. If it’s too dry, it will appear powdery or crystallized, making it difficult to spread evenly and increasing the chance of lumps and trapped air.
- Why Ratio Matters: Impact on strength and flexibility. When the monomer polymerizes, it beautifully surrounds each bead of polymer, forming a strong yet flexible enhancement. An incorrect ratio disrupts this delicate chemical process, leading to porosity (those voids/bubbles) and a weaker structure.
The concept of the “wet pearl” isn’t just a fancy term; it’s your critical sensory feedback mechanism for truly mastering acrylic application. For us beauty enthusiasts, who may lack precise measuring tools, developing the visual and tactile sense for this consistency is far more effective than trying to stick to theoretical ratios that can vary by product brand. If exact numerical ratios vary by brand, a fixed measurement isn’t universally applicable or easy for a home user without specialized tools, and relying solely on abstract numbers could lead to frustration and inconsistent results. The “wet pearl” consistency becomes your universal, practical standard.
It provides a real-time, observable target that you can aim for, regardless of the specific product brand or even slight variations in ambient conditions. By learning to recognize and feel the correct consistency, you can adapt your liquid-to-powder pickup to achieve optimal workability and polymerization. This approach encourages a more intuitive and adaptable method, shifting the learning focus from rigid, rule-based adherence to developing a skilled “eye” and “feel” for the material, which is a hallmark of true mastery in any craft.
Here’s a helpful guide to achieving that perfect bead:
Achieving the Perfect Acrylic Bead: Your Visual Guide
| Bead Appearance | Consistency | Common Issues | Bubble Risk | Solution |
|---|---|---|---|---|
| Too Wet | Runny, transparent, floods cuticles | Weak structure, excessive shrinkage, lifting | High (vaporized excess monomer) | Blot brush, use less liquid |
| Just Right | Smooth, self-leveling, holds shape, wet pearl | Vibrant, strong, flexible | Low | Practice, trust the process |
| Too Dry | Powdery, crystallized, crumbly | Difficult to spread, lumpy, brittle, poor adhesion | High (trapped air around undissolved powder) | Add more liquid, re-dip brush |
Tip 3: Conquer Your Brush Technique
Your brush is truly an extension of your hand, and how you use it significantly impacts whether those bubbles decide to show up.
- De-Airing Your Brush: The simple trick to release trapped air. Before you even think about picking up powder, gently press your acrylic brush to the bottom of your dappen dish in an “L” position. You’ll see tiny bubbles float to the surface – this is trapped air making its escape from the bristles. This simple step is absolutely vital for preventing air from being incorporated into your bead, as air within the brush can compromise the strength of the enhancement and lead to service breakdown.
- Gentle Application Strokes: Smooth, even movements. Once you have your perfect bead, apply it to the nail with smooth, even strokes. Avoid digging into the product or overworking it, as this can introduce even more air. The more the product is touched, the more bubbles can be created. Instead, use the side of your brush to gently guide the acrylic into shape. Be mindful not to press too hard with the brush, as this can also trap air and create bubbles.
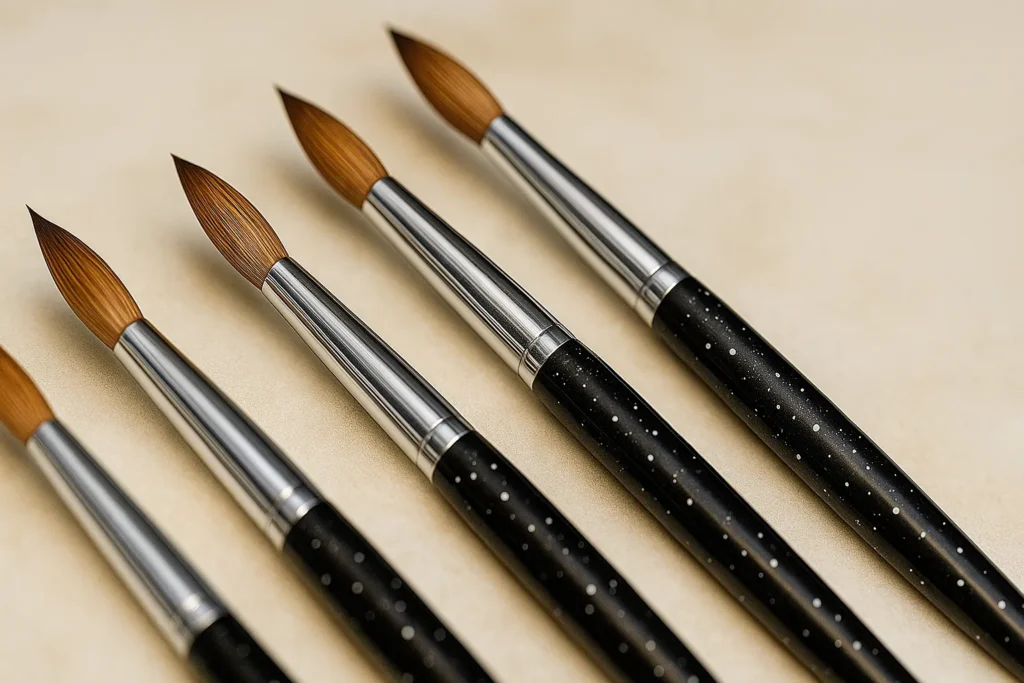
- Cleanliness is Key: Maintaining your tools. Always make sure your brush is clean and in good condition. A dirty or frayed brush can interfere with smooth application and introduce debris or air. It is also important to use a soft-bristled brush, similar to what you’d use for makeup blush, as stiffer “hogs hair” bristles can stir up bubbles.
The brush isn’t just a tool for application; it’s a potential source of trapped air. The simple act of de-airing the brush transforms it from a problem introducer to an effective applicator. Air trapped within the brush bristles, or bristles that are too stiff or coarse, will inevitably be transferred directly into the liquid monomer when the brush is dipped, and subsequently into the acrylic bead when the powder is picked up.
This direct introduction of air into the mixture creates the very bubbles we’re trying to avoid. The physical action of stiff bristles can also agitate the mixture, further incorporating air. This highlights that bubble prevention is not solely about the liquid-to-powder ratio or application speed, but also about the tool itself and its proper preparation. Paying attention to the details of your tools, understanding that their condition and preparation have a significant ripple effect on the final manicure quality, is crucial.
Tip 4: Slow Down and Be Deliberate with Application
Patience, my dear, is truly a virtue when it comes to bubble-free acrylics. Rushing is one of the most common causes of trapped air.
- Working in Small, Controlled Sections: Building the nail gradually. Apply the acrylic in small, controlled sections. This allows you to manage the product more effectively, prevents over-application, and significantly reduces the likelihood of trapping air. Building the nail gradually ensures an even, smooth finish and helps you control the thickness of the application.
- The Art of the Gentle Press: Avoiding air pockets. When placing the bead, press it down gently but firmly. For nail tips, apply at a 45-degree angle, slide it down until it hits the well, and then gently rock it up, holding firmly for 10-30 seconds. Avoid applying the nail parallel to your natural nail, as this can cause significant air bubbles. The goal is to smoothly push out any air from underneath as you apply, ensuring a clean application.
- Patience Pays Off: Don’t overwork the product. Once that bead is placed, give it about three seconds to polymerize before you even begin to guide it. This brief pause allows the product to start its chemical setting process. The more you touch or “play” with the acrylic, or “dig into it,” the more likely you are to introduce or trap air. Trust me, this is a common mistake that leads straight to bubbles.
The brief period (around 3 seconds) after placing the bead, where it begins to polymerize, is a critical “window” where the acrylic is most vulnerable to air trapping. Disturbing it too early or overworking it during this phase directly interferes with the natural settling of the material, preventing trapped air from escaping before the product sets. Polymerization is a chemical reaction where the liquid monomer and polymer powder begin to bond and solidify. During the initial seconds, the mixture is still in a semi-liquid, workable state, allowing any trapped air bubbles to naturally rise to the surface and escape.
If the product is immediately manipulated, pressed, or overworked during this crucial period, the physical action of the brush can push air deeper into the mixture, create new air pockets, or disrupt the natural self-leveling process, thereby preventing those bubbles from escaping before the acrylic hardens. This emphasizes that successful acrylic application isn’t just about applying the product, but about understanding and respecting the material’s inherent chemical processes. A mindful and patient approach, allowing the product to perform its initial chemical magic undisturbed, leads to consistently smoother, bubble-free results and a more efficient application process in the long run.
Tip 5: Choose High-Quality Products and Store Them Wisely
Your products are the raw materials for your masterpiece. Their quality, and how you treat them, make a world of difference.
- The Difference Quality Makes: Investing in your manicure. Always, always opt for fresh, high-quality acrylic powder and liquid. Old or cheap products are simply more likely to be inconsistent, harder to mix smoothly, and more prone to bubbling and other issues. Quality products often have better formulations that allow for smoother application and more consistent curing, which directly reduces the chance of bubbles and issues like yellowing.
- Temperature and Storage Tips: Keeping your products optimal. Store your liquid monomer and acrylic powder in a cool, dry place, away from direct sunlight or extreme temperatures. Warmer liquid tends to dry faster, which can trap air. Extreme temperatures can affect the consistency and stability of the products, leading to issues like accelerated polymerization where gases form and cannot be released, resulting in bubbles. Make sure bottle caps are tightened securely after each use to prevent product drying or contamination.
- Roll, Don’t Shake! The secret to bubble-free bottles. It’s a common habit to shake bottles of nail polish or liquid monomer, but this is a major culprit for introducing air bubbles directly into the product. Instead, gently roll the bottle between your hands to mix the contents without creating air pockets. This simple pro move makes a huge difference in achieving a smooth, bubble-free product from the very start.
The emphasis on high-quality products and proper storage highlights that bubble prevention starts before application. Products that are old, poorly formulated, or improperly stored can be inherently unstable or difficult to work with, increasing the likelihood of bubbles regardless of technique. Low-quality or aged acrylic products can have inconsistent particle sizes in the powder, degraded chemical components in the monomer, or an imbalance of initiators/inhibitors. These chemical inconsistencies make it inherently harder to achieve the ideal “wet pearl” consistency, lead to uneven polymerization, or cause the product to cure too quickly or slowly, all of which create opportunities for air to be trapped.
Improper storage, such as exposure to heat or cold, can further alter the chemical properties and workability. Furthermore, shaking bottles directly incorporates air into the liquid, making it problematic from the start. This implies that even perfect technique can’t fully compensate for compromised product integrity. Investing in reputable, fresh products and storing them correctly is a proactive, foundational step in bubble prevention.
Tip 6: Optimize Your Environment for Bubble-Free Curing
Your workspace plays a silent but significant role in the success of your acrylic application.
- Humidity and Temperature Control: Creating the ideal workspace. High humidity can cause the acrylic to dry unevenly, trapping moisture and leading to bubbles. Similarly, applying acrylic in a room that’s too hot or too cold can affect its consistency and drying time. For instance, warmer liquid tends to dry faster, which can trap air. Aim for a moderate room temperature and humidity level to avoid environmental factors that can interfere with the drying process.
- Still Air is Your Friend: Avoiding premature drying. Avoid working directly under a fan, near an open window with a breeze, or in a drafty area. Moving air can cause the top layer of your acrylic to dry prematurely, forming a “skin” that prevents solvents and air underneath from escaping. This creates a barrier, trapping any air or evaporating solvents, which then form bubbles as the deeper layers cure. Therefore, maintaining still air is crucial for a smooth, bubble-free finish.
Environmental factors such as temperature, humidity, and air movement act as an “invisible hand” that significantly influences the chemical polymerization and solvent evaporation processes of acrylics. These factors can either facilitate or hinder the natural release of trapped air, often overriding perfect technique if not controlled. Higher temperatures can accelerate the polymerization process, causing the acrylic to set too quickly before trapped air or evaporating monomer has a chance to escape. High humidity can interfere with the proper evaporation of solvents, leading to uneven drying and trapped moisture that manifests as bubbles.
Moving air from fans or breezes causes the surface of the acrylic to dry prematurely, forming a “skin” over the still-liquid interior. This skin then acts as a barrier, trapping any air or evaporating solvents underneath, which then form bubbles as the deeper layers cure. This demonstrates that even if all other steps (prep, ratio, technique, product quality) are perfectly executed, an uncontrolled environment can still sabotage the results. Creating an optimal setting for nail work, by understanding how the material behaves under different conditions, is a key component of success.
Tip 7: Don’t Forget the Finishing Touches: Base and Top Coats
While the acrylic itself is the main focus, the layers you apply over it also need careful attention to remain bubble-free.
- The Role of Base Coat: For polish layers over acrylic. If you plan to apply regular nail polish or gel polish over your acrylics, a base coat is essential for a smooth, even application and to prevent staining of the acrylic. It provides a smooth surface, ensuring that the nail polish adheres properly and lasts longer. Apply a thin, even layer and allow it to dry completely before applying color. Crucial Clarification: Remember, for the acrylic application itself, you use a primer, not a base coat. Base coats are for the polish layers on top of the cured acrylic.
- Sealing the Deal with Top Coat: Protecting your masterpiece. A high-quality top coat is the final step to seal in your manicure, provide a gorgeous glossy shine, and protect against chipping and wear. To avoid bubbles in your top coat, apply thin, even layers. Allow each layer to dry completely before applying the next. Rushing this step or applying thick layers is a common cause of trapped air in the top coat, as it takes longer to dry, trapping air underneath. And remember to roll, not shake, your top coat bottle before use to avoid introducing air bubbles into the polish.
The distinction between primer (for acrylic adhesion) and base/top coats (for polish over acrylic) is crucial for preventing bubbles at each stage of the manicure. Misapplying these products or using them interchangeably can lead to adhesion issues and trapped air, not just in the acrylic, but also in the subsequent polish layers. This is a common point of confusion. Using a base coat under acrylics (instead of a primer) would compromise the crucial chemical bond needed for acrylic adhesion, leading to lifting and subsequent air trapping.
Conversely, applying polish over cured acrylics without a base coat could lead to polish bubbling, chipping, or staining the acrylic. This highlights that “bubble prevention” is not a one-size-fits-all solution but requires product-specific knowledge at each layering stage. This reinforces the concept of a multi-layered approach to bubble prevention, where each step of the manicure, from natural nail prep to the final top coat, has its own specific product and technique requirements. Understanding these nuances prevents common pitfalls that arise from misusing products or misunderstanding their distinct roles, ultimately leading to a more consistently flawless and durable manicure.
Troubleshooting: What If Bubbles Still Appear?
Even with the best techniques, sometimes a stubborn bubble might sneak in. Don’t fret – here’s exactly what to do.
- Minor Fixes: Gentle filing for surface bubbles. If you notice small, superficial bubbles after the acrylic has hardened, you can often gently file the surface to smooth them out. Use a 180-grit file to gently buff away the imperfections until the nail is even. After filing, apply a top coat to give the nail a smooth, glossy finish. For bubbles in polish layers (over acrylic), a layer of polish thinner or even another thin layer of polish can sometimes flatten them. And hey, nail stickers or jewels can also be a fun way to disguise them!
- When to Start Fresh: Recognizing when a redo is best. If the bubbles are too numerous, large, or deeply embedded, or if the acrylic is lumpy, uneven, or lifting significantly, the best solution is often to remove the acrylic and start fresh. It’s truly better to invest a little more time now than to have an unsatisfactory result or potential issues later. Remember, practice makes perfect, and every redo is a learning opportunity.
While some users might associate bubbles with “greenies” (bacterial growth), it’s important to clarify that bubbles themselves are trapped air, not an infection. “Greenies” occur when moisture gets trapped under lifted acrylic, often caused by poor adhesion which bubbles can contribute to. This distinction helps in understanding the root cause without veering into unnecessary concern.
Here’s a quick reference for common bubbling issues:
Troubleshooting Bubbles: Quick Fixes & When to Redo
| Bubble Type/Issue | Cause (Common) | Quick Fix | When to Consider Redo |
|---|---|---|---|
| Small Surface Bubbles | Overworking, thick top coat, environmental factors | Gently file, apply thin top coat, use polish thinner | Deep or widespread bubbles |
| Bubbles Under Nail Tip | Improper tip application, trapped glue | Gently roll thumb (if fresh glue) | Significant lifting, poor adhesion |
| Deep/Numerous Bubbles | Incorrect ratio, rushed application, poor product | No quick fix | Always |
| Lifting/Peeling with Bubbles | Poor prep (no primer), incorrect ratio, product incompatibility | File loose product, fill (if minor); if “greenie,” air dry and let grow out | Significant lifting, persistent issues, or presence of “greenies” (bacterial growth) |
Conclusion
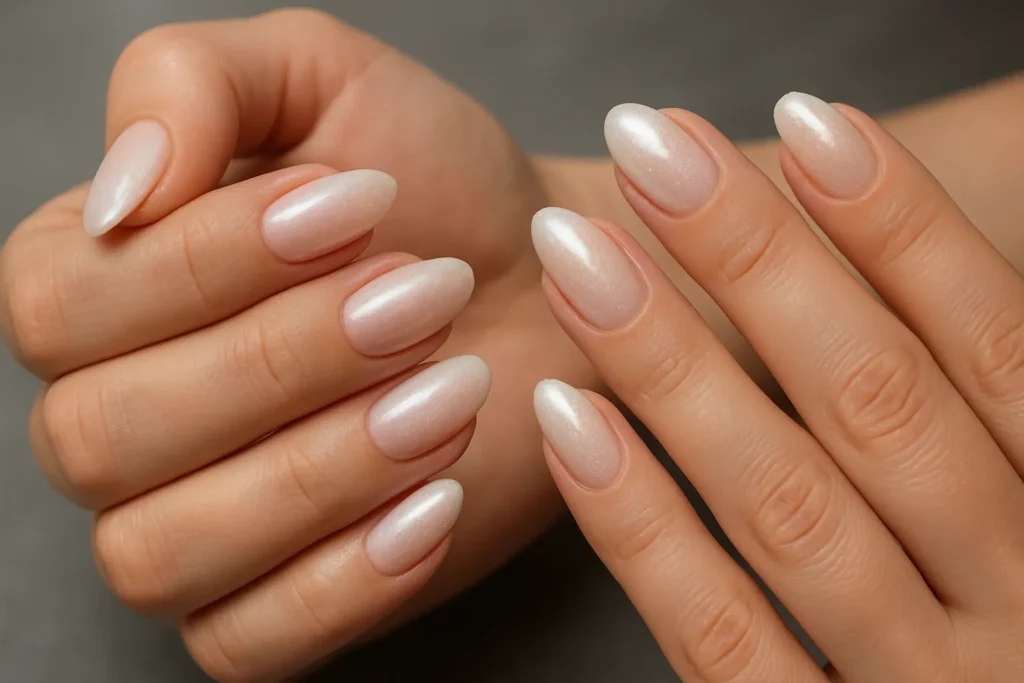
Achieving flawless, bubble-free acrylic nails is absolutely, 100% within your reach. It’s a beautiful journey of understanding the science behind the art, paying attention to those crucial details, and building confidence with every single application. By mastering your nail prep, perfecting your liquid-to-powder ratio, refining your brush technique, embracing a deliberate application pace, choosing high-quality products, optimizing your environment, and truly understanding the role of your finishing coats, you are setting yourself up for stunning success.
Please, don’t be discouraged if you encounter a few bumps (or bubbles!) along the way. Every attempt is a valuable learning experience, bringing you closer to that salon-perfect finish you dream of. So, gather your tools, take a deep breath, and dive into creating beautiful, bubble-free acrylic nails. You’ve got this!