We all adore that polished, strong, and perfectly sculpted look acrylics give us. They’re fantastic for adding length, boosting strength, and creating a flawless canvas for all your nail art dreams. But let’s be honest, those regular salon visits? They add up, don’t they? And the thought of doing it yourself at home can feel a bit… daunting.
Fear not, my beauty-savvy friends! This guide is here to pull back the curtain, demystify the process, and empower you to achieve stunning, salon-quality acrylic nails right from your own space. We’re going beyond just the ‘what’ – we’re diving deep into the ‘why’ and ‘how,’ always with the health of your natural nails as our top priority. Consider this your comprehensive, no-nonsense guide to mastering how to use acrylic powder for nails.
Also Read: Is Dip Powder The Same As Acrylic Powder?
Part 1: Your Acrylic Arsenal – Tools and Products You Actually Need
Before you even think about dipping a brush, you absolutely must gather the right tools and products. Skimping here isn’t just about a less-than-perfect finish; it can genuinely harm your natural nails. Think of it as building a house – you wouldn’t start with flimsy foundations, would you?
The Essential Kit: Your Blueprint for Success
A well-organised, well-equipped workspace is non-negotiable for successful acrylic application. Why? Because acrylics have unique properties that demand specific tools, and precise shaping requires a variety of nail file grits. This isn’t just about having stuff; it’s about having the right stuff.
- Nail Files and Clippers: Forget your everyday nail clippers; acrylics are tough, so you need specialised ones that can handle the job without damaging your tools or your nails. And files? You’ll need a range, because one size definitely doesn’t fit all here. A 240-grit file is your best friend for gently prepping your natural nail surface – think of it as creating the perfect canvas. For shaping that strong acrylic, you’ll reach for a coarser 120-grit file, then refine with a 180-grit. Want that glossy, salon-worthy shine without polish? Finer grits like 1000 and 4000 are your secret weapon.
- Cuticle Pusher and Knife: These aren’t just for show. They’re vital for gently pushing back your cuticles and meticulously scraping away any non-living tissue from the nail plate. Why bother? Because a clean, smooth nail surface is absolutely crucial for strong adhesion. If acrylic touches skin, it will lift, and that’s a recipe for disaster (and potential infection, but more on that later!).
- Nail Primer and Dehydrator: These two are the unsung heroes of longevity. A nail dehydrator sweeps away all those natural oils and moisture from your nail plate, creating a perfectly dry, clean base. Then, the primer steps in to create an invisible, super-sticky bond between your natural nail and the acrylic. Skipping these? You’re practically inviting lifting, and nobody wants that. Their proper use is the linchpin for a long-lasting manicure.
- Acrylic Nail Tips and Glue: If you’re adding length, tips are your go-to. The key here is finding tips that perfectly match your natural nail’s curve and width. If they don’t, file them down – a slightly too-small tip often looks far more natural than one that’s too wide. And glue? Less is more, darling. Apply it sparingly to avoid any contact with your skin.
- Acrylic Liquid (Monomer) and Powder: These are the dynamic duo that create your acrylic nail. But here’s a non-negotiable safety alert: the choice of monomer is critical. We’ll get into the nitty-gritty of why in a moment.
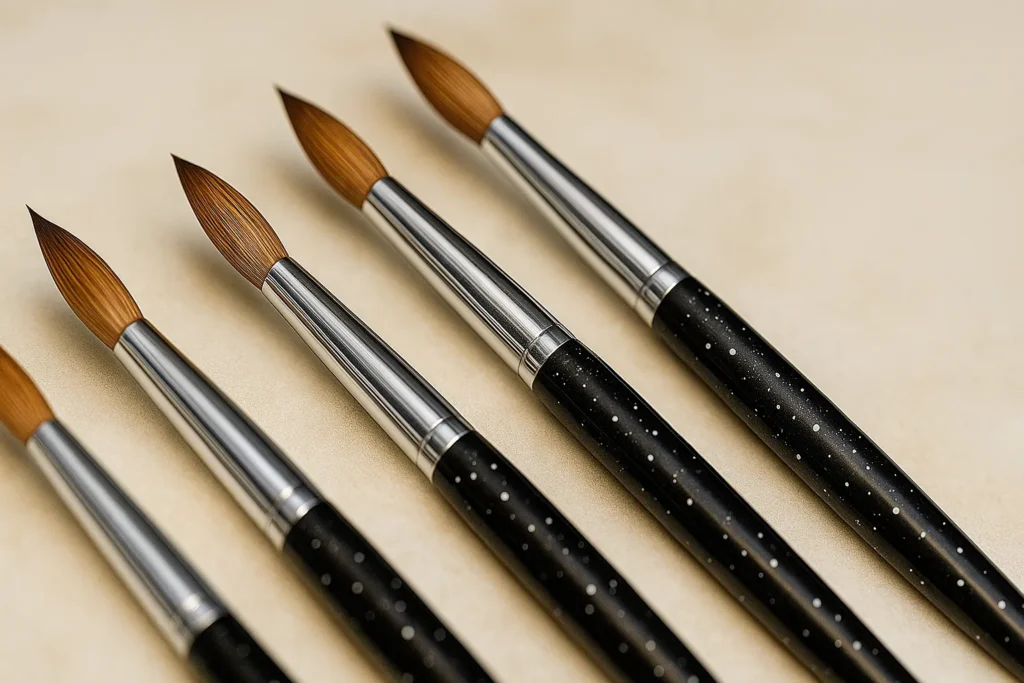
- Acrylic Brush: This isn’t just any brush; it’s your magic wand. A high-quality acrylic brush is indispensable for picking up and applying that perfect acrylic bead. For beginners, an oval, sharp size 8 brush is often recommended. Why size 8? It offers that sweet spot of control and product pickup, making for smoother, more forgiving application. And a pro tip: keep it clean! Wipe your brush on a paper towel between every stroke to stop acrylic from hardening in the bristles.
- Dappen Dish: You’ll need separate little dishes for your liquid monomer and acrylic powder. This keeps things tidy, prevents cross-contamination, and makes product management a breeze.
- Dusting Brush: After all that filing, you’ll have dust. A small dusting brush is brilliant for sweeping away any debris, keeping your workspace and nails pristine. This prevents dust from getting trapped in your acrylic, which can lead to unsightly bubbles or lifting.
- Top Coat: This is your manicure’s bodyguard. A protective top coat is the final, crucial step to seal and protect your finished acrylics. It boosts durability, adds a gorgeous shine, and acts as a shield against smudges and chips.
- Cuticle Oil: Post-application, your cuticles will thank you for a good dose of cuticle oil. It nourishes them and your nail beds, promoting overall nail health and giving your manicure that truly professional, hydrated finish.
- Training Finger/Hand: If you’re new to this, please, please practice on a training finger or hand first. This allows you to develop your technique, get a feel for the product, and make all your beginner mistakes without risking damage to your precious natural nails. It’s like learning to drive in a simulator before hitting the road!
- Ventilation: This isn’t a suggestion; it’s a must. Acrylic products release strong chemical fumes, and working in a well-ventilated area is paramount. Why? Because adequate airflow protects your respiratory system and overall health from hazardous chemical exposure . Open those windows, use a fan, or invest in a proper ventilation system. Your lungs will thank you.
Here’s a quick checklist to make sure you’ve got everything sorted:
| Tool/Product | Purpose | Why it’s Essential |
|---|---|---|
| Nail File (various grits) | Shaping, buffing, removing shine | Creates ideal surface for adhesion; shapes acrylic precisely |
| Nail Clippers (for acrylics) | Trimming natural nails & tips | Regular clippers are ineffective; prevents natural nail overlap |
| Cuticle Pusher & Knife | Prepping cuticle area | Creates smooth surface, prevents lifting by keeping acrylic off skin |
| Nail Dehydrator | Removes oils & moisture | Crucial for strong, long-lasting adhesion; prevents lifting |
| Nail Primer (acid-free) | Enhances adhesion | Creates ideal bonding surface; prevents chipping/peeling |
| Acrylic Liquid (EMA) | Activates powder for sculpting | Forms the acrylic; EMA is the only safe choice |
| Acrylic Powder | Forms the nail structure | Combines with liquid to create the nail; various types for different looks |
| Acrylic Brush (size 8 oval) | Picking up & applying bead | Provides control & product pickup for smooth application |
| Dappen Dish | Holding liquid & powder | Keeps products separate & accessible |
| Dusting Brush | Removes filing dust | Keeps workspace & nails clean, prevents bubbles/lifting |
| Protective Top Coat | Seals & protects acrylic | Extends wear, adds shine, prevents smudging/chipping |
| Cuticle Oil | Nourishes cuticles | Hydrates, promotes healthy nail beds, adds professional finish |
| Training Finger/Hand | Practice platform | Essential for beginners to master technique without damaging natural nails |
| Ventilation (Open windows, fan) | Disperses toxic fumes | Protects respiratory system & overall health from chemical exposure |
The Monomer Truth: EMA vs. MMA – A Non-Negotiable Choice
This is where we get serious about safety. The monomer you choose is a critical decision that directly impacts your nail health and overall well-being.
- The Dangers of MMA (Methyl Methacrylate): Let’s be crystal clear: Methyl Methacrylate (MMA) is a chemical you must avoid in nail products. Full stop. It was originally used in dental and bone cements, and while it found its way into the nail industry in the 1970s, it quickly became a problem. The FDA received countless complaints because MMA causes profound damage to natural nails and surrounding skin. We’re talking yellowing, permanent nail loss, numbness, irritation, and even air blockage. Its extreme hardness makes removal incredibly difficult, often leading to severe damage to your natural nail bed, cracking, and breakage. But it’s not just about your nails. MMA poses broader health risks, with potential links to miscarriages. The dust and fumes released during application and filing are hazardous, contributing to respiratory issues and dermatitis. That strong, unpleasant, almost sickly sweet chemical smell? That’s a characteristic indicator of MMA. Despite the dangers and FDA warnings, MMA sadly still pops up in some salons, often in areas where cost is prioritised over safety. For at-home users, unknowingly buying MMA products can lead to self-inflicted harm. So, be vigilant, read labels, and demand safe products.
- Why EMA (Ethyl Methacrylate) is the Only Option: Now, for the good news. Ethyl Methacrylate (EMA) is the approved, safer, and healthier alternative for acrylic nails. The Cosmetic Ingredient Review (CIR) has explicitly given EMA the green light for use in nail products. EMA dramatically reduces the health risks associated with MMA. It adheres beautifully to the nail plate, meaning less chance of dents or thinning. It’s gentler on your nails, allowing them to maintain their natural state without that uncomfortable tightness often felt with MMA. Its inherent flexibility helps reduce the risk of breakage and injury. Plus, EMA is far less likely to cause irritation or severe allergic reactions, making it a much better choice, especially if you have sensitive skin. EMA-based acrylics are also much gentler to remove, and many EMA solutions are formulated to be low-odor or even lightly scented, a welcome relief from the traditional chemical smell. So, when you’re shopping, always, always check for “Ethyl Methacrylate” on the ingredient list and run a mile from anything that says “Methyl Methacrylate.” If it smells overwhelmingly strong, it’s a red flag.
Also Read: How Long Do Acrylic Nails Last
Powder Power: Understanding Your Acrylic Options
The type of acrylic powder you choose isn’t just about colour; it significantly influences the final look and feel of your manicure. High-quality powders are finely milled, have strong pigmentation, and mix to a medium consistency with monomer, ensuring smooth application and durability .
- Clear Acrylic Powder: This is your foundational workhorse, a true staple in any nail kit. Its transparent finish makes it absolutely perfect for encapsulating fun elements like glitter, dried flowers, or even tiny decals, letting your intricate designs truly shine through. It’s also fantastic as a sturdy base for building extensions or creating a glossy overlay that makes any underlying colour pop.
- Pink and White Acrylic Powder: Hello, classic French manicure! These powders are the dynamic duo for that timeless, elegant look. The white powder gives you those crisp, vibrant tips, while the pink powder provides a soft, natural-looking base that beautifully mimics your natural nail bed. They come in various opacity levels, so you can customise your look from sheer to full coverage.
- Nude Acrylic Powder: For that effortlessly chic, natural vibe, nude powders are your best friend. They offer incredible versatility, ranging from light beige to deep mocha, providing a seamless, understated coat for minimalist designs or a neutral canvas for more elaborate art. These tones flatter a wide range of skin tones and transition beautifully from day to night.
- Cover Acrylic Powder: Got imperfections? Discoloration, ridges, or chips on your natural nail bed? This opaque powder is designed to conceal them beautifully. Available in natural shades like beige, peach, and mauve, its thicker consistency makes it brilliant for crafting seamless ombre designs, extending the nail bed, or achieving a flawless, structured finish.
- Colored Acrylic Powder: Ready to unleash your inner artist? Colored acrylic powders offer an expansive, vibrant palette. From electric neons to sophisticated jewel tones, they allow for incredible artistic freedom and elaborate designs without the fuss of separate polish. They’re especially perfect for seasonal, holiday, or special occasion nail looks.
- Glitter Acrylic Powder: If sparkle is your jam, these are for you! Glitter acrylic powders come in chunky or fine variations, creating dazzling, multi-dimensional effects. They pair beautifully with encapsulated nail art. Just remember to use a light hand during application for a smooth finish, and always seal with a high-quality topcoat to lock in that sparkle and prevent chipping.
Here’s a quick overview of your powder options:
| Powder Type | Characteristics | Ideal Application | Pro Tip |
|---|---|---|---|
| Clear | Transparent finish | Encapsulating nail art, building extensions, shiny overlays | Use as a protective layer for glitter to prevent smudging |
| Pink & White | White for crisp tips, pink for natural base (various opacities) | Classic French manicures, timeless polished look | Focus on smooth blending for a polished gradient |
| Nude | Natural tones (light beige to deep mocha) | Natural, understated look, minimalist designs, neutral base for art | Mix with matching liquid monomer for smooth, bubble-free application |
| Cover | Opaque, natural shades (beige, peach, mauve), thicker consistency | Concealing imperfections, ombre designs, extending nail beds, structuring nails | Layer gently with tapping motion for smooth ombre gradients |
| Colored | Wide range of vibrant shades | Elaborate designs, artistic freedom, seasonal/holiday looks | Always top with a clear finish to lock in vibrancy and prevent fading |
| Glitter | Chunky or fine glitter | Dazzling effects, encapsulated nail art | Use a light hand for smooth finish; encapsulate with clear acrylic to preserve shine |
Part 2: The Prep Work – Laying the Flawless Foundation
Listen up, because this is arguably the most critical stage for achieving long-lasting, healthy acrylic nails. Seriously, if you cut corners here, you’re setting yourself up for premature lifting, potential damage, and a whole lot of frustration. Don’t say I didn’t warn you!
Sanitation: The Absolute First Step (No Excuses!)
Before you even think about touching a nail, thorough sanitisation of your hands and all your tools is paramount. Wash your hands meticulously with warm water and soap, paying special attention to scrubbing around and under the nail plate to banish every speck of dirt and debris. This isn’t just about looking clean; it’s your primary defence against nasty infections. The dreaded “greenies” (that’s Pseudomonas bacteria, by the way) and fungal infections are directly linked to trapped moisture and dirty tools or nails. So, sanitising your hands and disinfecting your tools between uses isn’t just a good idea – it’s a non-negotiable shield against painful and potentially long-term health issues.
Nail Prep: Trim, Shape, Buff, and Care for Those Cuticles
- Removing Old Polish and Trimming: Any existing nail polish needs to go, and make sure it’s an acetone-based, oil-free remover. Then, your natural nails need a serious trim – clip them as short as possible, leaving just a few millimetres. Why? This creates a stable, strong foundation for your tips and prevents any awkward overlap with the acrylics.
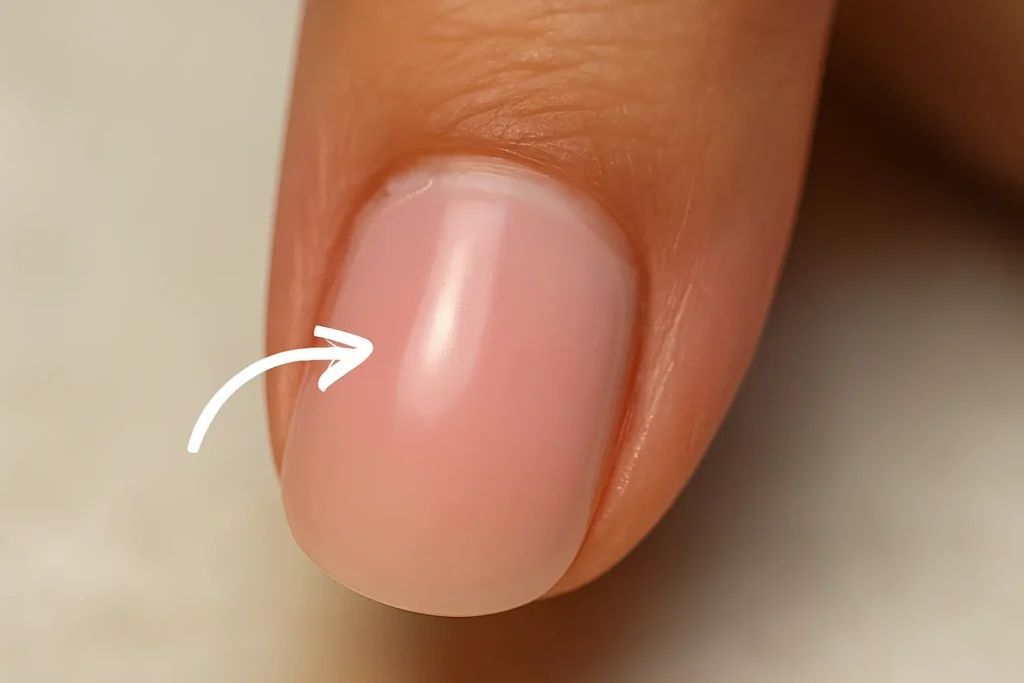
- Buffing the Surface: Now, take a soft nail file and lightly buff the entire surface of your nail. The goal here isn’t to thin your nail, but to remove its natural shine and create a slightly rough texture. Think of it like priming a wall before painting – that “roughed-up” surface gives the acrylic something to really grip onto, ensuring stronger adhesion and extending your manicure’s wear time .
- Cuticle Care: Why Dry is the Acrylic’s Best Friend: Gently push back your cuticles with a cuticle pusher. This is crucial because the acrylic must adhere solely to the nail plate, not your skin, to prevent lifting. And here’s a vital expert insight: for acrylic applications, a dry manicure is superior to a wet one. Why? Because soaking your nails causes the natural nail to absorb water and expand. As your nail then dries and shrinks, this expansion and contraction can lead to tiny separations, causing the acrylic to lift prematurely. Dry manicures, on the other hand, allow you to accurately identify and remove all that dry skin around the nail, resulting in a cleaner, more even nail plate that’s perfectly prepped for adhesion. So, avoid water exposure to your nails immediately before acrylic application – it’s a small step that makes a huge difference in adhesion and preventing that dreaded lifting.
Dehydration and Priming: The Secret to Long-Lasting Adhesion
- Dehydration: After buffing, grab your nail dehydrator (or isopropyl alcohol) and give your nail plate a thorough cleanse and dry. This step is paramount. If any residual oils, dirt, or moisture remain, the acrylic simply won’t adhere properly . It’s like trying to stick a sticker to a greasy surface – it just won’t hold!
- Priming: Once dehydrated, apply a nail primer. This product creates the ideal bonding surface for the acrylic to grip securely . I strongly recommend an acid-free primer (like Mia Secret’s Xtrabond Primer). Why acid-free? They’re much gentler on your natural nails and cuticles, significantly reducing the risk of chemical burns if you’re a little heavy-handed. Apply primer sparingly – a little goes a long way. The proper application of dehydrators and primers is the absolute linchpin for strong, long-lasting adhesion. Without them, lifting is almost guaranteed . This isn’t just a step; it’s the foundation of your entire manicure’s integrity.
Part 3: The Application – Mastering the Acrylic Bead
This is where the magic happens, where your acrylic nail truly takes shape. But don’t rush it, darling. Precision and practice are your best friends here.
Applying Tips: Sizing and Securing
If you’re using nail tips for added length, getting the size right and securing them properly is crucial.
- Sizing: Pick the correct size tip for each nail. If it’s not a perfect fit, file it down. A little insider tip: a slightly too-small tip often looks more aesthetically pleasing and natural than one that’s too large. The bottom edge of the tip should sit perfectly centred halfway down your natural nail.
- Gluing: A small dab of acrylic nail glue, applied from side to side on the tip, is all you need. Then, place the tip onto your natural nail and hold it firmly for 5-10 seconds with light pressure to prevent any sliding. Work one nail at a time to prevent the glue from drying prematurely.
- Trimming: Once those tips are securely attached, grab your clippers and cut them to your desired length and shape. If you accidentally apply a tip crookedly (it happens!), don’t panic. Soak it in water for a few minutes to loosen the glue, then dry your nail and reapply. Easy fix!
Mixing the Acrylic: Achieving the Perfect Liquid-to-Powder Ratio
This is often considered the trickiest part for beginners, but it’s absolutely fundamental for the strength, workability, and final appearance of your acrylic. An incorrect ratio, whether too wet or too dry, directly impacts your application, potentially leading to bumps, unevenness, cracking, or a weak structure. Conversely, a well-balanced ratio ensures a smooth application and a strong, durable bond.
- Loading the Brush: Dip your acrylic brush into the monomer, making sure all bubbles are released. Then, gently wipe any excess liquid against the side of the dappen dish. Now, run the brush through the acrylic powder to pick up a small, moist ball on its tip.
- The “3-Second Rule”: Here’s your golden rule for consistency: a properly mixed bead should settle into a smooth, creamy texture within approximately three seconds . If it’s too runny (too much liquid) or too powdery/crumbly (not enough liquid), you need to adjust your ratio . This is where practice truly makes perfect . Don’t get discouraged – it’s a skill you’ll hone!
- Brush Maintenance: This is a non-negotiable for smooth application and brush longevity: wipe your brush on a paper towel between every single stroke, especially when you’re starting out. This prevents acrylic from sticking to and hardening within the bristles, keeping your brush in top condition and ensuring smooth, effortless application.
The Art of Application: Building the Nail, Layer by Layer
- Strategic Placement: Start your application at the “smile line” – that’s the bottom edge of your acrylic tip where it meets your natural nail. Flatten the acrylic bead over this line and brush it down towards the tip, spreading it quickly and smoothly to create a seamless transition.
- The Apex and Cuticle Area: Now, pick up a second bead and place it near the cuticle, but here’s the crucial bit: it is critical that it does not touch the cuticle. Use small circular movements to bring the acrylic closer to the cuticle without flooding the area, then brush it down towards the first bead, blending smoothly. Why is not touching the cuticle so important? Because your skin naturally sheds, and natural oils prevent proper adhesion. If acrylic is applied to the cuticle, it will lift, creating a perfect entry point for moisture, which can then lead to bacterial or fungal infections. This is a fundamental rule for both manicure longevity and, more importantly, your nail health. The acrylic layer should be thin near the cuticle and gradually thicken towards the middle and ends of the nail, creating that strong, beautiful apex.
- Layering for Strength and Smoothness: Instead of trying to apply one thick, unwieldy layer, build your nail in thinner, successive layers . This technique helps you maintain an even surface while progressively building strength . Apply light, even pressure with your brush, almost “floating” it over the nail surface . This prevents bumps and ensures a smooth finish.
Drying and Curing: Patience is Key
Acrylics are air-dried, and they typically need about 10 minutes to set completely. To check if they’re ready, gently tap the surface of the nail with the handle of your acrylic brush. A distinct clicking sound tells you the acrylic has fully set and is ready for the next step. Don’t rush this drying period – patience now means perfection later.
Part 4: The Finishing Touches – Shaping, Shining, and Sealing Your Masterpiece
Once your acrylic structure is built and dry, it’s time to sculpt and polish those nails to absolute perfection. This is where your vision truly comes to life!
- Filing and Buffing: Sculpting the Desired Shape
- Shaping: Grab a coarse nail file (like a 180-grit) and start shaping your tips to your desired length and contour. Be mindful not to file too forcefully, as this can warp the shape of the acrylic.
- Smoothing: Now, switch to a finer grit file (a 240-grit is next) to smooth away any scratches left by the coarser file. Want that glass-like shine? Progress to 1000 and then 4000-grit files. Proper buffing with these finer grits can make your nails as shiny as if you’d applied a top coat. It’s all about that smooth transition!
- Dusting: After all that filing, you’ll have a fine powder of nail dust. Use a dusting brush to meticulously remove every speck. Why? Because lingering dust can mix with your nail polish, creating an uneven, bumpy finish – and we’re aiming for flawless, aren’t we?
- Adding Color and Top Coat: The Grand Finale
- Color Application: If you’re adding colour, apply your chosen acrylic shade just like you would regular nail polish. For a more opaque finish, apply multiple thin coats, allowing each one to dry thoroughly before the next. Patience is a virtue here!
- Protective Top Coat: This is the final, essential step. Apply a high-quality protective top coat. This layer seals your acrylic, locks in that gorgeous colour, imparts a brilliant shine, and significantly extends your manicure’s longevity by preventing chips and scratches. For beginners, the Urban Graffiti Top Coat is often recommended for its versatility. It’s the ultimate shield for your hard work!
Part 5: Troubleshooting and Triumphs – Common Issues and Their Resolution
Even the most seasoned nail enthusiasts hit a snag now and then. Understanding common problems and knowing how to fix them is an integral part of your learning journey. Don’t worry, we’ve got solutions!
Lifting: Causes, Prevention, and Gentle Fixes
- What is Lifting? Lifting happens when your applied acrylic separates from your natural nail, creating a visible gap . This isn’t just a cosmetic annoyance; it’s a serious concern. That gap can trap moisture, creating a perfect breeding ground for bacteria or fungal infections . So, addressing lifting promptly isn’t just about aesthetics; it’s about protecting your nail health.
- Causes: The usual suspects include improper nail preparation (think oils, dust, or moisture on the nail preventing a secure bond), incorrect application (like applying acrylic too thickly near or flooding the cuticle area), a poor powder-to-liquid ratio leading to a weak bond, or any moisture on the nail before application .
- Prevention: The key is meticulous preparation: ensure nails are clean, dry, oil-free, buffed, and cuticles are pushed back . Maintain that correct powder-to-liquid ratio, apply a thin layer at the cuticle, and meticulously seal the edges of your acrylic .
- Gentle Fixes (for minor lifting):
- Cleanse and Dehydrate: First, thoroughly clean the exposed natural nail with a dehydrator or isopropyl alcohol . This removes any lingering oils or bacteria.
- Remove Loose Edges: Gently lift and trim any loose acrylic edges using a sanitised cuticle pusher . Focus only on the lifted part to avoid further weakening.
- Blend: Lightly file the lifted area with a fine-grit file (around 180 grit works perfectly) at a 45-degree angle . This helps to seamlessly blend it with the rest of the nail, creating a smooth transition.
- Apply Cover Powder/Glue: A small amount of cover acrylic powder can be applied to fill any gaps and blend the repair . For very minor lifting, a few drops of nail glue can secure the lifted section .
- Buff and Reinforce: Buff the repaired area for smoothness . For extra durability, you can reinforce it with a thin layer of hard gel or builder gel, cured under an LED/UV lamp .
Bumps and Unevenness: Achieving a Salon-Smooth Finish
- Causes: Those annoying bumps and uneven spots often stem from an incorrect product ratio (too much liquid or powder), inadequate nail preparation, inconsistent brush pressure during application, or applying layers that are simply too thick .
- Prevention: The secret? Master that “creamy” bead consistency we talked about . Proper nail preparation (clean, buffed, primed nails) is your foundation . When applying, use light, even pressure with your brush, almost “floating” it over the nail . And remember, building the nail in thinner, successive layers, blending each into the previous one, is key to a smooth finish . Common pitfalls like air bubbles (often caused by overworking the acrylic) or acrylic drying too fast (in warm environments, requiring smaller beads and quicker blending) can also be avoided with these techniques .
- Fixes: Minor unevenness can be corrected by gently filing with a high-grit file to even out the surface, followed by buffing for a glossy finish . Just be careful not to over-file and inadvertently weaken the acrylic .
“Greenies” and Fungal Infections: Prevention is the Best Defense
- What are “Greenies”? This green discoloration is caused by Pseudomonas bacteria, which absolutely loves warm, damp, and nearly oxygen-free environments – precisely what you get under lifted or poorly applied artificial nails .
- Causes of Fungal Infections: Fungal infections are often caused by moisture trapped under loose acrylics, using dirty tools, prolonged wear of acrylics without proper maintenance, or tiny cracks and lifted edges that act as entry points for fungi .
- Signs of Unhealthy Nails: Your natural nails will tell you when they’re unhappy. Look for discoloration (especially green or yellow), peeling, splitting, soreness, sensitivity to touch, the appearance of white patches, or a thinning nail plate . If you see these, it’s time to pay attention.
- Prevention is Paramount:
- Keep Nails Dry and Clean: This is your number one rule. Avoiding prolonged water exposure and thoroughly drying your hands after washing is crucial to prevent water from getting under the acrylic and fostering bacterial/fungal growth . Regular cleaning with mild soap and warm water is also important.
- Proper Application: Ensure your acrylics are applied correctly, without air bubbles and with properly sealed edges . This prevents moisture trapping.
- Disinfect Tools: Meticulous disinfection of all your nail tools is essential to prevent the spread of bacteria and fungi .
- Fix Lifting Immediately: Any signs of lifting must be addressed promptly . Those gaps are prime entry points for bacteria.
- Take Breaks: While nails don’t literally “breathe,” they absolutely benefit from periodic breaks from acrylics to recover and “reset”. This helps prevent long-term thinning or damage.
- Avoid Sharing Tools: To prevent cross-contamination, never share your nail tools.
- When to Seek Professional Help: If you observe persistent discoloration, unpleasant odours, tenderness, or any signs of infection, the acrylic must be removed immediately . Then, consult a dermatologist or a licensed nail technician . It is imperative never to apply new acrylic over unhealthy nails. Infections can range in severity, with mild cases taking 6-8 weeks to heal and severe cases potentially requiring 6-12 months of medical treatment . Don’t mess with your health!
Here’s a quick reference for common acrylic nail problems and their solutions:
| Problem | Causes | Prevention | Fix/Solution |
|---|---|---|---|
| Lifting | Improper nail prep (oils, moisture), thick cuticle application, poor liquid-to-powder ratio | Thorough prep (clean, dry, buff, prime), thin cuticle application, correct ratio, seal edges | Clean, dehydrate, gently file lifted area, apply cover powder/glue, buff, reinforce with gel |
| Bumps/Unevenness | Incorrect product ratio, poor prep, inconsistent brush pressure, thick layers | Master “creamy” bead, proper prep, light/even brush pressure, build in thin layers | Gently file with high-grit file, then buff for smoothness |
| “Greenies”/Infection | Trapped moisture under lifted acrylic, dirty tools, prolonged wear, small cracks | Keep nails dry/clean, proper application (no bubbles, sealed edges), disinfect tools, fix lifting immediately, take breaks | Remove acrylic immediately, keep area clean, use antifungal treatments; consult professional for severe cases |
| Cracking/Breakage | MMA monomer, rigid acrylics, using nails as tools, improper application (too thin/thick in areas) | Use EMA monomer, build in layers for strength, avoid using nails as tools | Professional repair recommended; if minor, clean, dehydrate, apply small bead to crack, file, seal |
| Air Bubbles/Pits | Overworking acrylic with brush, too much liquid | Do not overwork the acrylic, tap gently, ensure correct liquid-to-powder ratio | File down gently to remove pits, reapply small bead if needed, buff smooth |
| Acrylic Sticking to Brush | Not wiping brush between strokes | Wipe brush on paper towel after every bead placement; dip in liquid and wipe if still wet | Soak brush in monomer to loosen hardened acrylic, then clean thoroughly |
Part 6: Living with Acrylics – Maintenance and Longevity
You’ve put in the work to create a beautiful set of acrylic nails, and now it’s time to keep them pristine and, crucially, ensure the health of your natural nails underneath. This isn’t just about looking good; it’s about smart, long-term nail care.
Daily Care: Keeping Them Clean, Dry, and Hydrated
- Keep Dry and Clean: This is paramount for preventing the growth of bacteria and fungi. After washing your hands, dry them thoroughly to prevent water from becoming trapped under the acrylic, which, as we’ve discussed, can lead to lifting and infections. Regular cleaning with mild soap and warm water is also important.
- Use Cuticle Oil Regularly: Daily hydration of your cuticles and nail beds is essential. This simple practice helps keep your acrylics securely in place, prevents dryness, and promotes overall nail health. Think of it as a daily dose of nourishment for your nail area.
Regular Fills: The Acrylic Lifeline
As your natural nails grow, a small gap will form between your cuticle and the applied acrylic. Regular fills, typically every 2-3 weeks, are absolutely crucial for maintenance. Why? Because these fills prevent excessive lifting, which, as you now know, is a primary entry point for moisture and bacteria, potentially leading to infections. Regular maintenance ensures your nails remain strong, beautiful, and healthy. Don’t skip your fill appointments – they’re your manicure’s lifeline!
Protecting Your Investment: Gloves and Non-Acetone Removers
- Wear Gloves for Chores: When you’re tackling tasks that involve harsh chemicals (like cleaning products) or prolonged water exposure (hello, dishwashing!), wearing gloves is highly recommended. These chemicals can weaken the acrylic material and reduce its longevity. It’s a small habit that makes a big difference.
- Use Non-Acetone Polish Remover: Acetone is a powerful solvent that’s known to break down acrylic material. So, when it’s time to change your nail polish, always, always choose a non-acetone remover to protect the integrity of your acrylics.
- Avoid Using Nails as Tools: Your beautiful acrylic nails are designed for aesthetic enhancement, not for opening cans, prying objects, or scratching labels. Such actions can cause severe damage to both the acrylic and, more importantly, your underlying natural nail. Treat them with care!
When to Take a Break: Listening to Your Natural Nails
While nails don’t “breathe” in the traditional sense (they don’t have lungs, after all!), they absolutely benefit from periodic breaks from acrylics to recover. This isn’t about deprivation; it’s about proactive health management, aiming to prevent long-term thinning or damage.
- Signs It’s Time for a Pause: Your natural nails will give you clues. Indicators that they need a break include a natural nail that’s no longer bright pink and smooth, peeling, splitting, soreness, sensitivity to touch, the appearance of white patches, or yellowing after acrylic removal .
- Frequency: There’s no one-size-fits-all timeframe for breaks, but taking regular pauses – even just once every few months – allows you to assess the health of your natural nails and address any signs of damage early. This practice reinforces a thoughtful and health-conscious approach to beauty, empowering you to make informed decisions for your long-term nail well-being.
Part 7: The Grand Farewell – Safely Removing Acrylics at Home
For the preservation of your natural nail health, it is absolutely imperative to avoid picking, pulling, or biting off acrylics. These actions are the quickest routes to severe damage, including thinning, peeling, and even holes in your nail plate. Patience, my dear, is truly crucial during the removal process.
The Acetone Soak Method: Step-by-Step for Safe Removal
The acetone soak method is widely considered the safest and most effective way to remove acrylic nails at home without causing damage to your natural nails .
- Required Materials: You’ll need nail clippers, a nail file, 100% acetone nail polish remover (and yes, it must be pure acetone, not those diluted drugstore versions ), petroleum jelly or cuticle oil, cotton balls or pads, and aluminium foil .
- Step 1: Clip and File Down: Start by using nail clippers to cut the excess length from your acrylics, making them as short as possible, ideally down to where your natural nail begins . Then, use a nail file to thin the acrylic layer on top . Why? This reduces the surface area, allowing the acetone to penetrate more easily and work its magic . Be cautious here – avoid filing too deep and damaging your natural nail .
- Step 2: Protect the Skin: Apply a generous amount of petroleum jelly or cuticle oil to the skin surrounding your nail beds and fingertips . Acetone is highly drying, and this step is vital for protecting your skin from irritation and dehydration .
- Step 3: Saturate and Wrap: Saturate a cotton ball or lint-free pad with 100% acetone and place it directly on top of the thinned acrylic nail, ensuring complete coverage . Then, wrap a piece of aluminium foil tightly around your finger to secure the cotton ball and create a warm, sealed environment that helps the acetone work more efficiently . Repeat this process for all nails.
- Step 4: Wait Patiently: This phase requires patience, and I mean it! Allow your nails to soak for at least 20 minutes . For more stubborn acrylics, you might need 30-40 minutes or an additional 5-10 minutes of soaking . Resist the urge to peek or rush!
- Step 5: Gently Remove: After the soaking period, remove one foil wrap. The acrylic should be soft and gummy enough to be gently flaked or scraped off with a cuticle pusher . If the acrylic remains hard, re-wrap the nail and soak for a longer duration. Never, ever apply force . If the cotton balls start to dry out, re-saturate them with acetone .
What NOT to Do: The Dangers of Picking and Forcing
- Never Pull or Bite: I cannot stress this enough. Forcefully pulling off acrylics will inevitably rip layers of your natural nail plate, leading to severe damage, thinning, and potentially even painful holes. It’s simply not worth it.
- Avoid Force: If the acrylic isn’t coming off easily, it’s a clear sign that it needs more soaking time . Forcing the removal will only result in damage to your natural nail.
- Be Wary of “Quick Fix” Hacks: Some viral methods, like using dental floss, can cause significant damage if performed incorrectly or prematurely . The safest at-home method remains the acetone soak, executed slowly and gently . Trust the process, not the TikTok trend.
Post-Removal Nail Care: Nurturing Natural Nails Back to Health
The recovery phase following acrylic removal is an integral part of your overall acrylic nail journey. Proper removal is just the first step in a necessary recovery process. Think of it as a spa day for your nails!
- Keep Them Short: Trim your natural nails short to minimise breakage and give them the best chance to strengthen.
- Hydrate Extensively: Acetone is incredibly dehydrating. Immediately after removal, apply cuticle oil and a rich hand cream liberally and frequently. Soaking your nails in nourishing oils like olive oil or coconut oil can also work wonders. Hydration is key to recovery!
- Nail Strengtheners: Incorporate a daily nail strengthening treatment. Look for products containing wheat protein, calcium, or keratin-repairing technology to aid in recovery. OPI Nail Envy is a widely recognised option for a reason.
- Healthy Diet: Support nail growth and strength from within. This means focusing on a diet rich in biotin and omega fatty acids, and maintaining adequate hydration. Your nails reflect your overall health!
- Allow for Recovery: Give your natural nails sufficient time to recover before reapplying acrylics. If you see signs of damage (discoloration, peeling, thinning), focus on repairing them until your nails feel resilient and healthy. This thoughtful approach ensures your long-term nail well-being.
Conclusion
You’ve now got the full scoop on how to use acrylic powder for nails at home – from building your essential kit and understanding the crucial difference between EMA and MMA, to mastering application techniques, troubleshooting common issues, and ensuring the ongoing health of your natural nails through proper maintenance and safe removal.
The journey to achieving salon-quality results at home demands respect for the process, a good dose of patience, and an unwavering commitment to hygiene and correct technique. Don’t be disheartened by initial challenges; they’re a normal part of the learning curve, and consistent practice will lead to incredible results. Always remember to work in a well-ventilated area, start with small acrylic beads, and consistently prioritise the health and integrity of your natural nails.
Armed with this knowledge, you are now empowered to create beautiful, strong nails safely and effectively, fostering a sustainable and truly empowering approach to your nail aesthetics. Go forth and create!