If you’ve ever had a gel manicure come off way too early, you’re not the only one. The key to a long-lasting salon gel mani is more than the polish or lamp – it’s all about the prep work. In this friendly guide, I’ll show you how to prep nails for gel polish so your color stays chip-free and beautiful for weeks. We’ll cover everything from nail prep steps and natural remedies to product recommendations and myths. Grab your nail file, and let’s get that lasting, beautiful shine with gel polish!
Why Nail Prep Matters for Gel Polish Longevity
Correct nail preparation is the key to a long-lasting gel manicure. Not prepping your nails could be the difference between a gel polish that lasts two weeks or more and one that lifts or chips in a few days. So, why does prep matter? Gel polish is applied to a surface, so you need a clean, oil-free surface with some texture for the gel polish to adhere properly. If you attempt to apply gel over nails that haven’t been properly prepared – let’s say they have some natural oils, lotion residue, and inconsistent texture – the polish cannot form a bond. There is a significant difference between proper preparation work and none. Without proper preparation, your gel is likely to peel or chip, and it will look less than professional.
On the other hand, proper preparation gives you not only a great, who-cares manicured look but also protects your nails. Good preparation is essential for maintaining healthy nails, especially if you frequently keep them polished. Think of nail prep like caring for canvas before painting – a little effort on the front end will keep your nails happy, healthy, and looking great.
How to Do Nail Art with Gel Polish (Step-by-Step for Beginners)
Nail Prep Steps: How to Prep Nails for Gel Polish
Ready to transform your at-home manicure routine? Follow these nail prep steps to set your nails up for gel polish success. Learning how to prep nails for polish (especially gel) will ensure your hard work lasts. Let’s break it down:
- Start with Clean, Bare Nails: Use a gentle nail polish remover to remove any old polish. If you have regular polish, use a non-acetone remover to be gentler on your nails. Gel polish from your last manicure should be properly soaked off (never peeled!). Once all polish has been removed, please wash your hands with soap and water, then dry them thoroughly. Clean, dry nails are crucial – any leftover moisture or pigment can ruin your new gel. (Fun fact: even natural oils on your nails can impact the polish’s adherence to your nails; it is all about cleanliness)
- Nail Shape (Clip & File): Decide on nail shape – square, round, almond, or whatever! If you want to remove length, use nail clippers to cut to shape, then use a nail file (180 grit is a good mid-grade) to refine the shape. File in one direction toward the center of the nail when shaping, rather than sawing back and forth, to help prevent splits. This step is essentially about refining edges and achieving a shape you love. A correctly shaped nail will look great, but it will also help prevent snags or breaks that affect the longevity of your gel manicure!
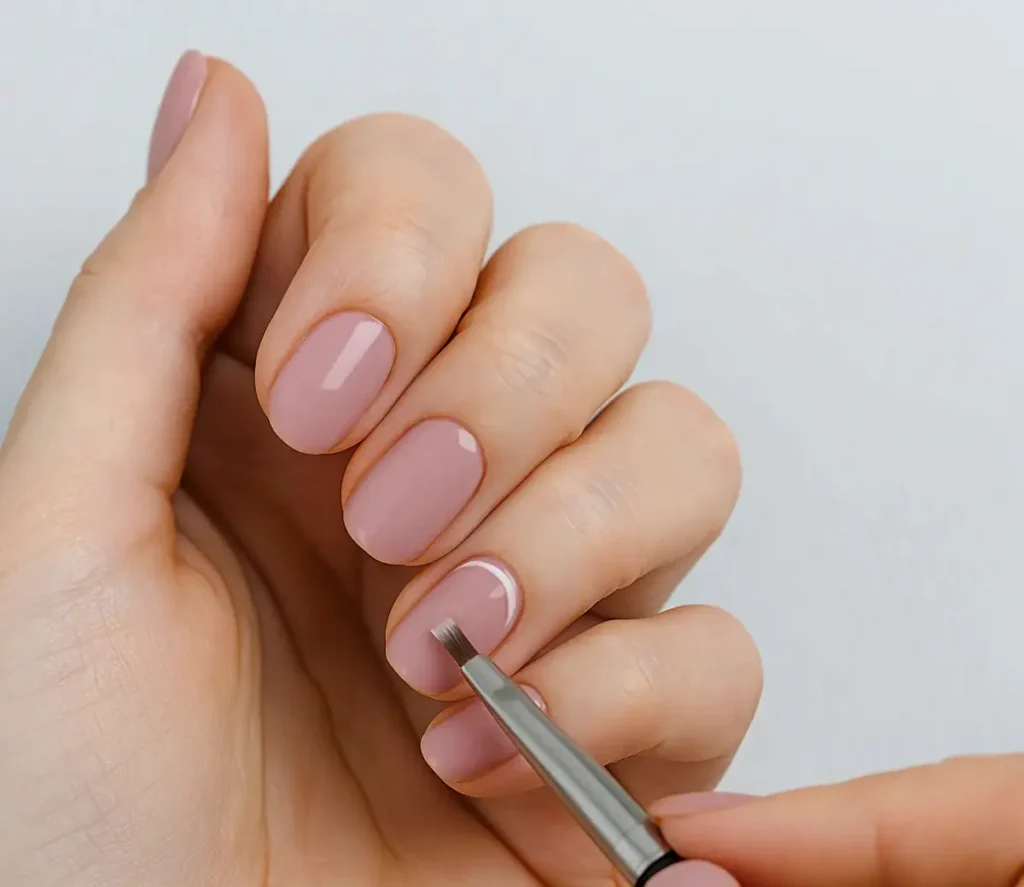
- Gently Push Back Your Cuticles: This step can significantly help with the proper adherence to your gel polish. If cuticles (the thin skin at the base of your nail) are covering the nail plate, the gel is not going to stick there and is going to lift easily. First, you need to soften your cuticles. You can use a cuticle-removing product (try Sally Hansen Instant Cuticle Remover) for a quick 15 seconds, or simply soak your fingertips in warm water for a couple of minutes (and fully dry them afterward). After using a cuticle pusher (an orange wood stick or metal pusher), very gently push the cuticle skin back off of the nail. Only remove the dead, excess skin (it will appear white or translucent). If you have hangnails or bits of skin, these can also be cut with cuticle nippers. You want to be careful not to cut any live cuticle skin while you’re here, or you’re likely to experience pain or unwanted infection. The goal is to expose the entire nail surface and make a clean outline. This will provide more area for the gel polish to adhere, resulting in a crisp look near the root of your nail. Take your time and be very gentle here – healthy cuticles are important for nail growth and overall health!
- Remove The Shine (Light Buffing Of The Nails): This is the stage where you are going to buff your nails to remove that natural shine gently. For gel polish application, this is a crucial step because we want to slightly roughen the surface to enable better adhesion of the product. You need to take a fine grit buffer (around 180 to 220 grit) and lightly buff the surface of each nail. You aren’t going to grind down the nail; you’re just removing that oily, glossy layer and creating a little texture. A few swipes with a fine buffer and your nail should look matte. A word of caution: don’t over-buff or use an over-aggressive file on the nail plate – we simply want to scuff the surface, not thin out your nails. Overbuffing can damage the natural nail and create unneeded weakness. Conversely, buffing with too fine of a grit (making your nail too smooth) can work against us – if your nail is polished as smooth as glass, gel polish is not going to adhere as well and can easily peel off. So, we want to strike a happy medium – nails that are no longer shiny but that have not been heavily filed. This gentle buffing step breaks up oils on the surface of the nail and provides texture for the gel to grip, which significantly reduces the chances of premature peeling.
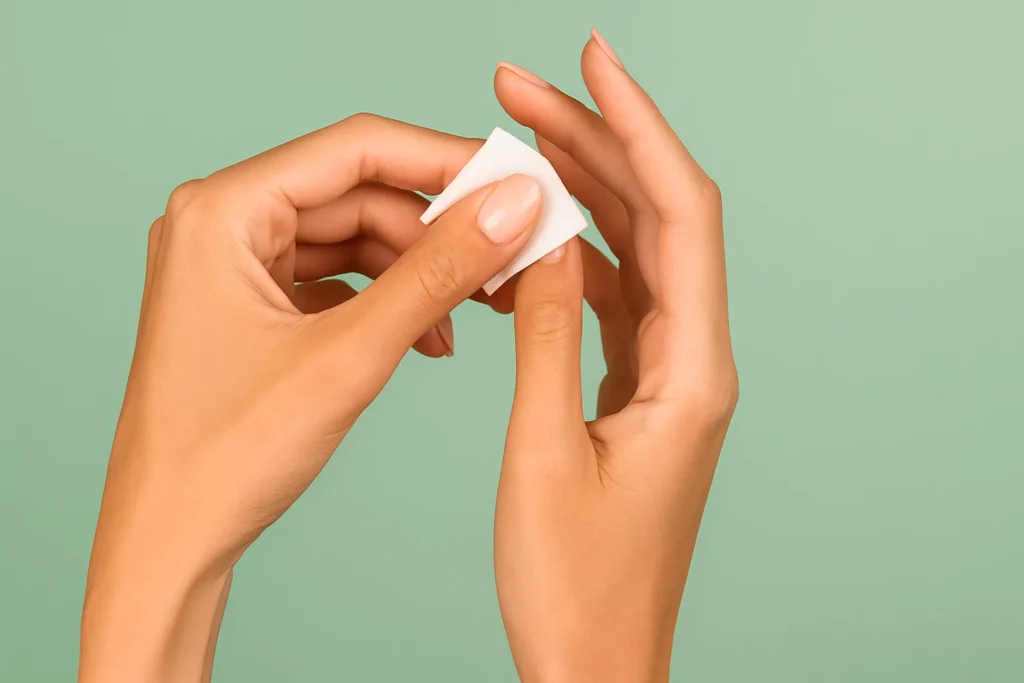
- Immersing and Dehydrating the Nails: After buffing, there will be nail dust and some kind of oils that are still left behind and which you can’t see on the surface of the nail. The mantra here is “no dust, no oil, no moisture” before applying the gel. Grab a lint-free wipe (or cotton pad that doesn’t leave fuzz) and soak it in either a nail cleanser or 90%+ isopropyl alcohol. Wipe each nail thoroughly and remove as much dust and oils as you can. Spend a little time on the cuticle area and edge of the nail as you want to grab any residue there. This is a crucial step for adhesion – if there is any grease or residue, it will prevent the gel from adhering. No matter how clean your nails look, trust me, there will usually be “invisible” oils or soap residue lurking around. (This is especially true if you used cuticle remover, or even just soap and water, earlier that might leave traces of moisturizer or oils on your nails.) So whatever you do, do NOT skip the scrub! Some people will wipe their nails with plain white vinegar, which is considered natural, to wipe away oils. Vinegar, being a mild solution of acetic acid, can help decrease the nail. Regardless of whether you use vinegar or alcohol on your nails, the goal is a clean, dry nail plate.
- (Optional) Use a Nail Dehydrator or Primer: If you are looking to enhance the longevity of your gel nails, especially if you struggle with gel polish lifting, this step can help. A nail dehydrator (sometimes called nail prep) is a liquid that helps remove oils and balance the pH of your nail. A nail primer/bonder, on the other hand, will hold your gel base coat in place like double-sided tape. Many at-home gel users swear by the Mia Secret Nail Prep Dehydrator and Primer duo as preventative measures against chipping. When using a dehydrator, apply a swipe to each nail (it dries virtually instantly). If you are using a primer or bonder, apply a thin layer of it – unless the instructions say otherwise. You normally allow the primer to air dry until it is tacky. We strongly recommend this optional step for a professional and long-lasting outcome. A good primer should ensure your nails are fully prepped for gel by chemically binding to the nail surface. (If you do not have a dehydrator or primer, don’t stress over this – a thorough alcohol wipe will work, too! But for those of you who do have a primer or bonder, it is a tiny thing to do that could add days, possibly weeks, to your manicure).
Your nails are prepped and ready to go; it’s time for the fun part! Applying your gel base coat, color, and top coat! Because you prepped your nails, you gave yourself every chance to have a perfect application. Since your nail surface is clean, dry, and slightly textured, your nail is the perfect canvas for gel polish. Follow your gel polish application steps (thin coats, curing under the LED/UV lamp, etc.) and enjoy the process of painting on that color, knowing it will stay!
Before we get ahead of ourselves, remember that nail prep for regular polish is quite similar. If you ever asked yourself how to prep nails for polish, then these steps (clean, shape, cuticles, buff, cleanse) are your best friends. The only variation with gel is the focus on removing every ounce of oil and possibly the use of primers. Now, with that said, let’s dig into some natural prep tips, and then I’ll offer up some product suggestions to aid you along the way.
Natural Nail Prep Solutions and Home Remedies
You don’t need fancy salon products for every aspect of nail prep. There are plenty of natural or home remedies that can help you get your nails in great shape before polishing. Here are a few tried-and-true solutions from the kitchen and bathroom:
- White Vinegar Wipe: As I’ve said before, white vinegar is a great natural cleaner for nails. Take some white vinegar on a cotton ball and wipe each nail just before you apply your base coat. It will remove oils and any soap that may have left a film on the nail plate, much like rubbing alcohol. The acetic acid in vinegar also acts as a mild dehydrator, which can improve the adherence of your polish. Just be sure to let it dry completely (vinegar smell included) before painting! If you don’t have a specific nail cleanser, this is a simple trick to make your polish last longer.
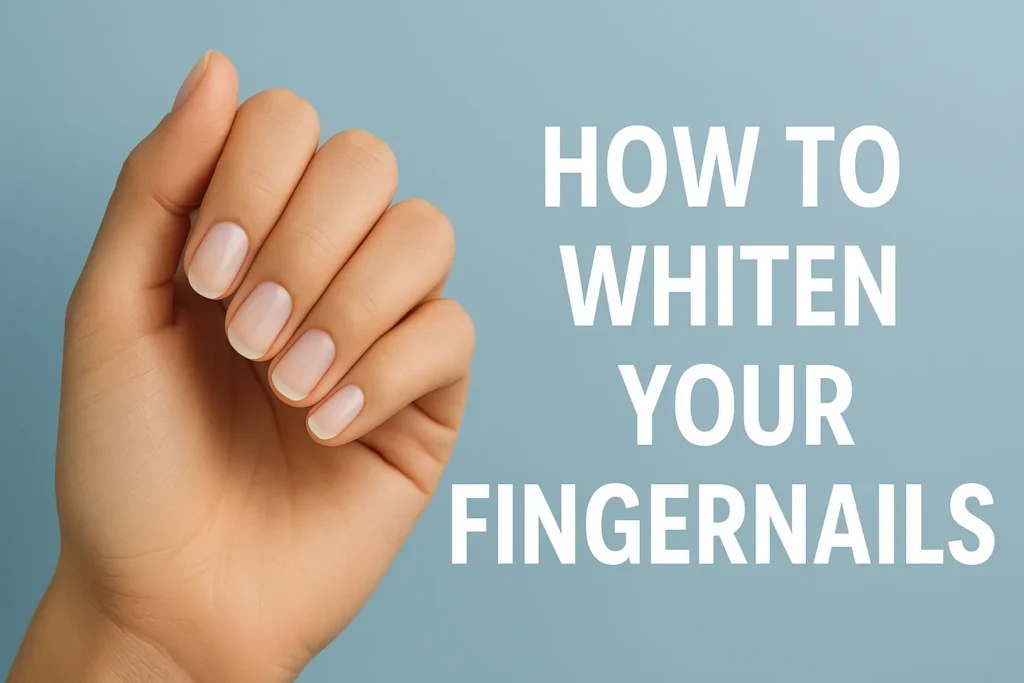
- Lemon Juice for Stains: If your natural nails have yellowed or are stained (perhaps from a previous dark polish), lemon juice will surely help whiten them. You can use a lemon slice to rub a little lemon into your nails, or you can soak your fingertips in lemon juice for a few minutes. The citric acid has a mild bleaching action to help whiten the discoloration. Another DIY trick is to make a paste of baking soda and lemon juice and use it to scrub your nails and lift stains gently. Bright, clean nails provide a perfect neutral base, making a fresh manicure even more appealing. (Be sure to wash and dry your nails well after using lemon, as the acidity could affect the polish if left on.)
- Warm Water or Oil Soak (Use Sparingly): If you’ve ever gone to a salon, you may be familiar with having your fingers soaked in warm water to soften your cuticles. Soaking is generally not recommended with gel polish prep, especially right before painting, as you do not want excess water on the nails. Excess water can cause the nails to expand, and when the nails begin to dry, they shrink, leading to chipping. If you do not have cuticle remover, you can soak your nails for a short amount of time in warm water with a small amount of mild soap to soften the cuticles. You will want to soak them for only a couple of minutes (to soften) and then push the cuticles back. Once finished, you will want to dry your nails immediately and completely, as water remaining on the nail can leave undesirable residue. You can also soak the cuticles in oil, which is a great alternative to water. Simply apply olive oil, coconut oil, or even a thick cream directly to your cuticles, allow to sit and soften the skin, and then push back the cuticles. You will still need to cleanse the nail afterward (oil is wonderful for skin, but you do not want oil on the nail plate from which you will be painting). The primary objective here is to gently remove dead skin so that you can push it back and flake it off easily and without damage, using what you have available at home.
- Olive Oil or Coconut Oil for Hydration: Although you’ll want your nails to be oil-free before applying the gel, it’s essential to keep your nails and cuticles hydrated afterward. A healthy, natural way to do this is to use olive oil or coconut oil. Use the oil as daily cuticle oil. Simply rub a drop into each nail and cuticle at bedtime. The natural oils are loaded with vitamins, and they (especially coconut oil) will soak into your issue-free nails and help prevent peeling and dryness. When a nail is hydrated, it is flexible and can take the stress of daily life (including layers of polish) without cracking. Please think of this as preventative maintenance: the healthier your nails are on a day-to-day basis; the better the gel polish will hold up when in use.
- Gentle Sugar Scrub: You can exfoliate the skin around your nails before a manicure (or anytime your hands feel rough) using a homemade sugar scrub. Mix a teaspoon of sugar with some olive oil (add a drop of essential oil if you want a scent) and use your fingers to massage it gently all over your hands and around your nails. In this process, you are sloughing off the dead skin around the nails and nail beds. After scrubbing, rinse your hands with warm water and soap and dry them completely. You’ll have skin and nails that are smooth and healthy. Just be sure to remove any oily residue from the nail plate afterward (using a vinegar or alcohol wipe), so they are clean. You have now achieved the same effect as those expensive hand scrubs, and you help your fingertips look fresh.
Utilizing these natural solutions can be both effective and cost-effective. And if you’re like many of us, you may have vinegar, lemons, oils, and sugar in your pantry, making it easy to do a little pampering for your nails without a trip to the store. There will still be steps of nail prep where you may want to use tools and products, however, especially for more advanced filing and priming. In this section, we will look at some of the best off-the-rack products (on Amazon) that can help support your process of nail prep and help you achieve professional results at home.
Best Nail Prep Products (Amazon Recommendations)
Home remedies are great, but there are a few targeted products that can enhance your nail prep process. I have compiled a list of highly rated items (found on Amazon) that will help you prep more easily and effectively for a gel manicure. These are products I would recommend to a friend who wishes to step up her at-home manicure practice:
- Sally Hansen Instant Cuticle Remover – Dissolve stubborn cuticles in seconds. This affordable gel formula softens and melts away excess dead skin around your nails. Simply add a drop to each cuticle, wait about 15 seconds, and you will see the dead skin easily removed when you do the cleanup. Use this before you push back your cuticles for professional-looking results. It contains aloe and chamomile, making it gentle on the skin as well.
- Tweezerman Stainless Steel Cuticle Pusher & Nail Cleaner – Slide back your cuticles like a boss. A top-quality cuticle pusher is a great tool to have, and Tweezerman’s cuticle pusher is excellent. It features two ends: a flat, curved end that is meant to gently push back your cuticles without scratching the nail and another pointed end for removing stuff from under your fingernails. The Tweezerman cuticle pusher is made from durable stainless steel, which allows you to apply pressure to push back your cuticles without worrying about breaking like the wooden ones. It features a nice, textured grip, allowing you to maintain the highest degree of precision. The beauty of this tool is that it ensures you have nice, neat, and tidy cuticles, which is also important for maintaining a gel polish seal and achieving long-lasting, beautiful manicures.
- 100/180 Grit Nail File and Buffer Set – Shape and buff at the correct grit. For gel nail prep, you will need a medium-grit nail file and a fine-grit buffer. This set has it all: a 100 grit (coarser) for shaping and a 180 grit (finer) for smoothing. Additionally, this pack includes multiple files and blocks, which is ideal for your kit. Use the 100-grit edge to file the free edge of your nails to your desired shape. Then, use the 180-grit buffer to buff the nail surface to remove shine gently. Having a set like this guarantees that you will always have a fresh file when one wears out, and this file is suitable for both natural and acrylic/gel nails.
- Mia Secret Nail Prep Dehydrator & Primer – When it comes to getting the most out of your gel manicure, using a dehydrator and a bonder is key. This duo will change the way you think about gel polish wearability. The Nail Prep Dehydrator is acid-free and is constructed to clean and safely rehydrate the nail plate (dehydrating oils) temporarily. The XtraBond Primer is applied after its sister formula, making a little “extra sticky base” for the gel polish to adhere to. When used together, these two products were reported to reduce chipping and lifting by a considerable margin, particularly if you typically experience longevity issues with your gel manicures not lasting. Many at-home users mentioned that with this duo, their gel manicures last to the same extent as they do when they are in a salon. These two items are compatible with any gel polish manufacturer.
- OPI Nail Envy Nail Strengthener – Build Stronger Natural Nails over Time. Nail Envy is a true classic and a favorite for a reason – it’s a clear nail treatment you can apply in between manicures to help build up weak nails. If you tend to have natural nails that peel, bend, or break easily, this will help strengthen them! It contains ingredients that fortify the nail plate, such as hydrolyzed wheat protein and calcium. You apply it like a regular clear polish (it dries fast), and in a couple of weeks, you will see stronger nails. Strong nails are the perfect base for gel polish (or any polish). You can use Nail Envy as a treatment when you are not wearing gel – for example, take a week off of color and use Nail Envy every day and see the difference. It’s like prepping your nails for the long term. A lot of professionals will apply a nail strengthener before a gel manicure if the nails are feeling thin (just note to pay attention to the specific instructions; some will prefer you don’t use it in the same application but rather as a separate regime directly under the gel).
- CND SolarOil Cuticle Oil – Nourish nails and skin for flexibility. This cult classic cuticle oil is a fantastic daily option! It is composed of natural oils, like jojoba, sweet almond, and vitamin E. By rubbing SolarOil into your nails and cuticles, you will keep them hydrated and flexible, which is super important for the ‘wear-ability’ of your gel mani! (Dry and brittle nails break or chip more easily – hydrated nails bend instead of break.) Apply a drop to each nail and rub it in after every hand washing or at least every evening. This will not only keep your manicure looking fresh (because your surrounding skin will not become dry or develop hangnails) but also condition the nail plate itself. Many nail techs would rank cuticle oil as their number one secret to longer-lasting enhancements. Plus, not only is SolarOil good for you, but it also has a pleasant light almond scent and absorbs without feeling greasy.
Each of these products can assist you through the different phases of nail prep and nail care. They are simple enough to use and have received a lot of love from the nail community. Even just using one or two of them in your routine could significantly affect the results you get with your gel polish. Now that we have mentioned tools and products let’s discuss how to maintain those results with proper habits.
Long-Term Nail Care Habits for Strong, Healthy Nails
The health of your nails is driven largely by your daily habits. Healthier nails are better at adhering to polish and better tolerate the stress of gel removal. Since we are focusing on a beauty and self-care-savvy audience, let’s explore ways to take care of your nails between manicures. Below are some long-term nail health habits.
- Keep Your Nails Dry (Wear Gloves for Household Tasks): Water is the number one enemy of any manicure lasting over a week. When nails are exposed to water for some time, they will expand. As they dry, they will contract, which is where splits or lift of the polish can start. Dermatologists warn that repeated or prolonged exposure to water can actually split your nails, so protect your hands when doing dishes, cleaning, or gardening. Wear rubber gloves (cotton-lined gloves are best if you wear a heavy sweater) to prevent overexposure to water and harsh cleaning agents that can cause nails to become brittle. As a bonus, your skin will pivotally be more hydrated.
- Moisturize Your Nails and Cuticles Every Day: We often remember to use hand lotion, but don’t forget that your nails also need moisturizing. Simply rub lotion or oil into your nails daily to keep them pliable. A good habit is to apply nourishing cuticle oil (such as SolarOil or olive oil) every night before bed. Moisturized nails are less likely to crack and chip, and they grow out healthier. This is even more important for nails to be hydrated and healthy in dry climate conditions or if you use a lot of hand sanitizer (the alcohol will dry out your nails and skin). One trick: After washing your hands, apply a small amount of cuticle oil; it helps seal in moisture. Experts even suggest using oils every time you wash your hands to fight the drying effects of soap and water.
- Don’t Use Your Nails as Tools: It can be so easy to pop open a soda can with your nails or peel off a sticker with that built-in “tool kit” you have. Try to stop doing this! When you use your nails to pry, pick, or open things, you put a lot of sideways pressure on your nails, causing cracks or breaks (or lifting your beautiful gel polish off!). Use the tools you have available, or be conscious of using the pads of your fingers. Treat your nails like a cherished piece of jewelry – with care. This habit alone can save you from many broken nails.
- Refrain from Biting or Picking at Your Nails or Cuticles: You are not only weakening your nails and wreaking havoc on the shape, but you are also introducing germs into your mouth (or the other way around). When you pick at your cuticles or hangnails, it leads to sores and openings that can be infected. This can be a very difficult habit to break down, but your nails will thank you for it. Keep your nails trimmed and perhaps your favorite bitter nail treatment if this issue persists. Just keep in mind that even a small cut or opening from picking at cuticles can allow germs in, causing redness and swelling around nails. Polishing your nails (with either gel or traditional polish) will also deter you from biting them because you won’t want to ruin the polish!
- Use Gentle Nail Products and Removers: Be mindful of your nail’s exposure to harsh chemicals. For instance, acetone is necessary to remove gel polish from nails, but it is very drying to nails. Therefore, when you do acetone ‘soak’ in your nails, make sure to hydrate again using an oil or lotion. When removing regular polish, try to use an acetone-free remover whenever possible. They take a bit longer to work but are not damaging to your nails. Do not overuse nail hardeners; while some product nails strengthen nails (the Mayo Clinic even mentions that it may be beneficial to nails), some hardeners have formaldehyde that can make nails much too hard or brittle with constant use. If you use these treatments as directed and you identify that your nails are getting too rigid or splitting, give your nails some rest!
- Evaluate Your Nutrition and Supplements: Sure, we’ve been focusing on outside care, but also keep in mind that a healthy diet with plenty of vitamins and minerals will help your nails grow strong from the inside. Make sure you are getting adequate protein, biotin, zinc, and iron in your eating, as deficiencies in these can show up in your nails. There are individuals who take biotin supplements for nail health. The research on their effectiveness has been inconsistent, yet some people report that they feel it helps strengthen their nails after a few months. Always consult your healthcare provider before starting any supplements. But at the very least, drink plenty of water and eat lots of nutrients; your nails (and skin and hair) will be happy for it.
- Give Your Nails a Break (Occasionally): Even though nails don’t actually “breathe,” it can be wise to take a short break from back-to-back gel manicures once in a while. Constantly wearing any polish (gel or regular) can potentially dry out your nails or cause keratin granulation (those rough white patches) if you’re not careful. Dermatologists say nails get oxygen and nutrients from the blood, not the air, so they don’t need to breathe per se. But if you notice your nails becoming overly dry, thinning, or peeling, it could be from the cumulative effect of polish and removers. Let them go bare for a week or two, apply a strengthening treatment like OPI Nail Envy, and lots of cuticle oil, to rejuvenate them. Think of it as a nail spa retreat. After they recover, you can get back to your gel glam.
By building these habits, you’re investing in your nails’ future. Strong, well-cared-for nails provide the ideal base for any manicure and ensure that your gel polish will last longer without issues. Long-term care is the gift that keeps on giving – you’ll find each subsequent manicure is easier and holds up better when your nails are in great shape.
Preventive Care for Lasting Gel Polish
We’ve prepped the nails and established healthy habits. Now let’s talk about keeping that gel manicure looking fresh. Preventive care is all about the little things you can do (or avoid doing) to prevent chips, lifts, or damage to your gel polish. Here are some tips to ensure gel polish longevity once your manicure is done:
- Seal the Deal – Cap the Free Edge: When you or your nail tech applies gel polish, one of the best practices is to cap the free edge (the tip of your nail) with each layer of polish. This means running the brush along the edge to seal in the polish. It prevents the edges from lifting easily and water from seeping under. If you’re doing your own gel nails, don’t forget this tiny step with base coat, color, and top coat. It creates a protective barrier at the nail’s tip that can significantly extend wear. If you get your nails done, you can always ask the tech to cap the edges if they haven’t – most will do it automatically.
- Avoid Excessive Water and Heat Exposure: We touched on water already, but it’s worth repeating for your polished nails. In the first 24-48 hours of a gel manicure, try to keep your nails out of prolonged hot water (quick showers are fine!). Although gel is cured and hardened under the lamp, some techs say that very hot water soon after application could contribute to lifting in some cases. Even long soaks in a hot bath or hot tub can potentially cause your nail bed to expand slightly from heat, which isn’t great for the polish bond. After that initial period, gel is pretty durable with water, but still, the less you soak your nails, the better. When doing housework like dishwashing or cleaning, those gloves we mentioned are your best friend – not just for nail health, but also to keep the gel topcoat from dulling due to detergents.
- Be Gentle – Treat Your Nails Kindly: This one sounds obvious, but it can be surprisingly hard in practice. If you want your gel manicure to last, pretend your nails are wet paint even when they’re not. That means being conscious of how you use your hands. Typing on a keyboard? Try to use the pads of your fingers instead of tapping with your nails. Opening a car door or a jar? Use the side of your finger or your palm. Every time you avoid putting pressure on the actual nail or bending it, you’re preventing chips or cracks. Gel polish has a little flex, but it’s not indestructible. If you treat your nails like “jewels, not tools,” you’ll easily get the full two to three weeks out of that manicure.
- Reapply Top Coat (for Extended Wear): Here’s a nifty trick if you want to squeeze out a few extra days of wear. After about a week or 10 days of wearing your gel manicure, apply a fresh layer of clear top coat on top of your nails (you can use a regular clear polish or a gel top coat if you have one and feel like curing it). Make sure to cap the free edge as well. This can restore the shine and reinforce the protection on your color. Some people even do this every 7 days like clockwork. It helps cover any microscopic tip wear that might have started and gives your mani a “refresh.” Just ensure the surface is clean and dry before you paint on the new top coat. If using a regular clear polish on top of gel, you can remove it later with non-acetone remover without affecting the gel underneath.
- Keep Up with Cuticle Oil: Yes, we’re mentioning cuticle oil again! It’s that important. Continue to apply oil to your cuticles and underneath the nail tips daily while you have your gel on. This prevents the nail (and the product) from becoming overly brittle. According to nail pros, hydrated nails are more flexible, so if you accidentally knock your nail, it’s less likely to chip – it might bend slightly instead. On the flip side, a very dry nail can be hard and prone to snapping (taking the gel with it). So moisturize, moisturize, moisturize – it truly prolongs the life of your manicure.
- File Any Chips or Lifts Immediately: If you do get a small chip in the gel or notice an edge starting to lift, address it sooner rather than later. Use a fine file to gently smooth out the chipped area or file off the lifted bit so it doesn’t snag. You can then seal that spot with a touch of top coat or even a drop of glue as a temporary fix. This prevents the damage from worsening. A tiny lift can spread if water or hair gets caught in it during showering, etc. By fixing a minor issue early, you can often keep the rest of the manicure intact and avoid having to remove everything prematurely.
- Avoid Picking or Peeling the Gel: This is more of a maintenance no-no than a prevention tip, but it’s vital. Don’t use your other nails (or teeth, yikes!) to pick at any lifted gel edges. Picking is so tempting, especially as the manicure gets older, but it’s the worst thing you can do for your nail’s health. Peeling off gel polish will usually take off a layer of your natural nail with it, leading to thinning and damage. It can take months for those peeled layers to grow out. So even if one nail lifts, resist the urge to peel it off like a sticker. Instead, remove it properly (more on safe removal below) or patch it as mentioned. Your natural nails will stay strong and ready for the next manicure if you avoid self-inflicted peel damage.
By following these preventive care tips, you’ll maintain that just-done look on your gel nails for longer and also protect your natural nails in the process. Prevention is easier than repair, after all! Now, let’s dispel some misconceptions floating around out there with a quick myth-busting session.
Nail Prep Myths vs Facts
In the realm of nail care, there are a few myths that have been passed around. Let’s set the record straight with some facts, so you can prep and care for your nails with confidence:
- Myth: “Nails need to breathe between manicures.”
Fact: Nails are made of dead keratin cells and don’t actually breathe – they get oxygen and nutrients from your blood, not the air. You don’t need to leave nails unpolished for them to “get air.” That said, giving your nails a polish-free break occasionally can be beneficial for other reasons (like rehydrating them and reducing chemical exposure). But you’re not suffocating your nails by keeping them painted. If your nails are healthy, you can reapply gel manicures back-to-back. Just focus on proper prep and removal to keep them in good shape. - Myth: “Gel polish always ruins your natural nails.”
Fact: Gel polish itself doesn’t inherently damage nails – it’s the improper application or removal that can cause issues. If you aggressively file the nail surface or rip off the gel, then yes, your nails will be weaker and damaged. But when applied correctly on a well-prepped nail and removed gently (soaking in acetone and sliding it off without scraping too hard), gel polish can be worn for years with no ill effects. In fact, some people find their nails even get a bit of protection from the hard gel layer acting as a shield. The key is to treat your nails kindly. One common source of damage is when a nail tech over-buffs your nail plate or uses an electric file improperly – that can thin out the nail. Another is when people pick and peel off gels, tearing off nail layers. Done right, gels are pretty safe. So don’t blame the gel – often it’s human error. Always follow safe practices and your natural nails can stay strong. - Myth: “You should soak your nails in water before a gel manicure.”
Fact: Actually, professional gel manicurists often do a “dry manicure” for gel services. Excess water can cause your nails to swell, and later as they dry and shrink, the gel may not fit as well, leading to lifting. It’s okay to briefly soak or use cuticle remover to tidy cuticles (as we did in prep), but you must ensure the nails are completely dry and dehydrated afterwards. Any residual moisture can interfere with polish adhesion. A better method is to use a cuticle softening product or just a tiny bit of warm water, and then thoroughly dry and cleanse the nail. In short, water is not really your friend during gel prep. Save the hand soak for when you’re not about to apply polish. - Myth: “Using a UV or LED lamp for gel nails is dangerous.”
Fact: The curing lamps for gel polish do emit UV light (mostly UVA rays). Over time, excessive UVA exposure can contribute to skin aging or damage. However, the exposure in a gel manicure is very minimal – we’re talking a few minutes at most, typically. Dermatologists have noted that it’s a low risk, but if you’re concerned, you can take simple precautions: apply a broad-spectrum sunscreen on your hands (avoiding the nails) about 20 minutes before you do your nails, or wear UV-protective manicure gloves (gloves with the fingertips cut off) during curing. These measures will basically block the UV and ease any worries. Many gels now cure so fast (30-60 seconds per coat under LED) that hands are under the light for a very short total time. So, while the concern isn’t entirely a myth, it’s one that’s easily managed with sunscreen or gloves. Don’t let it scare you away from enjoying your gel polish – just be smart about protection like you would with any UV exposure.
Those are some of the big myths debunked. By knowing the facts, you can make informed decisions in your nail care routine. Now you can tell your friends confidently why nail prep matters and why some of those old wives’ tales (like nails “breathing”) aren’t quite true!
Safe Practices for Gel Polish Application and Removal
Finally, a quick word on safe practices. We’ve talked a lot about prepping and maintaining your gel nails, but how you apply and remove gel polish also impacts your nail health. To keep things safe and damage-free, keep these tips in mind:
- Work in a Well-Ventilated Area: When you’re using chemicals like acetone (for removal) or even when applying primers and polishes, make sure you have some airflow. Open a window or use a small fan. Gel polishes typically have less odor than acrylics, but it’s still wise not to inhale product fumes. Good ventilation will also make your DIY manicure session more pleasant (nobody likes a room full of chemical smell).
- Follow Product Instructions: It might be tempting to skip steps (like the full cure time under the lamp) or use products in ways not intended. Always read the labels and follow the recommended usage. For example, if a primer says “air dry 30 seconds,” do that before slapping on gel. If a top coat says “cure 60 seconds under LED,” don’t yank your hand out at 30. Using the products as directed ensures they work properly and prevents mishaps like allergies or skin irritation. More is not always better – applying thin coats of gel as instructed will cure better and actually last longer than a thick gloopy coat.
- Protect Your Skin During Curing: As mentioned in the myth section, you can wear UV shield gloves or sunscreen on your hands to protect your skin from the lamp’s rays. It’s a small step that can keep your hands looking youthful and free from sun damage. Also, when painting, try not to get gel on your skin (wipe it off immediately if you do, before curing). Cured gel on your skin can cause irritation or contact allergies over time for some people. So neat application is not just about looks, but safety too.
- Never Force or Peel Off Gel Polish: I know we harped on this, but it’s worth repeating under safety: always remove gel polish properly. That means soaking a cotton ball in acetone, placing it on the nail, wrapping it with foil (or using those nifty soak-off clips), and waiting 10-15 minutes for the gel to soften. After that, the gel will come off gently when you push it with a stick – no scraping of your actual nail needed. If there’s resistance, soak a bit longer. Peeling it off without soaking will strip layers of your nail and leave them paper-thin. Not only is that damaging, it can also sting and make your nails sensitive. It’s just not worth it. Be patient with removal, and your nails will remain intact and healthy.
- Watch for Signs of Nail Damage: Pay attention to what your nails are telling you. If you notice white patches on your nail surface after removing polish, you might be over-buffing or drying them out – those could be keratin granulations. If you see ridges or peeling, maybe you’re being too rough during prep or removal. Adjust your technique accordingly (for instance, use a gentler file, moisturize more, or take a break from gels to let nails recover if needed). Pain is also a sign – nothing in a gel manicure should be painful. If you feel burning when your hand is under the lamp, the coat might be too thick (causing a heat spike), or you could be sensitive to a product. Remove your hand, let it cool, and thin out that layer. Also, if cutting cuticles, never cut live tissue – it should not hurt or bleed. Safety first!
- Store and Handle Products Carefully: Keep your bottles of gel polish away from direct sunlight or heat (it can cure the product in the bottle, ruining it, and also could be a fire hazard in extreme heat). Keep them tightly closed when not in use, so you don’t breathe vapors and the product doesn’t evaporate or thicken. Acetone is highly flammable, so treat it with caution: don’t use it near an open flame and keep the bottle closed when you’re not actively using it. These sound like common-sense tips, but during a fun mani night it’s easy to forget. A little care with how you handle products keeps you and your home safe.
By following these safe practices, you’ll ensure that your journey to long-lasting gel nails is a smooth and healthy one. Remember, the goal is not just a beautiful manicure, but also keeping your natural nails in great condition so you can enjoy many beautiful manicures to come!
Wrapping Up (and Looking Great!): By now, you’ve learned how to prep nails for gel polish like a true pro. From understanding why prep is crucial, to mastering the step-by-step nail prep process, to implementing long-term nail care and busting myths – you’re equipped to achieve a gorgeous gel manicure that can actually go the distance. Prepping your nails might add a few extra minutes to your routine, but the payoff is huge: longer-lasting color, fewer nail problems, and healthier nails underneath it all.
I encourage you to put these tips into practice next time you set up your at-home nail station. Make it a self-care ritual – play some music or a podcast, have your tools and maybe a cup of tea at the ready, and enjoy the process of pampering your nails. You’ll likely find that not only do your gel manis last longer, but the whole experience is more fun when you know you’re doing something good for yourself.
If you have any questions or your own awesome nail prep tips, share them in the comments below! I’d love to hear about your experiences – whether you tried a vinegar wipe or discovered a fantastic new product on Amazon, let’s chat about it. And if you found this guide helpful, please share it with a friend who loves doing her nails or anyone who’s struggled with gel polish not lasting. We’re all here to learn and look fabulous together.
Now go show off those nails, and enjoy your long-lasting gel polish glow! Happy polishing!
If you enjoyed this post, leave a comment with your favorite tip or any questions you have. And don’t forget to share this article with your fellow nail enthusiasts – let’s help everyone achieve salon-quality gel manicures at home. Here’s to strong nails and beautiful, long-lasting gel polish!