There’s something truly special about a fresh manicure, isn’t there? It’s more than just polished nails; it’s a little moment of self-care, a burst of creativity, and a wonderful way to express personal style. Nails offer a tiny canvas, ready for an artistic touch, and experimenting with color is one of the most delightful ways to boost confidence and brighten any day. The act of tending to one’s nails, whether through a simple polish application or an intricate design, can be a deeply personal ritual that contributes to overall well-being and self-assurance. It transforms a routine beauty task into an empowering act of self-expression.
While classic shades will always have their place, sometimes a desire for something a little unexpected arises—a pairing that turns heads and makes one feel truly chic. That’s where daring Nail Color Combos come in! This exploration will dive into five unique pairings that might not have been considered before, but absolutely should be. Prepare to discover practical, actionable tips to recreate these stunning looks right from the comfort of home, ensuring each manicure is not just beautiful, but also a reflection of individual flair and confidence.
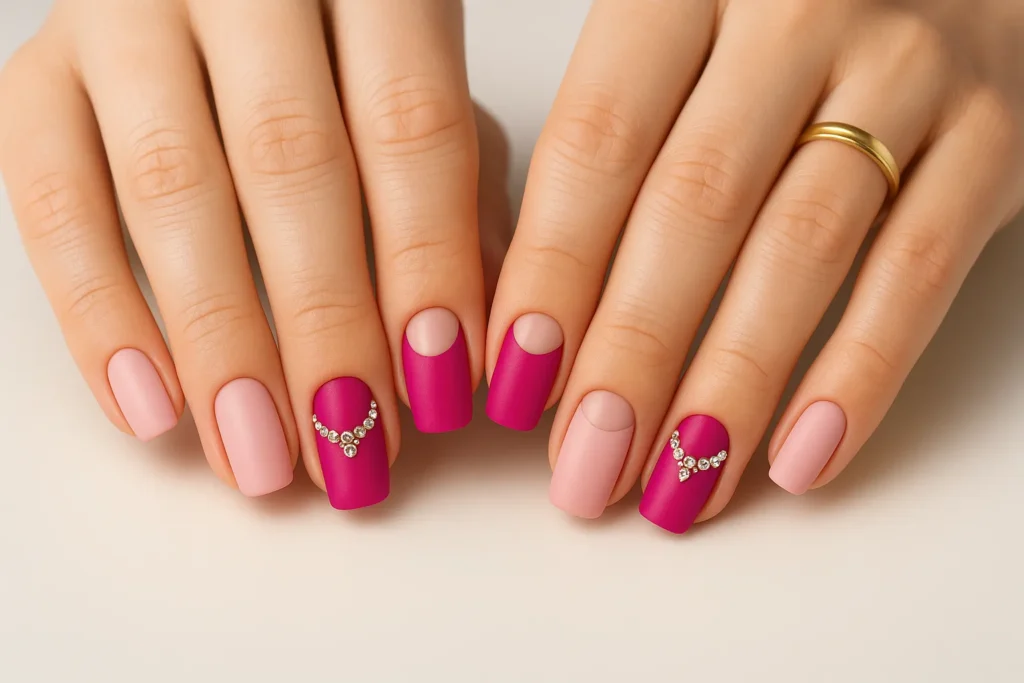
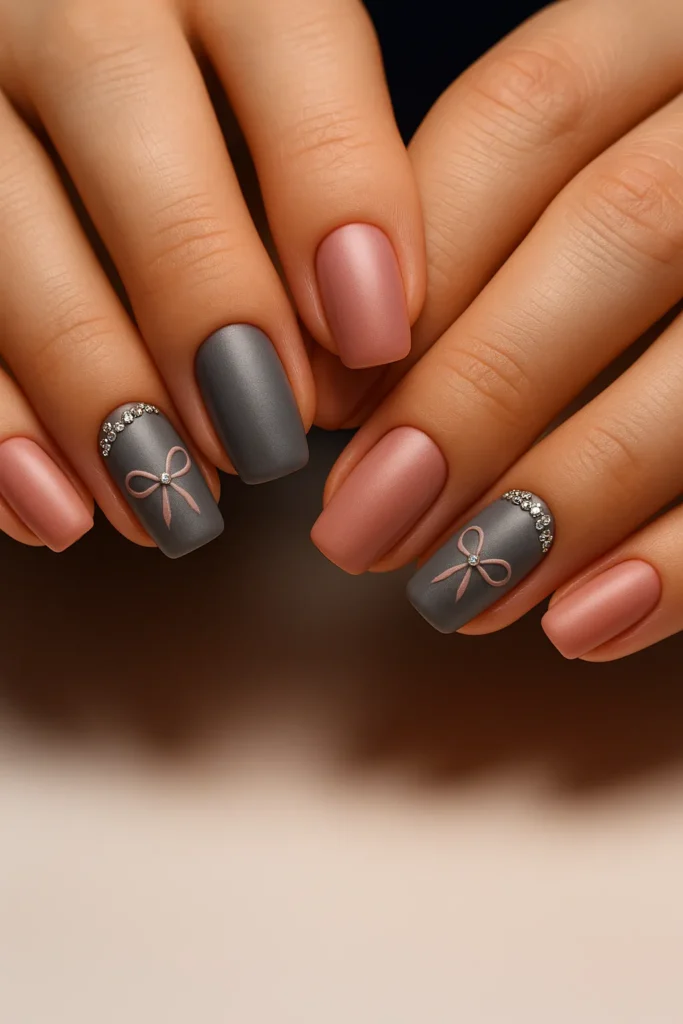
Combo 1: Matte Dusty Rose & Charcoal Grey – Understated Elegance
Why This Nail Color Combo Works
This pairing embodies modern sophistication. The soft, romantic dusty rose offers a delicate, feminine touch, while the deep, grounding charcoal grey provides a strong, contemporary contrast. The beauty of this combination lies in its ability to be both subtle and striking, making it suitable for a wide range of occasions. What truly elevates this look is the matte finish, which strips away shine to reveal a velvety, luxurious texture. This non-reflective surface creates a sophisticated, almost tactile appearance that feels incredibly chic and understated. It’s a versatile combination that seamlessly transitions from a professional setting to an elegant evening out, proving that subtle can be utterly captivating. The absence of gloss draws attention to the purity of the colors and the precision of the application, contributing to a refined aesthetic.
What You’ll Need for This Look
To achieve this elegantly muted manicure, gather the following essentials:
- Matte Dusty Rose nail polish (or a regular dusty rose polish paired with a matte top coat)
- Matte Charcoal Grey nail polish (or a regular charcoal grey polish paired with a matte top coat)
- A high-quality base coat. This product is essential for creating a smooth foundation, preventing the natural nail from staining, and ensuring the polish adheres beautifully, which significantly extends the wear of the manicure.
- A standard glossy top coat. This is a crucial, often surprising, step for achieving a truly flawless matte finish, as it creates an ultra-smooth underlying surface.
- A dedicated matte top coat. This product transforms any glossy polish into that signature velvety, no-shine look.
- Small, delicate silver rhinestones.
- Nail art glue or a specialized gem gel. These adhesives are designed for secure rhinestone application, ensuring they stay in place.
- A rhinestone applicator tool. Tools like a wax-tipped pen, dotting tool, or fine tweezers allow for easy and precise placement of tiny embellishments.
- A fine detail nail art brush. This brush is indispensable for painting intricate designs, such as the delicate bow accent.
- Nail polish remover and a clean-up brush. These are vital for perfecting edges and removing any stray polish, contributing to a crisp, professional finish.
Your Step-by-Step Guide to Matte Perfection
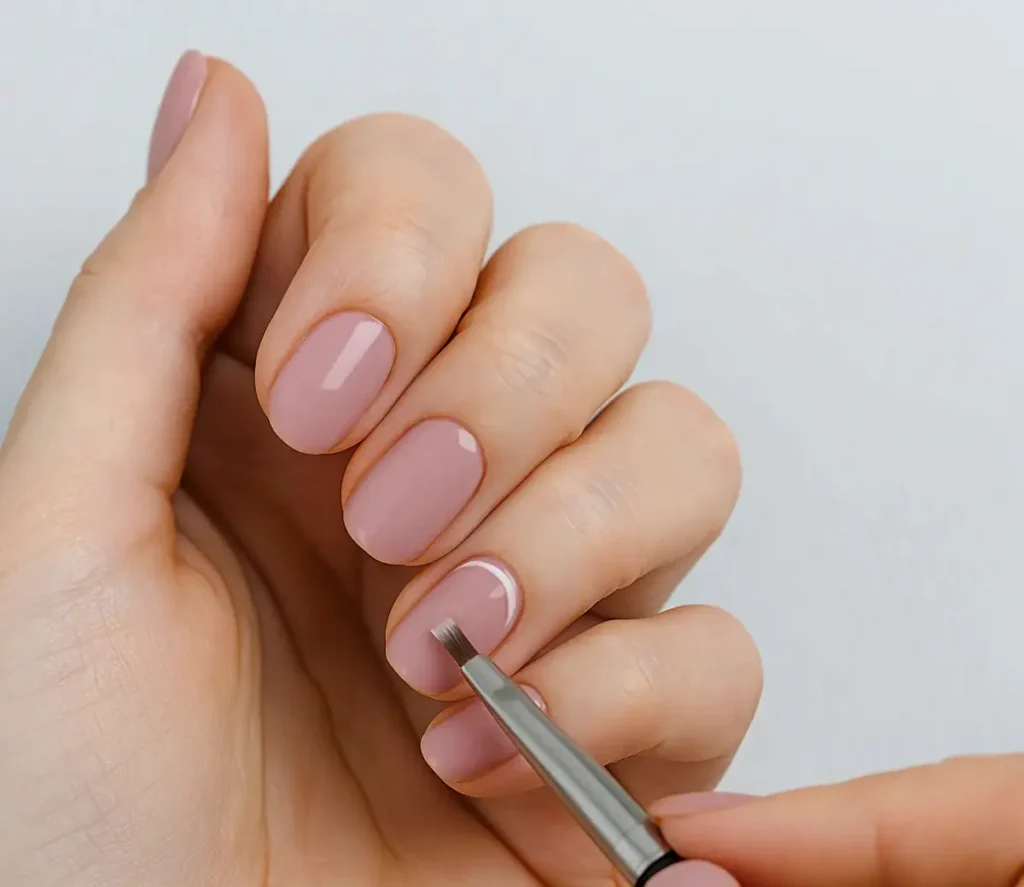
- Prep Your Canvas: Begin by ensuring nails are clean, dry, and perfectly shaped. Proper nail preparation, including shaping and buffing, creates a durable base and reduces the likelihood of chipping or peeling. Apply one thin, even layer of the chosen base coat to all nails. This crucial step protects the natural nail from discoloration, especially from darker pigments, and provides a sticky surface for the color polish to adhere to, which is key for a long-lasting manicure. Allow it to dry completely.
- Color Application: Apply one thin coat of dusty rose polish to some nails and charcoal grey to others, alternating the colors to create the desired pattern. Applying thin layers is absolutely crucial for thorough drying and achieving a uniform, professional-looking finish, preventing the polish from becoming too thick, which can lead to peeling.
- Second Coat & Smoothness Layer: Once the first coat is dry to the touch, apply a second thin coat of each color for full, opaque coverage. For an ultra-smooth matte finish that truly rivals salon quality, apply one thin layer of a standard glossy top coat over the cured color coats. This creates an incredibly even, self-leveled base for the matte top coat to adhere to, preventing any underlying imperfections or brush strokes from showing through. This step is a game-changer for achieving a professional look, as the glossy layer fills in any minor ridges or unevenness, providing a perfectly flat surface for the matte finish.
- Matte Transformation: Once the glossy top coat is completely dry (or cured if using gel polish), it’s time for the magic! Apply a thin, even layer of the matte top coat over all nails. For best results, use about three strokes: one down the middle of the nail, followed by one on each side, ensuring uniform coverage. It is important not to go too heavy on the first coat, as slight translucence is normal before the second layer. Don’t forget to “cap” the free edge of the nail by running the brush along the very tip; this helps seal in the color and prevents chipping, significantly extending the life of the manicure.
- Rhinestone Embellishment: For the accent nail(s) featuring rhinestones, apply a tiny dot of nail art glue or gem gel along the cuticle line where the sparkle is envisioned. Using a rhinestone applicator tool, gently pick up and place the small silver rhinestones onto the adhesive. Press them down lightly to ensure they are securely embedded. For larger rhinestones, a quick 10-second cure under a nail lamp can help them stay put.
- Delicate Bow Detail: On another accent nail, use a fine detail brush and the dusty rose matte polish (or regular polish that will be matted later) to carefully paint a charming, intricate bow design. Take time with small, precise strokes to achieve the delicate look. For intricate designs, a very fine detail brush or striping brush is essential, as the thinner the brush, the more precise control is available over tiny lines and shapes.
- Seal and Protect: Once all polish and designs are completely dry, apply a final layer of matte top coat over all nails. When reaching the rhinestone nails, be incredibly careful to apply the top coat around the rhinestones, sealing their edges, but avoid brushing directly over the facets to preserve their brilliant sparkle. Brushing over rhinestones can dull their shine and make them appear flat. For the bow nail, ensure it is fully covered. Always cap the free edge for added durability.
Pro Tips for a Flawless Matte Finish
- The Glossy Undercoat Technique: To achieve a truly smooth, flawless matte finish, especially with darker or textured polishes, applying a standard glossy top coat before the matte top coat is highly recommended. This step creates an ideal, even canvas for the matte finish to adhere to. The glossy layer helps to self-level the polish, smoothing out any minor imperfections or brush strokes from the color coats. Without this underlying smoothness, the non-reflective nature of matte polish can sometimes highlight any unevenness or texture beneath, leading to a less refined appearance. This technique ensures a perfectly uniform, velvety finish, elevating the final look to a professional standard.
- Working with Quick-Drying Polish: Matte polishes are known for their quick-drying nature. This characteristic means that efficient and uniform application is necessary to avoid streaking or uneven patches. Because the polish sets quickly, there is less time for it to self-level. Applying thin, even coats with swift, deliberate strokes, such as one middle stroke and two side strokes, helps ensure consistent coverage before the polish dries. Going too heavy on the first coat should be avoided, as slight translucence is normal and will be covered by the second layer. Working quickly and methodically ensures a uniform application before the polish sets, which is crucial for a smooth, non-streaky matte appearance.
- Preserving Rhinestone Sparkle: When applying the final top coat, it is important to be mindful not to brush directly over the facets of rhinestones. Rhinestones derive their sparkle from light reflecting off their precisely cut surfaces. If a top coat is brushed directly over them, it can fill in these facets, dulling their shine and making them appear flat. Instead, carefully apply the top coat around the rhinestones, sealing their edges to secure them in place while allowing their brilliance to remain vibrant and catch the light. This meticulous approach ensures the embellishments retain their dazzling effect.
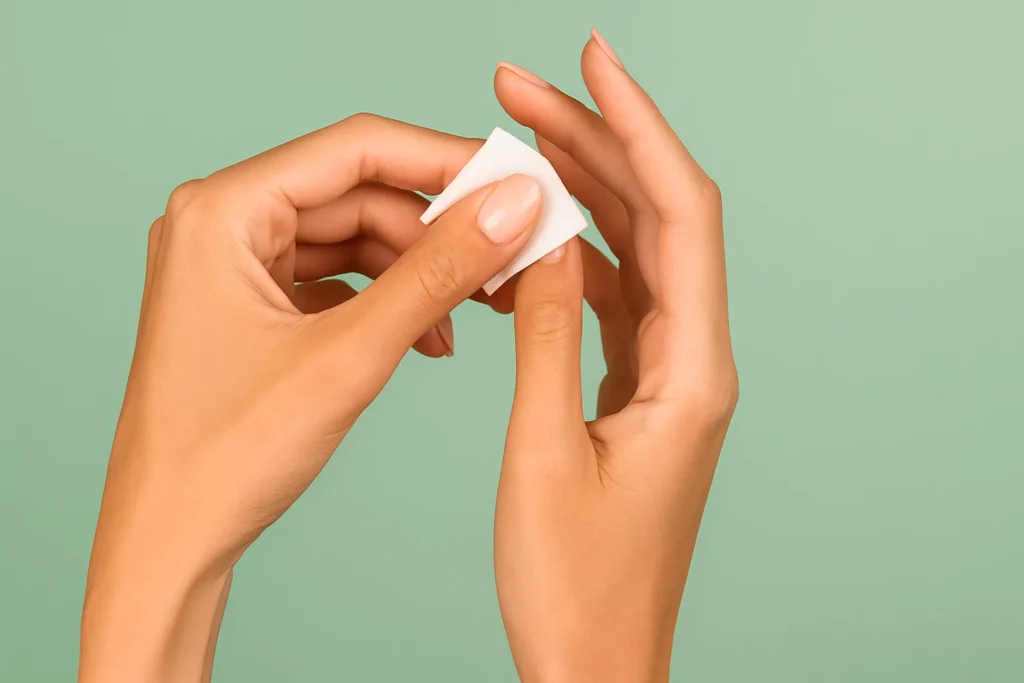
- Clean Edges for a Polished Look: Before the top coat dries, using a clean-up brush dipped in nail polish remover is essential for meticulously tidying any polish that may have gotten onto the skin or cuticles. This step creates a crisp, professional edge that significantly elevates the overall look from a DIY attempt to a dazzling, salon-quality manicure. Clean edges provide a defined boundary for the polish, making the entire design appear more intentional and refined.
Combo 2: Mustard Yellow & Olive Green with Leaf Accents – Nature’s Chic Palette

Why This Nail Color Combo Works
This delightful combination brings the warmth of a sun-drenched autumn day right to the fingertips. The vibrant, creamy mustard yellow perfectly complements the muted, earthy olive green, creating a harmonious and inviting palette. This pairing evokes images of natural landscapes, making the manicure feel organic and grounded. The delicate hand-painted (or stickered) leaf accents on a crisp white base add an artistic, organic touch, making this look feel fresh, unique, and deeply connected to nature’s beauty. It’s a chic way to embrace a natural aesthetic with a playful twist, offering a visually appealing balance between bold color and intricate detail. The white accent provides a clean contrast that makes the leaf motif truly pop.
Gathering Your Tools for Leafy Art
To craft this botanical masterpiece, assemble the following tools:
- Mustard Yellow nail polish (a creamy, opaque finish works best here )
- Olive Green nail polish (also a creamy finish)
- Crisp White nail polish (for the accent nail base)
- A reliable base coat. This foundational layer protects the nail and ensures proper adhesion of subsequent polish layers.
- A glossy top coat. This seals the design, adds a beautiful shine, and protects the manicure from daily wear and tear.
- For hand-painting: A fine detail nail art brush (or a liner brush). These brushes are essential for creating intricate leaf designs with precision.
- Optional for hand-painting: Acrylic craft paint in green. This is a fantastic alternative for precise detail work due to its consistency and drying time.
- For an easier alternative: Nail art stickers with delicate leaf motifs. These offer a convenient and time-saving option for achieving complex designs without advanced freehand skills.
- Nail polish remover and a clean-up brush. These tools are crucial for maintaining clean lines and a professional finish.
Crafting Your Botanical Masterpiece
- Foundation First: Always start with clean, prepped nails. Apply a thin, even layer of the base coat to all nails and allow it to dry completely. This step is vital for protecting the natural nail and creating a smooth, adhesive surface for the polish.
- Color Blocking: Apply two thin, even coats of mustard yellow polish to some nails and olive green to others, alternating the colors to create the desired pattern. For the nails chosen as accent nails (typically the ring or middle finger), apply two thin coats of crisp white polish. Allow each coat to dry thoroughly between applications. Applying thin layers helps each coat dry more completely and reduces the risk of smudging, which is particularly important for vibrant colors to maintain their vibrancy without becoming too thick.
- Hand-Painted Leaves (For the Artistic Soul):
- Once the white accent nails are completely dry, dip the fine detail brush into the olive green polish (or, for even greater control and quicker drying, use green acrylic craft paint ). Wipe off any excess product on the brush to prevent thick lines.
- Carefully paint delicate leaf motifs onto the white accent nails. Simple outlines or filled-in designs can be created for a more solid look. Focus on smooth, deliberate strokes.
- Technique for Steadiness: If the hand feels shaky, try holding a buffing block or another small object with the hand being painted. Some artists also find it easier to keep the brush still and move the nail itself to draw the lines, which can provide greater stability for intricate details.
- Nail Stickers (For Speed and Simplicity):
- Ensure white accent nails are completely dry before applying stickers. This prevents the sticker from sinking into the polish layers, which can happen if the polish is still wet.
- Using tweezers, carefully peel off the chosen leaf nail stickers from their sheet.
- Place the sticker onto the nail in the desired position and gently press down to ensure it adheres smoothly, paying special attention to the edges to prevent lifting. Nail stickers offer a convenient and time-saving way to achieve complex designs without needing advanced freehand skills.
- Seal with Shine: Once all polish and designs are completely dry, apply a high-shine glossy top coat over all nails. Ensure the free edge of each nail is “capped” by running the brush along the very tip; this crucial step helps to seal in the design and maximize its longevity, preventing chips and peeling. A top coat acts as a shield against daily wear and tear, maintaining the manicure’s luster and extending its life.
Pro Tips for Hand-Painted Accents (or using nail stickers)
- Brush Selection for Detail: For intricate designs like delicate leaves, a very fine detail brush or striping brush is absolutely essential. The thinner the brush, the more precise control is available over those tiny lines and shapes, allowing for truly intricate patterns. These specialized brushes enable the creation of fine details that would be impossible with a standard polish brush, directly impacting the quality and intricacy of the design.
- Acrylic Paint as an Advantage: If regular nail polish feels too “gloopy” or slow-drying for detailed hand-painted work, consider using acrylic craft paint for designs. Acrylic paint dries quickly and has a stiffer consistency, which allows for much more precise, delicate strokes. This property means that fine lines and small details can be executed with greater control, as the paint holds its shape better and doesn’t spread as much as traditional polish. Just be sure to seal it thoroughly with a durable top coat for protection, as acrylic paint alone is not designed for nail wear.
- Techniques for a Steady Hand: To minimize shakiness during freehand painting, try resting the painting hand on a stable surface, such as a table. Holding a buffing block or another small object in the non-painting hand can also provide added support and stability. Some artists even find it easier to keep the brush still and move the nail itself to create the desired lines and curves. These techniques are practical ways to overcome natural hand movements and achieve cleaner, more precise lines, which is crucial for intricate designs.
- Stickers vs. Hand-Painting for Accessibility: Nail stickers offer an incredibly convenient and time-saving alternative for achieving complex designs without needing advanced freehand skills. They are perfect for beginners or when time is limited, providing a “salon quality look all by yourself”. This means that individuals without extensive artistic training can still achieve intricate and visually appealing nail art, fostering confidence in their DIY abilities. However, it is important to be aware that some stickers can be thick or rigid and may not lay perfectly flat on highly curved nails, especially when used with regular polish. Many users report that stickers are easier to apply and achieve a flat adherence when used with gel polish, often with a quick flash cure. This highlights that while hand-painting offers ultimate customization, accessible tools like stickers empower a broader audience to enjoy intricate designs, aligning with the goal of providing helpful and confidence-building information.
- Practice and Patience: Nail art is a skill that improves significantly with practice. Do not be discouraged if initial attempts are not flawless. Starting with simpler designs and gradually increasing complexity is a good approach. Practicing on a nail wheel or a silicone mat before applying designs directly to the nails can be very beneficial. This allows for experimentation and refinement of techniques without the pressure of working on a fresh manicure, building skill and confidence over time.
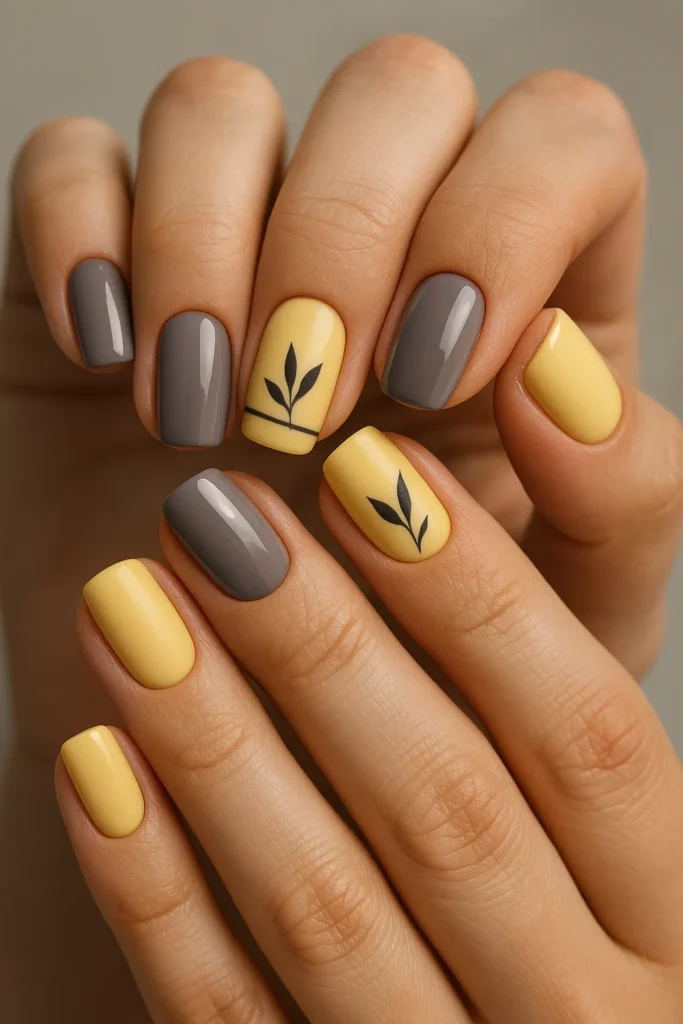
Combo 3: Elegant Slate Grey and Saffron Yellow Accent Nails – Modern Sophistication
Why This Nail Color Combo Works
This stunning Nail Color Combo marries the cool, understated elegance of slate grey with the warm, vibrant richness of saffron yellow. It’s an unexpected yet harmonious pairing that feels incredibly modern and sophisticated. The slate grey provides a grounding, neutral base that exudes quiet confidence, while the saffron yellow adds a pop of vibrant warmth, preventing the overall look from being too somber. The glossy finish enhances the depth and richness of both colors, providing a polished, reflective surface that catches the light beautifully. The minimalist, stylized designs on the saffron accent nails add a touch of artistic flair without overwhelming the chic simplicity of the overall look. It’s a statement manicure that speaks volumes about refined taste, demonstrating how thoughtful color pairing and subtle artistry can create a truly impactful aesthetic.
Essentials for Your Accent Nail Design
To create this striking and sophisticated manicure, gather the following:
- Slate Grey nail polish (a glossy finish is key for this look )
- Saffron Yellow nail polish (also with a glossy finish)
- Dark Grey or Black nail art polish (for the accent designs)
- A high-quality base coat. This prepares the nail surface, ensuring better adhesion and preventing staining.
- A glossy top coat. This seals the design, provides a high-shine finish, and protects the manicure from chipping.
- A thin striping brush or fine detail brush. These tools are absolutely essential for creating crisp lines and the elegant leaf/feather motif.
- Optional: Striping tape. This is a valuable tool for achieving perfectly straight, clean lines, especially for geometric elements.
- Nail polish remover and a clean-up brush. These are indispensable for perfecting edges and correcting any mistakes, ensuring a sharp, professional result.
Creating Your Striking Accent Nails
- Perfect Prep: As always, start with thoroughly clean, dry, and shaped nails. Proper nail hygiene, including keeping nails dry and clean, and using moisturizer, contributes to healthy, strong nails, which are the best canvas for any manicure. Apply a good base coat to all nails and allow it to dry completely. This foundational step is crucial for protecting the natural nail and ensuring the longevity of the manicure.
- Base Colors: Apply two thin, even coats of slate grey polish to most of the nails. On the chosen accent nails (the ring or middle finger works beautifully for this design), apply two thin, even coats of saffron yellow. Ensure each coat dries completely before proceeding to the next step. Applying thin layers allows for thorough drying and prevents the polish from becoming too thick, which can lead to smudging or peeling.
- Designing the Accent:
- For the Horizontal Band: On one of the saffron yellow accent nails, use a thin striping brush and dark grey/black polish to carefully paint a thin, straight horizontal band across the nail. For ultimate precision, striping tape can be applied once the base color is completely dry. Paint over the tape, and then carefully peel the tape off immediately while the polish is still wet. This technique helps achieve perfectly crisp, straight lines that are difficult to replicate freehand.
- For the Leaf/Feather Motif: On another saffron yellow accent nail, use a fine detail brush and dark grey/black polish to carefully draw the elegant, sweeping leaf or feather motif. Focus on smooth, continuous lines and a delicate touch to capture the intricate detail. A detail brush is essential for creating shapes and small details, allowing for precise control over each stroke.
- Seal with Shine: Once all polish and designs are completely dry, apply a high-shine glossy top coat over all nails. Ensure the free edge of each nail is “capped” by running the brush along the very tip. This technique helps to seal in the color and extend the life of the manicure, as the tips are often where chipping begins. A quality top coat forms a hard shell over the polish, making it more resistant to chipping and daily wear. This will protect the intricate designs, add a beautiful, polished finish, and significantly extend the life of the manicure.
Pro Tips for Crisp Lines and Designs
- Achieving a Steady Hand for Smooth Lines: Creating crisp, clean lines requires a steady hand. One effective technique is to rest the painting hand on a stable surface, such as a table. Alternatively, holding a buffing block or another small object in the non-painting hand can provide additional support and help minimize any natural shakiness. These methods provide a stable anchor, allowing for more controlled and precise strokes, which is fundamental for intricate designs.
- The Right Brush is Essential: For precise lines and intricate motifs like the leaf or feather, a very thin striping brush or fine detail brush is indispensable. These brushes are designed with thin, elongated bristles that allow for superior control and accuracy in creating delicate patterns and sharp lines. Before starting, ensure the brush is clean and free of any dried polish, as polish buildup can affect flow and line quality, making it difficult to achieve smooth, consistent results.
- Less is More with Polish: When loading the brush for detail work, it is always best to use a minimal amount of polish. Applying too much polish to the brush can lead to thick, gloopy, and messy lines that are difficult to control and can obscure fine details. It is always possible to dip for more polish if needed, but removing excess after it has been applied to the nail is much harder. This approach ensures that each stroke is clean and precise, contributing to the overall sharpness of the design.
- Striping Tape for Precision: For perfectly straight lines, striping tape is a secret weapon. This tool is particularly valuable for geometric designs and modern abstract art, where crisp, unwavering lines are desired. To use it effectively, apply the tape firmly once the base color is completely dry. Paint over the tape, and then carefully peel it off immediately while the top polish is still wet. This prevents the polish from drying onto the tape, which could cause jagged edges or pull up the underlying color. The use of striping tape directly addresses the challenge of achieving professional-level crispness, elevating the quality of DIY nail art by providing a reliable method for creating flawless straight lines.
- Clean-Up for Definition: Any stray lines, smudges, or polish that has gotten onto the skin can be easily corrected with a clean-up brush dipped in nail polish remover. This step is absolutely crucial for creating a sharp, professional-looking finish that truly defines the design. Meticulous clean-up around the cuticles and nail edges provides a polished, salon-quality appearance, making the intricate details stand out even more.
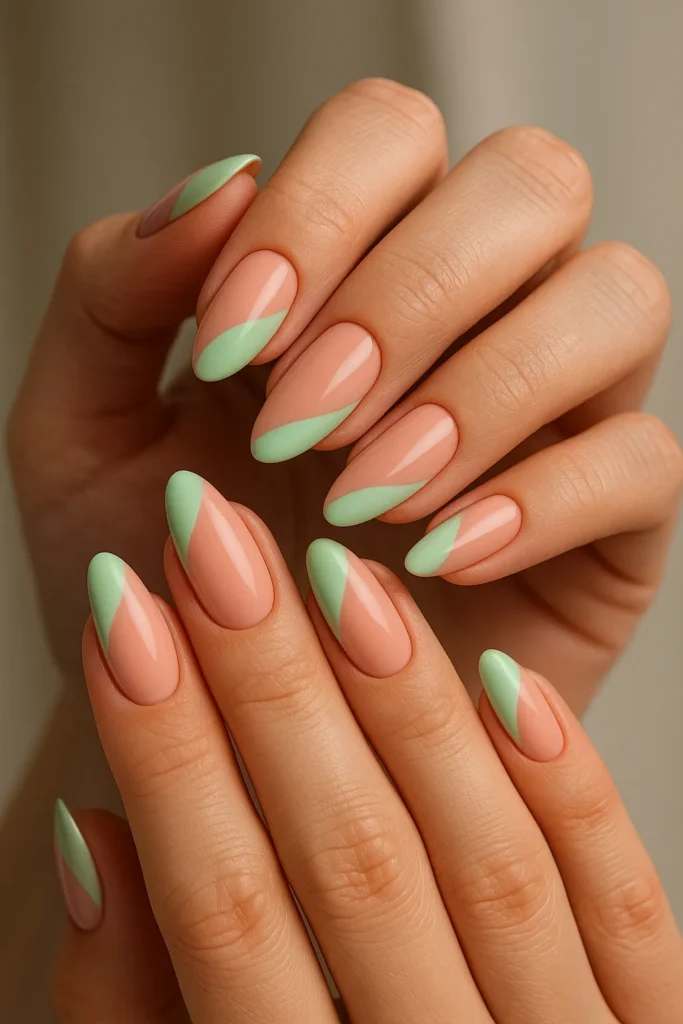
Combo 4: Soft Peach & Mint Green Wavy French Tips – A Fresh Twist on a Classic
Why This Nail Color Combo Works
This delightful Nail Color Combo offers a fresh, ethereal, and utterly charming take on the classic French manicure. The soft, creamy peach base provides a warm, universally flattering canvas that complements various skin tones. The delicate mint green tips, rendered in graceful, undulating waves, inject a playful and artistic twist, moving beyond the traditional straight line. This organic, fluid design makes the manicure feel whimsical and modern. This look is perfect for welcoming spring, brightening up summer days, or simply adding a touch of whimsical elegance to everyday style. Its inherently organic and free-form nature means it’s surprisingly forgiving, making it an excellent choice for DIY enthusiasts who might be intimidated by perfectly straight lines. The beauty of this design lies in its versatility; each nail can be slightly different, reflecting personal style and making it non-dominant hand friendly.
Your Kit for Wavy Wonders
To master this fresh and artistic manicure, gather the following:
- Soft Peach or very Light Pink nail polish (for the base color)
- Delicate Mint Green nail polish (for the wavy tips)
- A reliable base coat. This prepares the nail surface for polish, improving adhesion and preventing staining.
- A glossy top coat. This seals the design, adds a beautiful shine, and helps prevent chipping, extending the life of the manicure.
- A liner brush or fine detail brush. These brushes are absolutely essential for creating those graceful waves with precision and control.
- Optional: A dotting tool or even a simple toothpick. These can be used as alternatives for creating the wavy lines, offering flexibility in tool choice.
- Nail polish remover and a clean-up brush. These are vital for refining lines and ensuring a neat finish.
Mastering the Wavy French Tip
- Foundation First: Prep nails by ensuring they are clean, dry, and shaped. Apply a thin, even layer of the base coat to all nails and allow it to dry completely. This step creates a smooth, protective layer that enhances polish adhesion and prevents discoloration.
- Base Color Application: Apply two thin, even coats of the soft peach or light pink polish to all nails. Allow each coat to dry thoroughly between applications. Thin layers are crucial for proper drying and a uniform finish, preventing the polish from becoming too thick and prone to smudging or peeling.
- Crafting the Wavy Tips:
- Once the base color is completely dry, dip a liner brush or fine detail brush into the delicate mint green polish. Wipe off any excess polish to ensure a fine, controlled line.
- To create the wavy tip, envision splitting the French tip into two parts: one line that aligns with the natural tip of the nail and another that is slightly below it.
- Starting from one side of the nail, use the liner brush to add a gentle curve resembling a wave, sweeping across the tip. The second half of the wave should start just a tiny bit below the first half and overlap slightly, creating asymmetrical lines that resemble a fluid wave.
- The beauty of this design is that it doesn’t need to be perfectly symmetrical; its playful quality shines through imperfections. Let the liner brush do most of the work, focusing on smooth, continuous movements.
- For those who prefer, a dotting tool or toothpick can also be used to create the wavy lines, offering an alternative for achieving the desired effect.
- Seal with Shine: Once all polish and wavy designs are completely dry, apply a high-shine glossy top coat over all nails. Ensure the free edge of each nail is “capped” by running the brush along the very tip. This vital step helps to seal in the design, protect it from daily wear and tear, and maximize its longevity, preventing chips and adding a beautiful, polished finish.
Pro Tips for Wavy French Tips
- Embracing Imperfection for Charm: Unlike traditional French tips which demand perfect straight lines, the wavy French tip design thrives on its organic, fluid nature. This means that slight variations or “imperfections” in the wave pattern actually enhance its artistic and playful quality. This characteristic makes the design incredibly forgiving for DIY enthusiasts, especially when working with the non-dominant hand. The focus shifts from rigid precision to artistic expression, making the process more enjoyable and less intimidating.
- The Right Brush for Fluidity: For creating graceful, undulating waves, a liner brush or fine detail brush is absolutely essential. These brushes, with their thin, elongated bristles, allow for precise control over the polish flow, enabling the creation of smooth, continuous curves. While other tools like dotting tools or toothpicks can be used , a dedicated liner brush offers the most fluid and professional-looking results for this specific design, making it easier to achieve the desired wavy effect.
- Working with Minimal Polish: When loading the brush for the wavy tips, always use a minimal amount of polish. Too much polish on the brush can lead to thick, gloopy lines that are difficult to control and can obscure the delicate nature of the wave. A small amount ensures a crisp, thin line that defines the wave beautifully. It is always easier to add more polish if needed than to remove excess.
- Steady Hand Techniques: Even with a forgiving design, a steady hand helps. Resting the painting hand on a stable surface, such as a table, can provide support. Some individuals find it helpful to hold a buffing block or another small object in their non-painting hand for added stability. For those struggling with their non-dominant hand, keeping the brush still and moving the nail itself to draw the lines can be a game-changer. This technique allows for greater control and precision, even for less experienced hands.
- Layering for Depth: While the design is simple, applying two thin coats of the mint green for the wavy tip can enhance the color’s vibrancy and opacity without adding bulk. Ensuring each layer is dry before applying the next prevents smudging and contributes to a smoother, more durable finish.
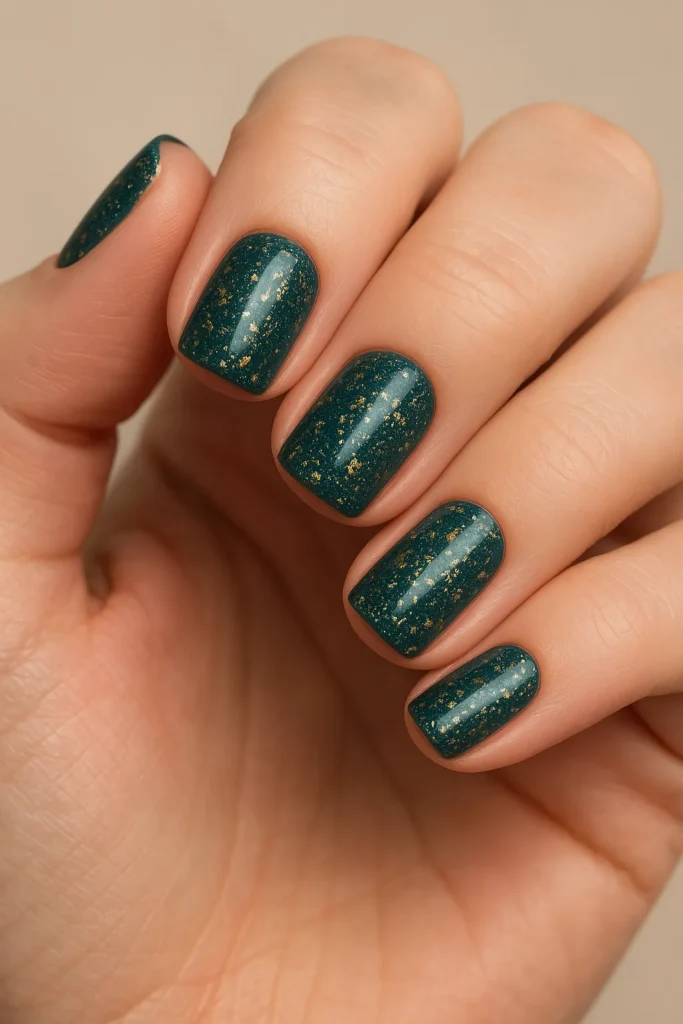
Combo 5: Deep Teal & Shimmering Gold Flakes – Opulent Radiance
Why This Nail Color Combo Works
This combination exudes opulent radiance, bringing a touch of luxurious glamour to the fingertips. The rich, jewel-toned deep teal provides an intense, sophisticated base that evokes the depth of precious stones or a serene, moonlit ocean. This dark, luxurious canvas creates a striking contrast for the delicate, irregular flakes of shimmering gold. The gold flakes are strategically placed or scattered, catching the light to create a subtle yet opulent sparkle. This adds dimension and a touch of glamour that contrasts beautifully with the intense depth of the teal. The interplay between the matte or glossy depth of the teal and the metallic shimmer of the gold creates a dynamic and captivating visual effect, making this manicure feel truly special and high-end. It’s a statement of elegance and refined taste, perfect for special occasions or when a desire to feel truly luxurious arises.
Your Treasure Chest for Gold Flake Glamour
To create this dazzling, opulent look, gather the following:
- Deep Teal nail polish (can be a glossy or matte finish, depending on desired contrast )
- Shimmering Gold Flakes (also known as gold foil flakes or gold leafing)
- A reliable base coat. This is essential for protecting the nail and ensuring polish adhesion.
- A glossy top coat. This will seal the design, add shine, and protect the gold flakes. If a matte teal base is chosen, a matte top coat can be used for the final seal, but a glossy top coat is often preferred over flakes to enhance their shimmer.
- A dotting tool, toothpick, or clean tweezers. These tools are ideal for picking up and placing the delicate gold flakes.
- Nail polish remover and a clean-up brush. For perfecting edges and removing any stray polish or flakes.
Crafting Your Opulent Radiance
- Foundation First: As with any manicure, start with thoroughly clean, dry, and shaped nails. Apply a thin, even layer of your chosen base coat to all nails and allow it to dry completely. This step ensures a smooth canvas and helps prevent staining, especially with deep, rich colors like teal.
- Deep Teal Base: Apply two thin, even coats of the deep teal nail polish to all nails. Allow each coat to dry completely between applications. For a truly opaque and rich color, two thin coats are generally more effective than one thick coat, as thin layers dry more thoroughly and are less prone to smudging or peeling.
- Applying the Shimmering Gold Flakes:
- Once the teal polish is dry to the touch, it’s time to apply the gold flakes. If using a regular polish, the flakes can be placed onto a slightly tacky layer or a fresh, thin coat of clear polish or top coat. If using gel polish, the flakes can be pressed directly into the sticky “inhibition layer” that remains after curing, or into a thin layer of gem gel or base coat.
- Carefully pour a small amount of gold flakes into a shallow container.
- Using a dotting tool, toothpick, or clean tweezers, gently pick up individual gold flakes or small clusters. Place them strategically onto the nail, pressing gently to ensure they lay flat and adhere to the tacky surface. The flakes can be scattered for a subtle effect or concentrated for a more dramatic look. If desired, lightly swipe over them to spread them out and ensure they are truly flat.
- It is crucial to ensure all edges of the flakes are laying flat against the nail surface. If any pieces are sticking up, they can become sharp and catch on things later. Use the edge of a clean tool to gently press down any raised edges around the cuticles and sides of the nail.
- Seal and Protect: Once all the gold flakes are perfectly placed and lying flat, apply a generous layer of top coat over all nails. This step is vital for sealing in the gold flakes, protecting them from chipping, and providing a smooth, durable finish. If a glossy top coat is used, it will enhance the shimmering effect of the flakes. If a matte top coat is preferred for the teal base, it can still be applied over the flakes, but it might slightly mute their metallic shine. Ensure the free edge of each nail is “capped” to maximize longevity.
Pro Tips for Gold Flake Glamour
- The Tacky Layer is Key: The success of applying gold flakes largely depends on having a slightly tacky surface for them to adhere to. If using regular nail polish, apply a thin layer of clear polish or a top coat and immediately place the flakes before it fully dries. If working with gel polish, the natural “inhibition layer” left after curing is ideal for pressing the flakes into. This sticky surface acts as a natural adhesive, allowing the delicate flakes to bond securely to the nail.
- Ensuring Flat Adhesion: Gold flakes are incredibly fine, but if they are not pressed down completely flat, their edges can stick up, creating a rough texture and potentially catching on things. After placing the flakes, use a clean dotting tool, toothpick, or the edge of tweezers to gently press them down, especially around the cuticles and nail edges. This meticulous step ensures a smooth, professional finish that feels seamless to the touch, even though it appears textured. Ignoring this step can lead to sharp, uncomfortable edges once the top coat is applied.
- Tool Selection for Precision: While fingers might seem convenient, using a precise tool like a dotting tool, a toothpick, or fine-tipped tweezers is highly recommended for picking up and placing individual gold flakes. These tools allow for greater control, enabling strategic placement of the flakes to create the desired design, whether it’s a sparse scattering or a concentrated cluster. This precision minimizes waste and ensures the flakes are positioned exactly where they are intended.
- Contrast for Visual Impact: The visual appeal of gold flakes is significantly enhanced by the contrast with the base color. A deep, rich color like teal provides a dramatic backdrop that makes the shimmering gold truly pop. The metallic shine of the flakes stands out against the intense depth of the base, creating a luxurious and eye-catching effect. This interplay between light and dark, and between matte or glossy and metallic, creates a dynamic and opulent manicure.
- Sealing for Longevity and Smoothness: Applying a thorough layer of top coat over the gold flakes is crucial for both longevity and a smooth finish. The top coat encapsulates the flakes, preventing them from chipping or peeling off. Furthermore, it creates a smooth surface over the potentially textured flakes, ensuring the manicure is comfortable to wear and has a polished appearance. For optimal durability, ensuring the top coat fully covers and seals all edges of the flakes is important.
Unleash Your Inner Nail Artist!
There is immense joy and empowerment to be found in expressing personal style through the art of the manicure. These five unique Nail Color Combos—from the understated elegance of Matte Dusty Rose & Charcoal Grey to the opulent radiance of Deep Teal & Shimmering Gold Flakes—offer a spectrum of possibilities to elevate your nail game. Each combination provides a distinct mood and aesthetic, inviting experimentation and creativity.
The journey of creating these looks at home is not just about the final polished result; it’s about the self-care ritual, the confidence gained from mastering new techniques, and the sheer delight of wearing something truly unique. Remember, every stroke is an opportunity for self-expression, and every finished manicure is a testament to your personal flair.
So, why not gather your polishes, brushes, and a dash of daring spirit? Pick your favorite Nail Color Combos from this guide, or let them inspire your own unexpected pairings. Dive in, experiment, and don’t be afraid to try something new. The world of nail art is your canvas, and the possibilities for expressing your beautiful self are endless. Go on, give them a try – your nails are waiting to tell your story!